АВТОМАТИЧЕСКАЯ ТРАНСМИССИЯ В СБОРЕ СНЯТИЕ
-
DISCONNECT CABLE FROM NEGATIVE BATTERY TERMINAL
Note
Wait at least 90 seconds after disconnecting the cable from the negative (-) battery terminal to prevent airbag and seat belt pretensioner activation.
-
REMOVE NO. 1 ENGINE UNDER COVER (for Pre-Runner)
-
REMOVE NO. 2 ENGINE UNDER COVER (for Pre-Runner)
-
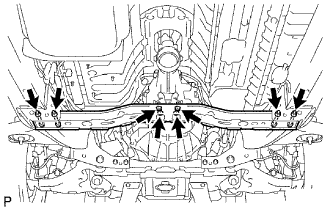
REMOVE NO. 2 FRAME CROSSMEMBER SUB-ASSEMBLY (except Pre-Runner)
-
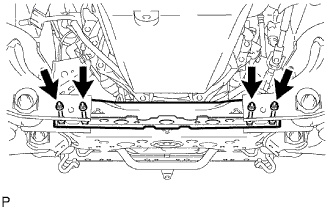
Remove the 4 nuts, 4 bolts and frame crossmember.
-
-
DISCONNECT CENTER EXHAUST PIPE ASSEMBLY
-
Remove the 2 bolts and 2 nuts.
-
Disconnect the center exhaust pipe from the front exhaust pipe and remove the gasket.
-
-
REMOVE FRONT EXHAUST PIPE ASSEMBLY
-
Выкрутите 2 болта и снимите 2 пружины сжатия.
-
Отсоедините переднюю трубу от выпускной трубы и снимите прокладку.
-
Снимите переднюю трубу с опоры.
-
-
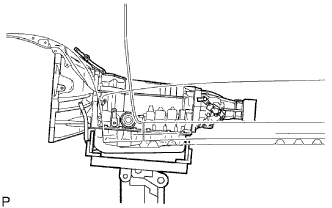
REMOVE PROPELLER SHAFT WITH CENTER BEARING ASSEMBLY
-
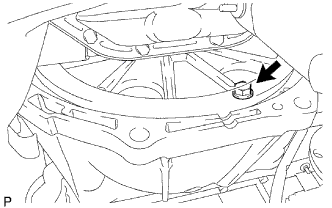
DRAIN AUTOMATIC TRANSMISSION FLUID
-
Remove the drain plug and gasket, and drain ATF.
-
Install a new gasket and the drain plug.
- Torque:
- 20 N*m { 205 kgf*cm, 15 ft.*lbf }
-
-
REMOVE TRANSMISSION OIL FILLER TUBE SUB-ASSEMBLY
-
Remove the transmission oil dipstick.
-
Remove the 2 bolts and oil filler tube.
-
Remove the O-ring from the oil filler tube.
-
-
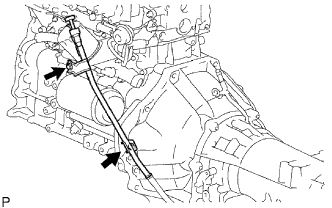
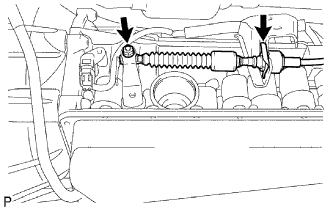
DISCONNECT OIL COOLER TUBE
-
Using a union nut wrench, disconnect the oil cooler tube inlet and oil cooler tube outlet.
-
Remove the 3 bolts and 3 clamps.
-
-
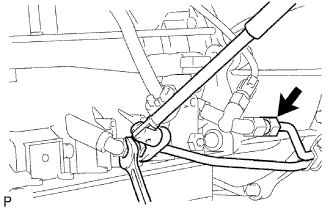
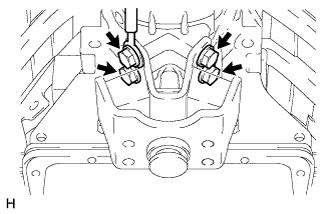
DISCONNECT TRANSMISSION CONTROL CABLE ASSEMBLY
-
Remove the nut and disconnect the control cable.
-
Remove the clip and disconnect the control cable.
-
-
REMOVE STARTER ASSEMBLY
-
SUPPORT AUTOMATIC TRANSMISSION ASSEMBLY
-
Support the transmission with a transmission jack.
-
-
REMOVE NO. 3 FRAME CROSSMEMBER SUB-ASSEMBLY
-
Remove the 4 set bolts of the rear No. 1 engine mounting insulator.
-
Remove the 4 nuts, 4 bolts and frame crossmember.
-
-
REMOVE NO. 1 ENGINE MOUNTING INSULATOR REAR
-
Remove the 4 bolts, ground cable and engine mounting insulator.
-
-
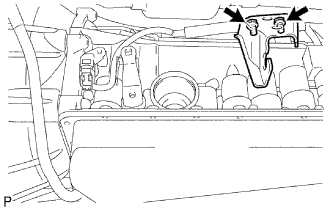
DISCONNECT ENGINE WIRE
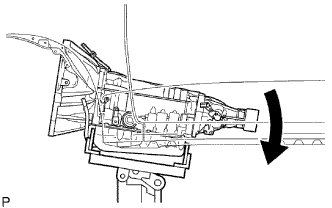
-
Tilt the transmission downward.
Note
Make sure the cooling fan does not contact the fan shroud.
-
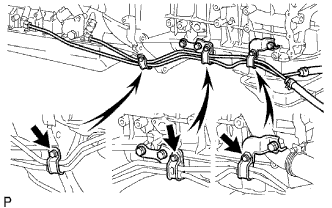
Disconnect the connectors.
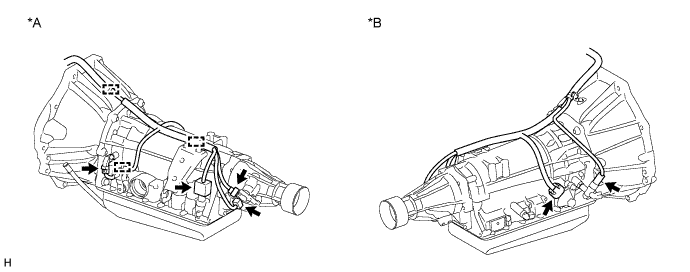
Text in Illustration *A LH Side *B RH Side
-
Disconnect the temperature sensor connector.
-
Disconnect the park/neutral position switch connector.
-
Disconnect the 3 speed sensor connectors.
-
Disconnect the transmission wire connector.
-
-
-
REMOVE WIRE HARNESS CLAMP BRACKET
-
Remove the bolt and wire harness clamp bracket from the transmission.
-
-
REMOVE STIFFENER PLATE
-
Remove the 4 bolts and stiffener plate RH (with clamp tube).
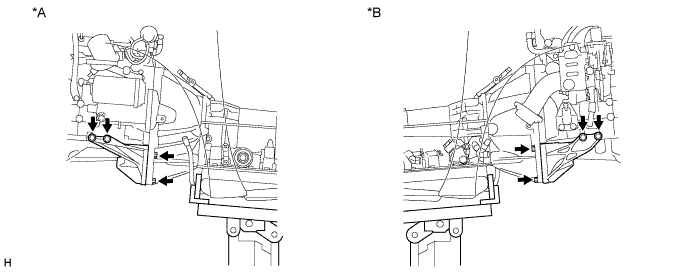
Text in Illustration *A LH Side *B RH Side -
Remove the 4 bolts and stiffener plate LH.
-
Remove the No. 4 cylinder block insulator.
-
Remove the No. 2 end plate.
-
-
REMOVE AUTOMATIC TRANSMISSION ASSEMBLY
-
Turn the crankshaft to gain access to each bolt.
-
Hold the crankshaft pulley bolt with a wrench, and remove the 6 torque converter clutch mounting bolts.
-
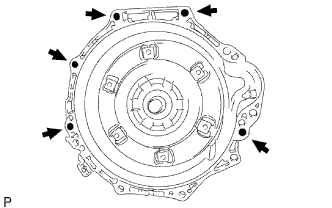
Remove the 5 bolts.
-
Disconnect the transmission from the engine.
-
-
REMOVE TRANSMISSION CONTROL CABLE BRACKET
-
Remove the 2 bolts and control cable bracket from the transmission.
-
-
REMOVE TORQUE CONVERTER CLUTCH ASSEMBLY