ROOF HEADLINING REASSEMBLY
PROCEDURE
INSTALL NO. 2 ANTENNA CORD SUB-ASSEMBLY
INSTALL NO. 1 ROOF WIRE
Apply butyl tape to the roof headlining so that the tape is aligned with the wire harness marking as shown in the illustration.
Tip:Use butyl tape that has a width of 10 mm (0.394 in.).
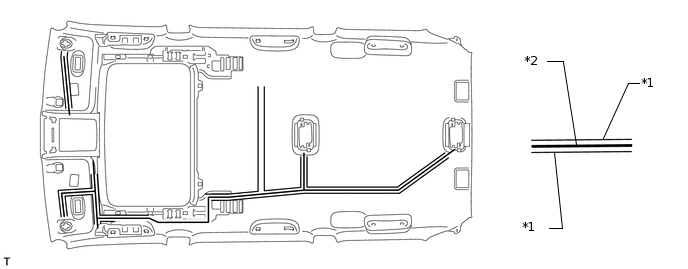
*1
Wire Harness Marking
*2
Butyl Tape
Align the No. 1 roof wire with the wire harness installation points as shown in the illustration and attach it to the roof headlining to install it.
Tip:Be sure to securely attach the roof wire so that it is not twisted.
Attach each clamp.
Tip:Make sure the inner mirror wire harness and rain sensor wire harness are securely set into the cutouts of the roof headlining.
Turn the visor connectors approximately 90° clockwise to install them to the roof headlining.
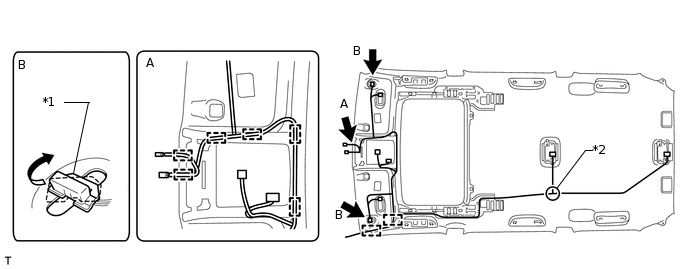
*1
Visor Connector
*2
Wire Harness Installation Point
INSTALL VANITY LIGHT ASSEMBLY
Tip:Use the same procedure for the other vanity light.
Attach the 3 claws to install the vanity light.
INSTALL NO. 3 ROOF SILENCER PAD
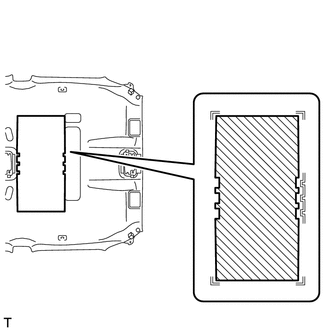
Align the No. 3 roof silencer pad with the markings on the roof headlining and install the No. 3 roof silencer pad to the position shown in the illustration using double-sided tape.
INSTALL ROOF SIDE AIR OUTLET REGISTER (w/ Rear Air Conditioning System)
Tip:Use the same procedure for all roof side air outlet registers.
Attach the 6 claws to install the roof side air outlet register.