CAMSHAFT OIL CONTROL VALVE REMOVAL
PROCEDURE
-
REMOVE NO. 2 CYLINDER HEAD COVER
-
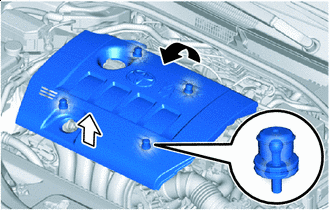

Disengage the 2 rear clips first 
Disengage the 2 front clips next Lift the rear of the No. 2 cylinder head cover to disengage the 2 rear clips. Lift the front of the No. 2 cylinder head cover to disengage the 2 front clips and remove the No. 2 cylinder head cover.
Note
Attempting to disengage both front and rear clips at the same time may cause the No. 2 cylinder head cover to break.
-
-
REMOVE CAMSHAFT TIMING OIL CONTROL VALVE ASSEMBLY (for Intake Side)
-
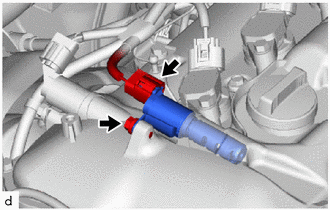
Disconnect the camshaft timing oil control valve assembly connector.
-
Remove the bolt and camshaft timing oil control valve assembly from the cylinder head cover sub-assembly.
Note
-
Do not allow foreign matter to contact the oil seal face of the camshaft timing oil control valve assembly (connecting surface with the cylinder head cover sub-assembly).
-
If the camshaft timing oil control valve assembly has been struck or dropped, replace it.
-
-
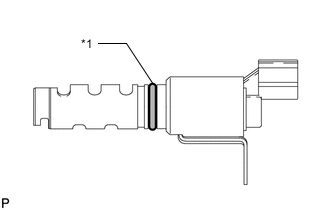
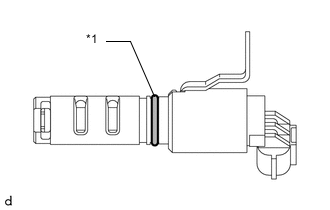
*1 O-ring Remove the O-ring from the camshaft timing oil control valve assembly.
-
-
REMOVE CAMSHAFT TIMING OIL CONTROL VALVE ASSEMBLY (for Exhaust Side)
-
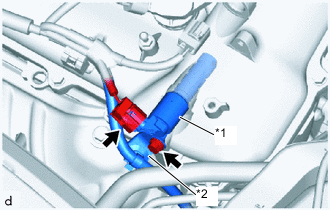
*1 Camshaft Timing Oil Control Valve Assembly *2 Wire Harness Bracket Disconnect the camshaft timing oil control valve assembly connector.
-
Remove the bolt and wire harness bracket.
-
Remove the camshaft timing oil control valve assembly from the cylinder head cover sub-assembly.
Note
-
Do not allow foreign matter to contact the oil seal face of the camshaft timing oil control valve assembly (connecting surface with the cylinder head cover sub-assembly).
-
If the camshaft timing oil control valve assembly has been struck or dropped, replace it.
-
-
*1 O-ring Remove the O-ring from the camshaft timing oil control valve assembly.
-