ROOF HEADLINING REASSEMBLY
CAUTION / NOTICE / HINT
Tech Tips
-
Use the same procedure for LHD and RHD vehicles.
-
The procedure listed below is for the LHD vehicles.
PROCEDURE
-
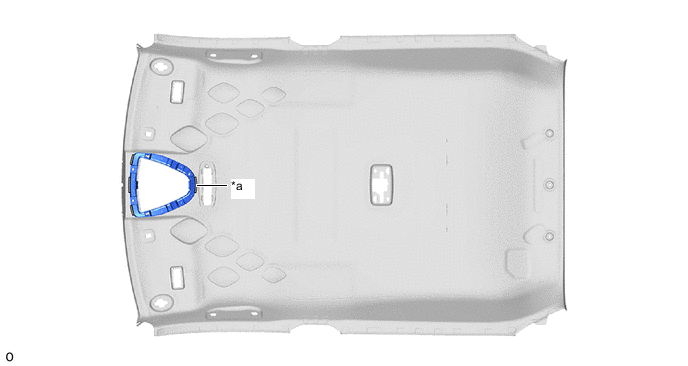
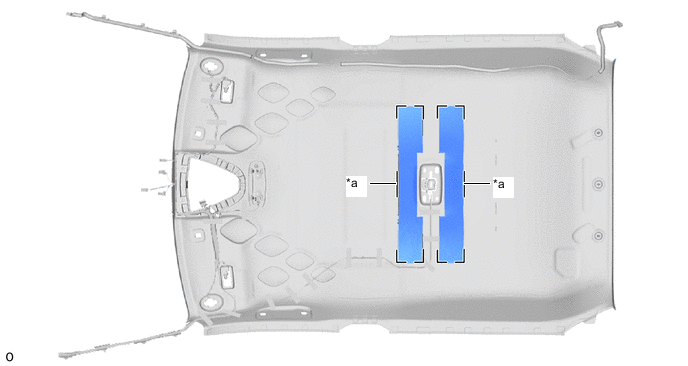
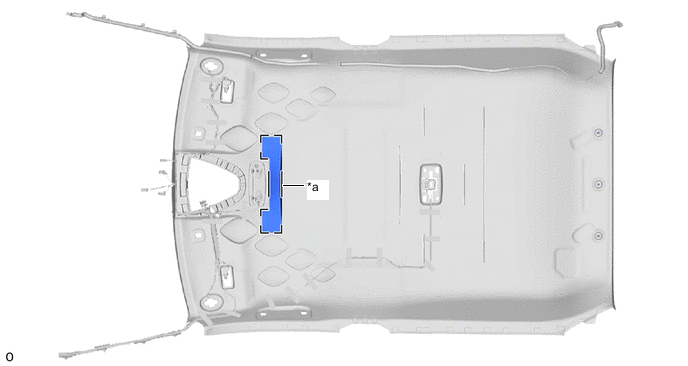
INSTALL ROOF HEADLINING SUPPORT PLATE (w/ Intrusion Sensor)
-
Align the markings on the roof headlining with the roof headlining support plate and install it using hot melt glue.

*a Marking - -
-
-
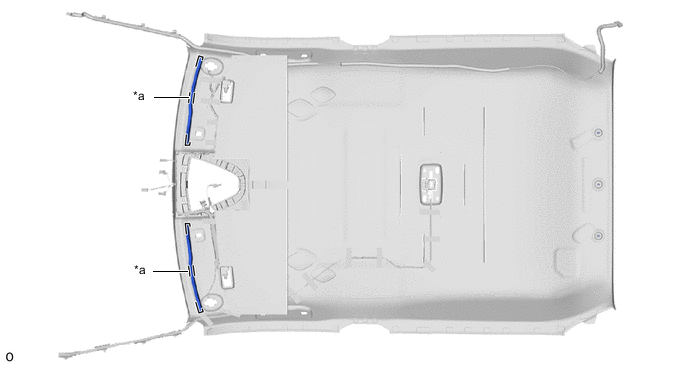
INSTALL HEADLINING LIGHT CASE (w/ Map Light)
-
Align the markings on the roof headlining with the headlining light case and install it using hot melt glue.
*a Marking - -
-
-
INSTALL NO. 2 ANTENNA CORD SUB-ASSEMBLY
-
INSTALL NO. 1 ROOF WIRE
-
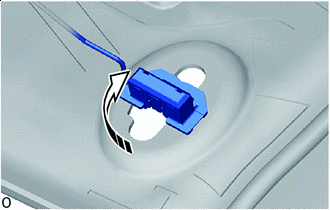

Install in this Direction w/ Vanity Light:
-
Turn the visor connectors approximately 90° clockwise to connect the visor connector as shown in the illustration.
Tech Tips
Use the same procedures for the opposite side.
-
-
for TMMT Made:
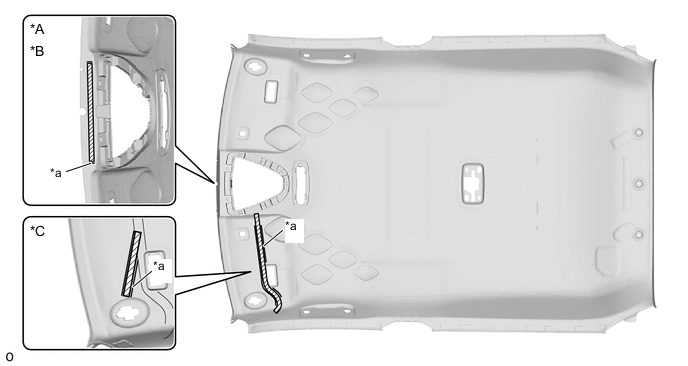
*A w/ Rain Sensor *B w/ Lane Departure Alert System *C w/ Vanity Light - - *a Marking - - 
Double-sided Tape - -
-
Apply double-sided tape as shown in the illustration.
Note
Apply the supports with uniform loading, and without protruding from the roof headlining markings.
-
Line up the No. 1 roof wire positioning tape and the roof headlining markings.
-
Align new pieces of each adhesive tapes with the markings of the roof headlining and install them.
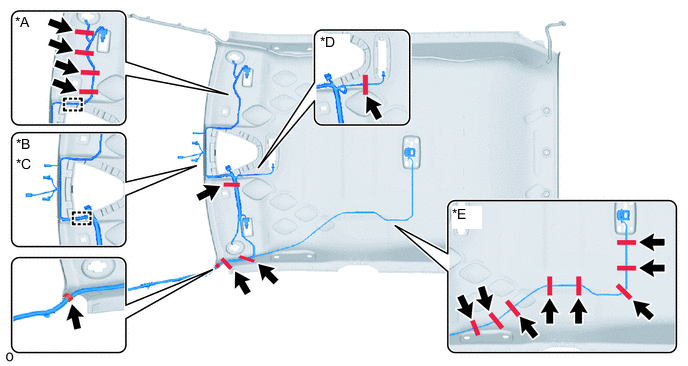
*A w/ Vanity Light *B Rain Sensor *C w/ Lane Departure Alert System *D w/ Intrusion Sensor *E w/ Map Light - - -
Engage each guide.
-
-
except TMMT Made:
-
Line up the No. 1 roof wire positioning tape and the roof headlining markings.
-
Align new pieces of each adhesive tapes with the markings of the roof headlining and install them.
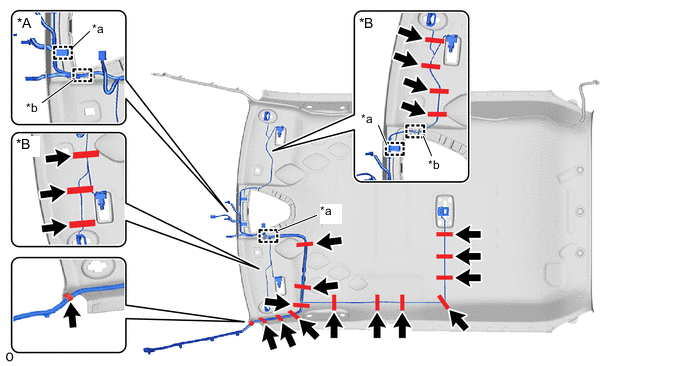
*A w/ Rain Sensor *B w/ Vanity Light *a Clamp *b Guide -
Engage each guide.
-
Engage each clamp.
-
-
-
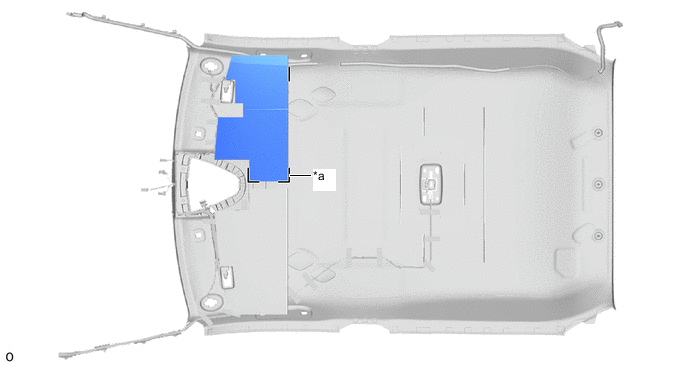
INSTALL ROOF SILENCER PAD (w/ Map Light)
-
Align the markings on the roof headlining with the 2 roof silencer pads and install them using hot melt glue.
*a Marking - -
-
-
INSTALL NO. 2 ROOF SILENCER PAD (w/ Map Light)
-
Align the markings on the roof headlining with the 2 No. 2 roof silencer pads and install them using hot melt glue.
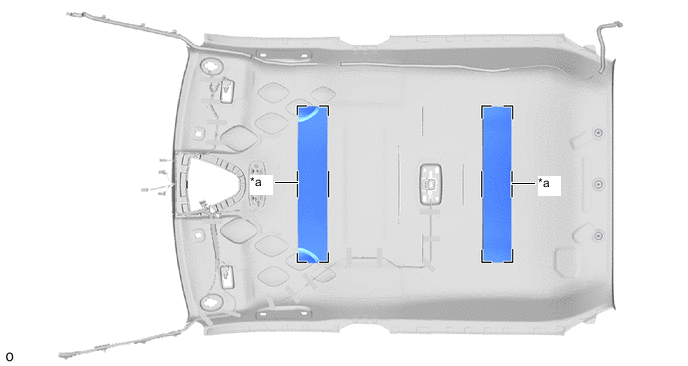
*a Marking - -
-
-
INSTALL ROOF HEADLINING FORMING PAD (w/ Map Light)
-
Align the markings on the roof headlining with the 2 roof headlining forming pads and install them using hot melt glue.
*a Marking - -
-
-
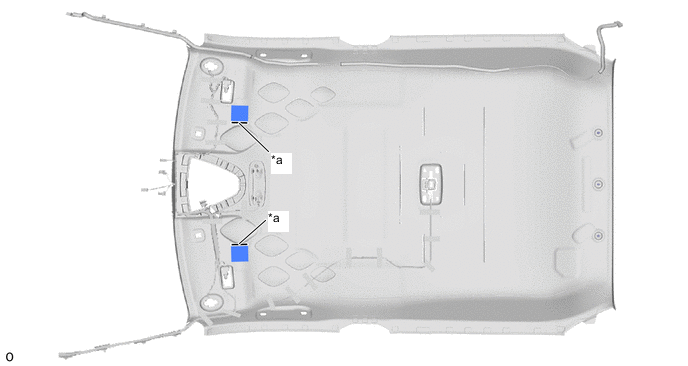
INSTALL NO. 1 ROOF SILENCER PAD (w/o Safety Connect System)
-
Align the markings on the roof headlining with the No. 1 roof silencer pad and install it using hot melt glue.
*a Marking - -
-
-
INSTALL NO. 1 ROOF SILENCER PAD (w/ Safety Connect System)
-
Align a new No. 1 roof silencer pad with the silencer markings on the roof headlining and install the No. 1 roof silencer pad using double-sided tape.
Tech Tips
Peel off the backing paper from the double-sided tape before installing the No. 1 roof silencer pad.
*a Marking - -
-
-
INSTALL NO. 3 ROOF SILENCER PAD (w/ Safety Connect System)
-
Align the markings on the roof headlining with the No. 3 roof silencer pad and install it using hot melt glue.

*a Marking - -
-
-
INSTALL NO. 4 ROOF SILENCER PAD (w/ Safety Connect System)
-
Align the markings on the roof headlining with the No. 4 roof silencer pad and install it using hot melt glue.
*a Marking - -
-