CONDENSER(except 1AD-FTV) REMOVAL
PROCEDURE
RECOVER REFRIGERANT FROM REFRIGERATION SYSTEM
REMOVE RADIATOR GRILLE SUB-ASSEMBLY
REMOVE HEADLIGHT ASSEMBLY LH (for 1ND-TV)
REMOVE HEADLIGHT ASSEMBLY RH (for 1ND-TV)
Tip:Use the same procedure as for the LH side.
REMOVE BATTERY CLAMP SUB-ASSEMBLY
-
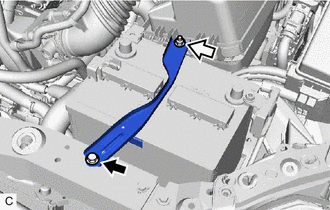

Bolt

Nut
Remove the bolt, nut and battery clamp sub-assembly, battery clamp bolt.
-
DISCONNECT NO. 1 WATER HOSE CLAMP BRACKET (for 1ND-TV)
DISCONNECT NO. 1 WATER HOSE CLAMP BRACKET (for 1NR-FE)
DISCONNECT NO. 1 WATER HOSE CLAMP BRACKET (for 1ZR-FAE)
REMOVE UPPER RADIATOR SUPPORT SUB-ASSEMBLY (for 1ND-TV)
REMOVE UPPER RADIATOR SUPPORT SUB-ASSEMBLY (for 1NR-FE)
REMOVE UPPER RADIATOR SUPPORT SUB-ASSEMBLY (for 1ZR-FAE)
REMOVE NO. 1 RADIATOR SUPPORT (for 1ND-TV)
REMOVE NO. 2 FAN SHROUD
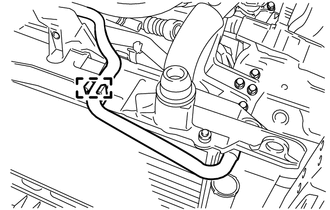
Disengage the clamp and disconnect the No. 3 water by-pass hose from the No. 2 fan shroud.
-
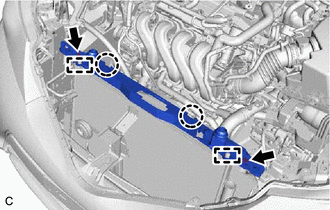
Remove the 2 bolts.
Disengage the 2 claws and 2 guides, and remove the No. 2 fan shroud.
DISCONNECT DISCHARGE HOSE SUB-ASSEMBLY
-
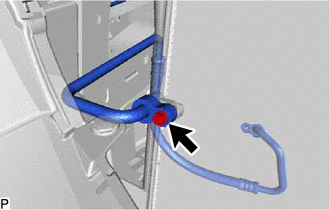
Remove the bolt and disconnect the discharge hose sub-assembly from the condenser with receiver assembly.
Remove the O-ring from the discharge hose sub-assembly.
Note:Seal the openings of the disconnected parts using vinyl tape to prevent entry of moisture and foreign matter.
-
DISCONNECT AIR CONDITIONER TUBE ASSEMBLY
-
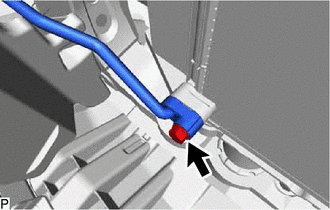
Remove the bolt and disconnect the air conditioner tube assembly from the condenser with receiver assembly.
Remove the O-ring from the air conditioner tube assembly.
Note:Seal the openings of the disconnected parts using vinyl tape to prevent entry of moisture and foreign matter.
-
REMOVE CONDENSER WITH RECEIVER ASSEMBLY
-
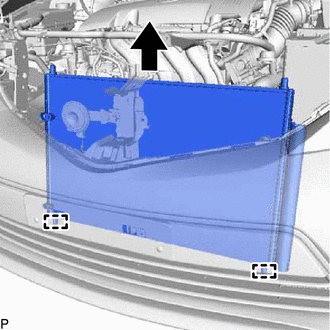
Disengage the 2 guides and remove the condenser with receiver assembly as shown in the illustration.
Note:Do not damage the condenser with receiver assembly or radiator when removing the condenser with receiver assembly.
-