FRONT SIDE WINDOW GLASS REMOVAL
-
REMOVE SLIDE DOOR WINDOW GARNISH LH
-
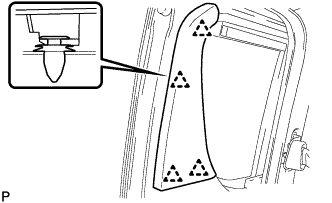
Disengage the 4 clips and remove the slide door window garnish.
-
-
REMOVE REAR DOOR TRIM BOARD SUB-ASSEMBLY LH
-
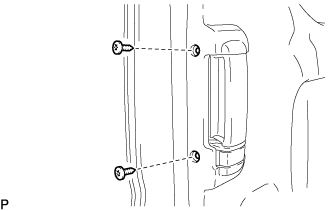
Using a "torx" socket wrench (T25), remove the 2 "torx" screws.
-
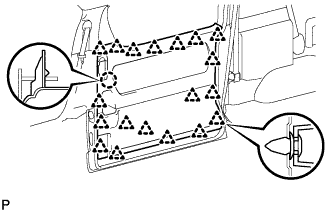
Disengage the 19 clips and claw and remove the rear door trim board sub-assembly.
-
-
REMOVE NO. 2 REAR DOOR TRIM MOULDING LH
-
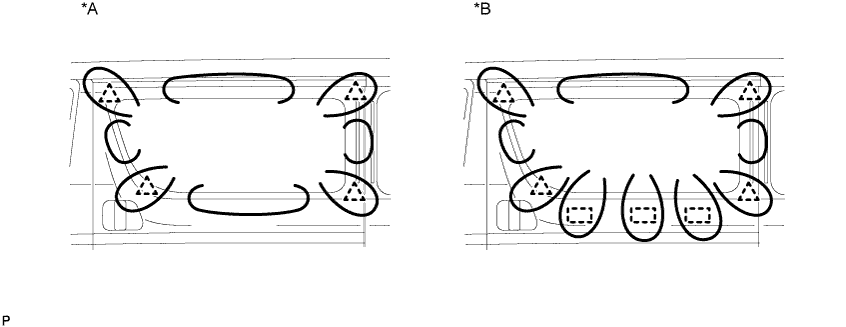
Remove the No. 2 rear door trim moulding LH as shown in the illustration.
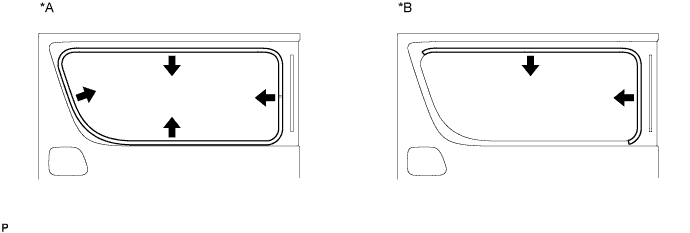
Text in Illustration *A w/o Rear Door Trim Board Sub-assembly *B w/ Rear Door Trim Board Sub-assembly
-
-
REMOVE EMERGENCY HAMMER CAUTION PLATE (w/ Emergency Hammer Caution Plate)
Tech Tips
-
If a emergency hammer caution plate is damaged, replace it with a new one.
-
Only for the LH side.
-
Remove the emergency hammer caution plate.
-
-
REMOVE FRONT SIDE WINDOW GLASS
-
Apply protective tape to the outer surface of the vehicle body to prevent scratches.
Text in Illustration *A for Type A
for Type B
*B w/ Window Seal Set Plate -
From the interior, insert piano wires between the vehicle body and front side window glass as shown in the illustration.
-
Tie objects that can serve as handles (for example, wooden blocks) to all wire ends.
Note
When separating the front side window glass from the vehicle, be careful not to damage the vehicles paint or interior/exterior ornaments.
-
Cut through the adhesive by pulling the piano wire around the front side window glass.
-
Using a suction cup, remove the front side window glass.
Note
Leave as much adhesive on the vehicle body as possible when removing the front side window glass.
-
-
REMOVE FRONT SIDE WINDOW SEAL SET PLATE LH (w/ Window Seal Set Plate)
-
Using a scraper, remove the front side window seal set plate LH.
Note
-
Be careful not to damage the front side window assembly LH.
-
Be sure to replace the front side window seal set plate LH with a new one.
-
-