ROOF HEADLINING INSTALLATION
CAUTION / NOTICE / HINT
A bolt without a torque specification is shown in the standard bolt chart (Click here).
PROCEDURE
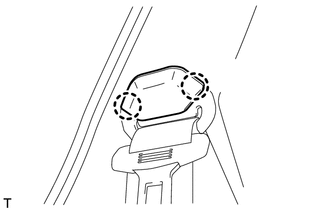
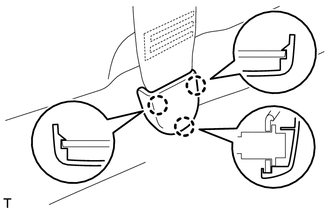
INSTALL REAR NO. 2 SEAT SHOULDER BELT HANGER LH (w/ Rear No. 1 Seat, w/ Rear No. 2 Seat)
Attach the claw and guide to install the rear No. 2 seat shoulder belt hanger.
INSTALL REAR NO. 2 SEAT SHOULDER BELT HANGER RH (w/ Rear No. 1 Seat, w/ Rear No. 2 Seat)
Tip:Use the same procedure described for the LH side.
INSTALL REAR SEAT SHOULDER BELT HANGER LH (w/ Rear No. 1 Seat)
Attach the claw and guide to install the rear seat shoulder belt hanger.
INSTALL REAR SEAT SHOULDER BELT HANGER RH (w/ Rear No. 1 Seat)
Tip:Use the same procedure described for the LH side.
INSTALL NO. 1 ROOF SIDE INNER GARNISH CAP (w/o Rear No. 1 Seat, w/o Rear No. 2 Seat)
 Tip:
Tip:Use the same procedure for all the No. 1 roof side inner garnish caps.
Attach the 2 claws to install the No. 1 roof side inner garnish cap.
INSTALL REAR DECK TRIM CLIP (w/o Rear No. 1 Seat)
 Tip:
Tip:Use the same procedure to install the rear deck trim clip on the other side.
Attach the claw and guide to install the rear deck trim clip.
INSTALL DECK SIDE TRIM COVER LH (w/o Rear No. 2 Seat)
Install the deck side trim cover with the 2 screws.
INSTALL DECK SIDE TRIM COVER RH (w/o Rear No. 2 Seat)
Tip:Use the same procedure described for the LH side.
INSTALL NO. 1 CUP HOLDER
 Tip:
Tip:Use the same procedure to install the No. 1 cup holder on the other side.
Attach the 3 claws and 2 guides to install the No. 1 cup holder.
INSTALL DECK TRIM SIDE BELT HOLE COVER LH (w/o Rear No. 2 Seat)
Slide the deck trim side belt hole cover in the direction indicated by the arrow in the illustration and attach the 2 claws and 6 guides to install it.
INSTALL DECK TRIM SIDE BELT HOLE COVER RH (w/o Rear No. 2 Seat)
Tip:Use the same procedure described for the LH side.
INSTALL NO. 1 DECK BOARD BRACKET LH (w/o Rear No. 2 Seat)
Install the No. 1 deck board bracket with the 2 screws.
INSTALL NO. 1 DECK BOARD BRACKET RH (w/o Rear No. 2 Seat)
Tip:Use the same procedure described for the LH side.
INSTALL REAR NO. 3 SIDE RAIL SPACER LH (w/ Curtain Shield Airbag)
Attach the 2 claws to install the rear No. 3 side rail spacer.
INSTALL REAR NO. 3 SIDE RAIL SPACER RH (w/ Curtain Shield Airbag)
Tip:Use the same procedure described for the LH side.
INSTALL REAR NO. 2 SIDE RAIL SPACER LH (w/o Rear No. 2 Seat, w/o Curtain Shield Airbag)
Attach the 2 claws to install the rear No. 2 side rail spacer.
INSTALL REAR NO. 2 SIDE RAIL SPACER RH (w/o Rear No. 2 Seat, w/o Curtain Shield Airbag)
Tip:Use the same procedure described for the LH side.
INSTALL REAR SIDE RAIL SPACER LH (w/o Curtain Shield Airbag)
Attach the 4 claws to install the rear side rail spacer.
INSTALL REAR SIDE RAIL SPACER RH (w/o Curtain Shield Airbag)
Tip:Use the same procedure described for the LH side.
INSTALL FRONT SIDE RAIL SPACER LH (w/o Curtain Shield Airbag)
Attach the 4 claws to install the front side rail spacer.
INSTALL FRONT SIDE RAIL SPACER RH (w/o Curtain Shield Airbag)
Tip:Use the same procedure described for the LH side.
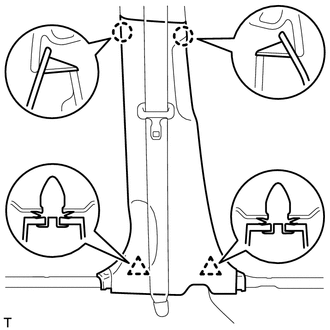
INSTALL SHOULDER BELT ANCHOR PLATE LH
Attach the 5 claws and 3 guides to install the shoulder belt anchor plate.
INSTALL SHOULDER BELT ANCHOR PLATE RH
Tip:Use the same procedure described for the LH side.
INSTALL REAR DOOR SCUFF PANEL LH

Attach the 5 claws and guide to install the rear door scuff panel.
INSTALL REAR DOOR SCUFF PANEL RH
Tip:Use the same procedure described for the LH side.
INSTALL REAR DOOR SCUFF PLATE OUTSIDE LH
Attach the 3 clips and 2 guides to install the rear door scuff plate outside.
INSTALL REAR DOOR SCUFF PLATE OUTSIDE RH
Tip:Use the same procedure described for the LH side.
INSTALL FRONT DOOR SCUFF PLATE OUTSIDE
 Tip:
Tip:Use the same procedure to install the front door scuff plate outside on the other side.
Attach the 3 clips and 2 guides to install the front door scuff plate outside.
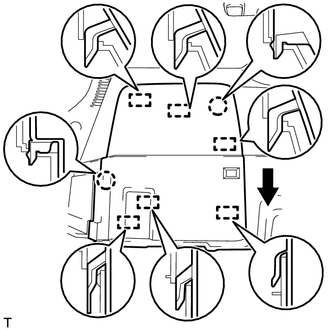
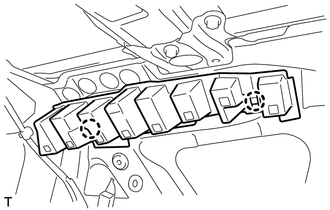
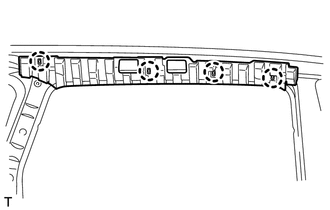
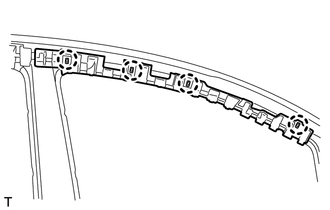
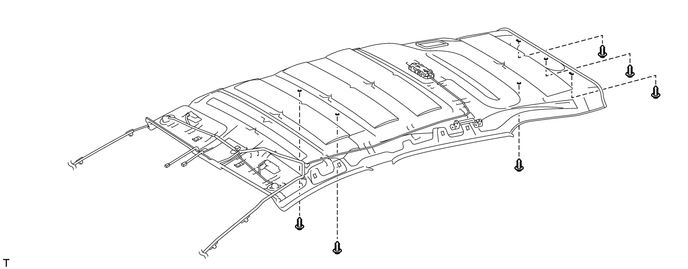
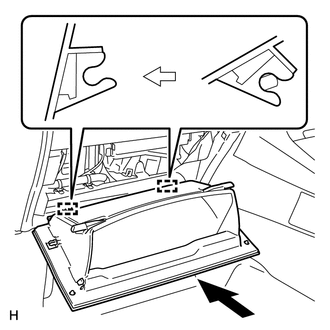
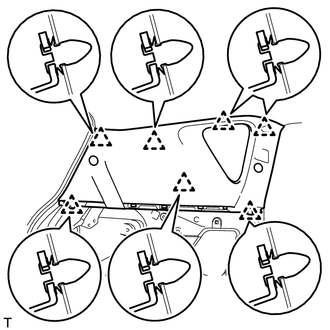
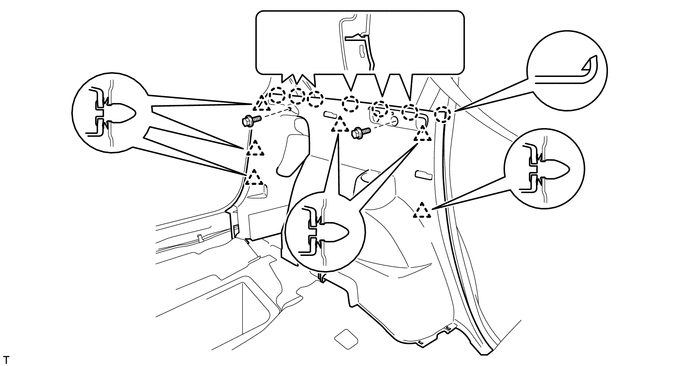
INSTALL ROOF HEADLINING ASSEMBLY
 Tip:
Tip:Before installing the roof headlining, move the front seats and rear No. 1 seat to the positions shown in the illustration.
-
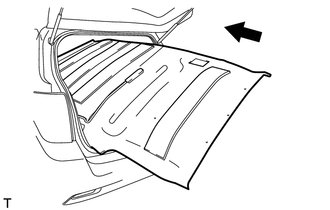
Place the roof headlining into the vehicle through the back door.
Note:Be careful not to damage the roof headlining when placing it in the cabin.
w/o Roof Sunshade System:
Install the roof headlining with the 6 clips.
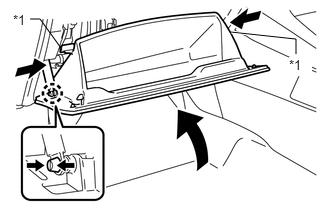
w/ Roof Sunshade System:
Attach the 2 guides and 11 fasteners to install the headlining.
Install the 3 clips.
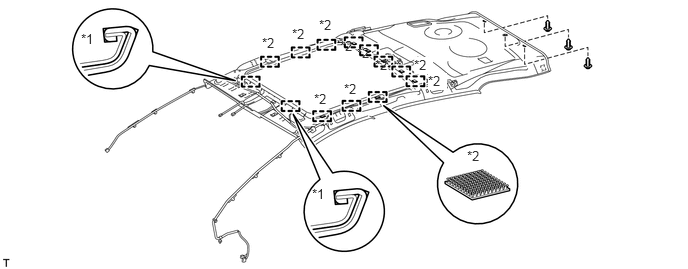
Table 1. Text in Illustration *1
Guide
*2
Fastener
for LHD:
-
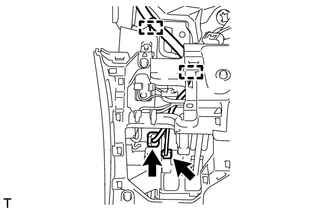
Connect the 2 connectors and attach the 2 clamps.
-
for RHD:
-
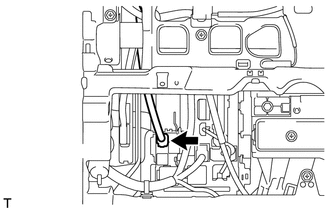
Connect the connector.
-
Connect the connector and attach the 2 clamps.
-
-
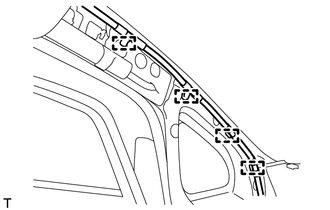
Attach the 4 clamps to the front pillar LH.
-

Connect the 2 connectors and attach the clamp to the rear pillar RH.
Install the bolt, and then align the No. 2 antenna cord with the cutout in the roof headlining and install the No. 2 antenna cord to the roof headlining.
Table 2. Text in Illustration *1
Roof Headlining Cutout
-
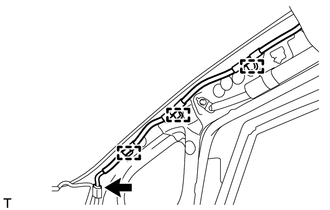
Connect the connector and attach the 3 clamps to the front pillar RH.
-
w/ Pre-collision System:
Connect the connectors.
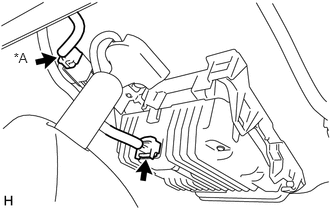
Table 3. Text in Illustration *A
w/ EC Mirror
-
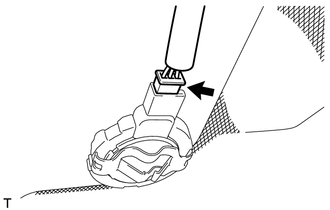
w/ Rain Sensor:
Connect the rain sensor connector.
-
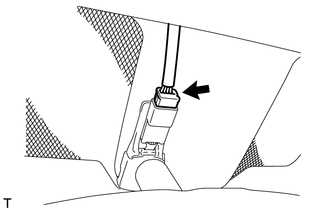
w/o Pre-collision System, w/ EC Mirror:
Connect the EC mirror connector.
-
INSTALL INSTRUMENT PANEL SAFETY PAD SUB-ASSEMBLY
Install the instrument panel safety pad sub-assembly (Click here).
INSTALL GLOVE COMPARTMENT DOOR ASSEMBLY (for RHD)
Attach the 2 hinges to install the glove compartment door.
-
Attach the glove compartment door stopper to the glove compartment door as shown in the illustration.
While pushing in the sides of the glove compartment door as indicated by the arrows in the illustration, close the glove compartment door to engage the 2 stoppers.
Table 4. Text in Illustration *1
Stopper
INSTALL FUSE BOX OPENING COVER (for LHD)
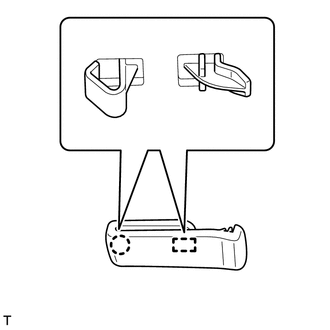
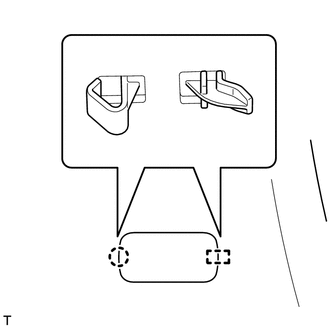
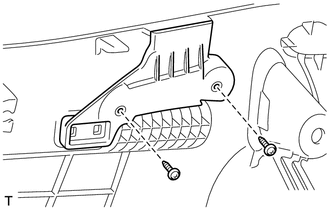
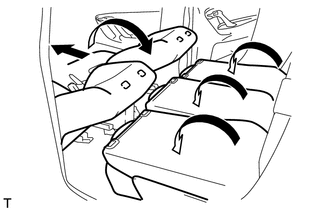
INSTALL REAR ASSIST GRIP ASSEMBLY
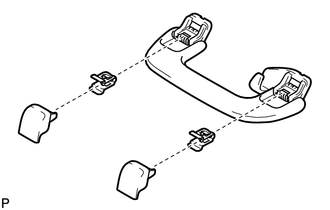 Tip:
Tip:Use the same procedure for the other rear assist grip.
Assemble the rear assist grip as shown in the illustration.
-
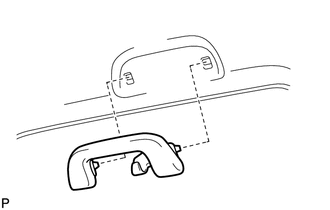
Install the rear assist grip.
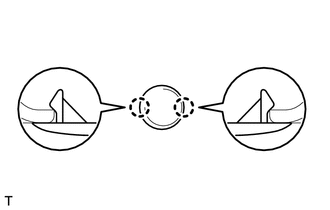
INSTALL ASSIST GRIP ASSEMBLY
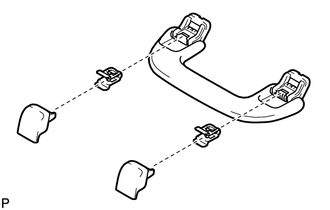 Tip:
Tip:Use the same procedure for the other assist grip.
Assemble the assist grip as shown in the illustration.
-
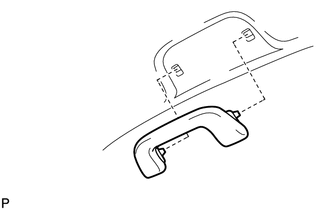
Install the assist grip.
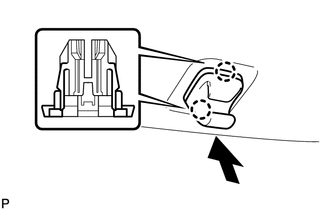
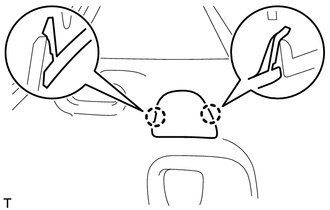
INSTALL VISOR HOLDER
 Tip:
Tip:Use the same procedure to install the visor holder on the other side
Attach the 2 claws.
Push in the visor holder as shown in the illustration.
INSTALL VISOR ASSEMBLY LH
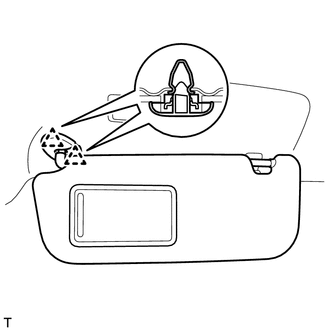
Attach the 2 clips to install the visor.
INSTALL VISOR ASSEMBLY RH
Tip:Use the same procedure described for the LH side.
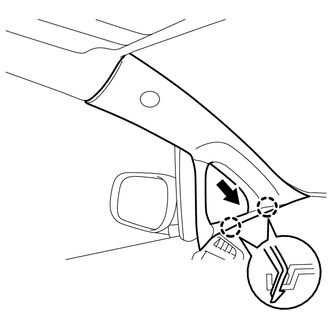
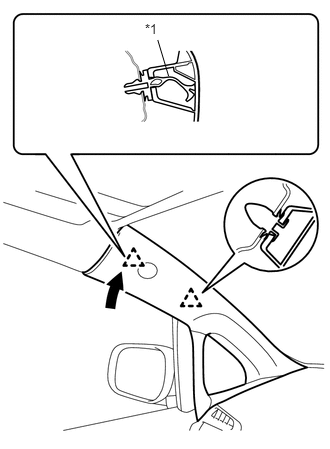
INSTALL PRE-COLLISION CITY COVER (w/ Pre-collision System)
INSTALL PRE-COLLISION CITY COVER 2ND (w/ Pre-collision System)
INSTALL RAIN SENSOR COVER (w/ Rain Sensor)
INSTALL INNER REAR VIEW MIRROR STAY HOLDER COVER (w/o Pre-collision System, w/ EC Mirror)
INSTALL SEAT BELT ANCHOR COVER
Attach the 2 claws to install the seat belt anchor cover.
Install the 2 screws.
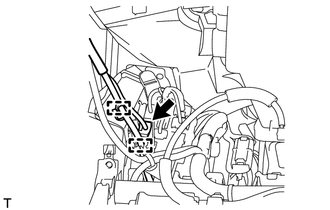
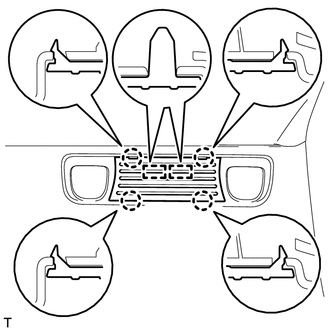
INSTALL MAP LIGHT ASSEMBLY
Connect the connector.
Attach the 4 clips to install the map light.
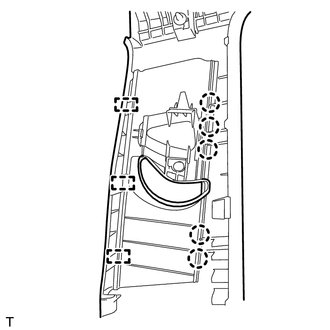
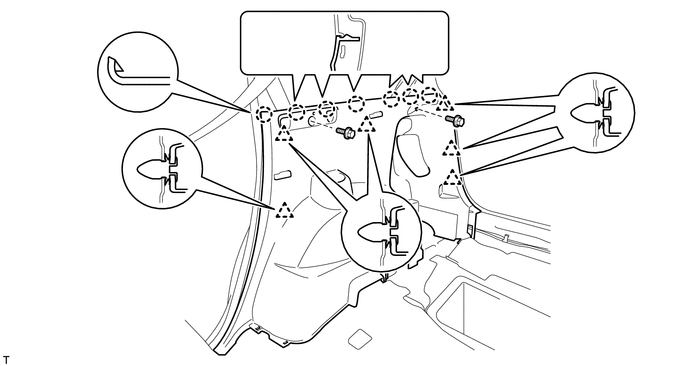
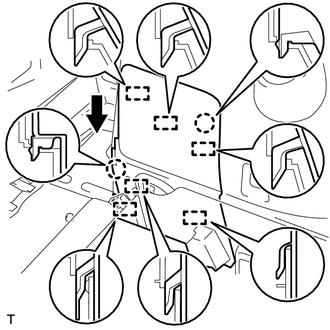
INSTALL INNER ROOF SIDE GARNISH ASSEMBLY LH
Attach the 7 clips to install the inner roof side garnish.
w/ Rear No. 1 Seat:
-
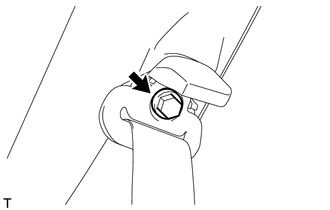
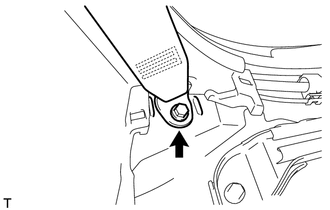
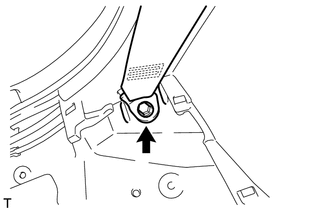
Install the rear No. 1 seat belt shoulder anchor with the bolt.
42 N*m
428 kgf*cm
31 ft.*lbf
-
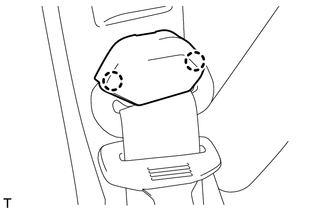
Attach the 2 claws to close the rear No. 1 seat belt shoulder anchor cover.
-
w/ Rear No. 2 Seat:
-
Install the rear No. 2 seat belt shoulder anchor with the bolt.
42 N*m
428 kgf*cm
31 ft.*lbf
-
Attach the 2 claws to close the rear No. 2 seat belt shoulder anchor cover.
-
INSTALL INNER ROOF SIDE GARNISH ASSEMBLY RH
Tip:Use the same procedure described for the LH side.
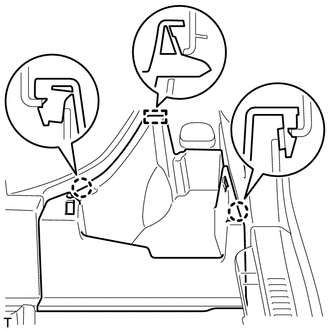
INSTALL DECK TRIM SIDE PANEL ASSEMBLY LH
Connect the connector.
Attach the 6 clips and 7 claws to install the deck trim side panel.
Install the 2 bolts.
-
w/ Rear No. 1 Seat:
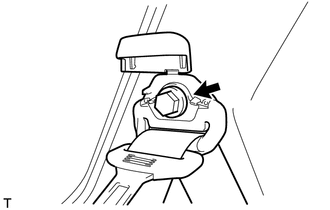
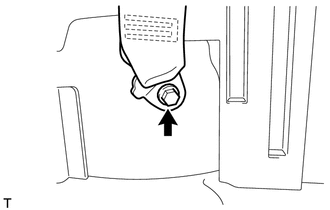
Install the rear No. 1 seat belt anchor with the bolt.
42 N*m
428 kgf*cm
31 ft.*lbf
-
w/ Rear No. 2 Seat:
Install the rear No. 2 seat belt anchor with the bolt.
42 N*m
428 kgf*cm
31 ft.*lbf
INSTALL DECK TRIM SIDE PANEL ASSEMBLY RH
Attach the 6 clips and 7 claws to install the deck trim side panel.
Install the 2 bolts.
-
w/ Rear No. 1 Seat:
Install the rear No. 1 seat belt anchor with the bolt.
42 N*m
428 kgf*cm
31 ft.*lbf
-
w/ Rear No. 2 Seat:
Install the rear No. 2 seat belt anchor with the bolt.
42 N*m
428 kgf*cm
31 ft.*lbf
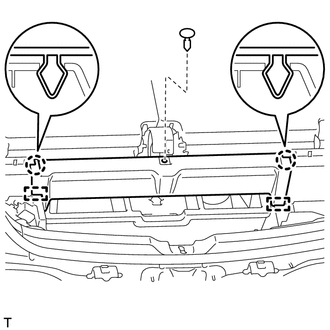
INSTALL LUGGAGE HOLD BELT STRIKER ASSEMBLY
 Tip:
Tip:Use the same procedure for all the luggage hold belt strikers.
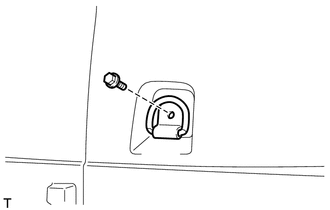
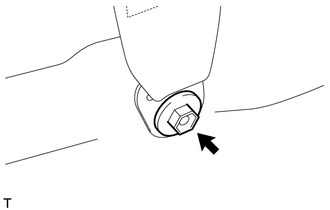
Install the luggage hold belt striker with the bolt.
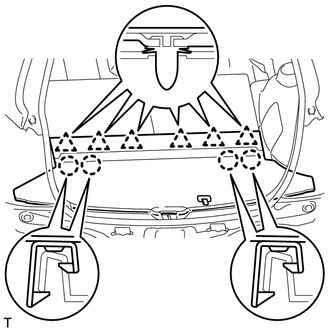
INSTALL DECK TRIM SIDE SERVICE HOLE COVER
 Tip:
Tip:Use the same procedure to install the deck trim side service hole cover on the other side.
Attach the 4 claws and 2 guides to install the deck trim side service hole cover.
INSTALL FRONT DECK SIDE TRIM COVER LH
Attach the 2 claws to install the front deck side trim cover.
INSTALL FRONT DECK SIDE TRIM COVER RH
Tip:Use the same procedure described for the LH side.
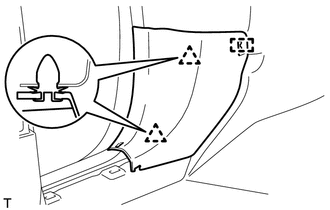
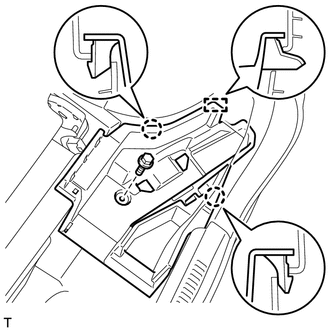
INSTALL CENTER PILLAR GARNISH LH
Pass the front seat outer belt floor anchor through the center pillar garnish.
Attach the clip to install the center pillar garnish.
Install the 2 screws.
-
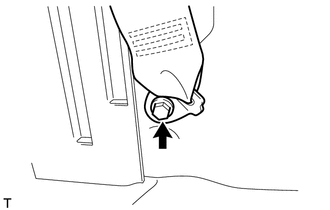
Install the front seat outer belt floor anchor with the bolt.
42 N*m
428 kgf*cm
31 ft.*lbf
INSTALL CENTER PILLAR GARNISH RH
Tip:Use the same procedure described for the LH side.
INSTALL LAP BELT OUTER ANCHOR COVER
 Tip:
Tip:Use the same procedure for the other lap belt outer anchor cover.
Attach the 3 claws to install the lap belt outer anchor cover.
INSTALL NO. 2 FLOOR BOARD
Install the No. 2 floor board.
INSTALL NO. 1 FLOOR BOARD
Install the No. 1 floor board.
INSTALL LOWER CENTER PILLAR GARNISH LH
Attach the 2 claws and 2 clips to install the lower center pillar garnish.
INSTALL LOWER CENTER PILLAR GARNISH RH
Tip:Use the same procedure described for the LH side.
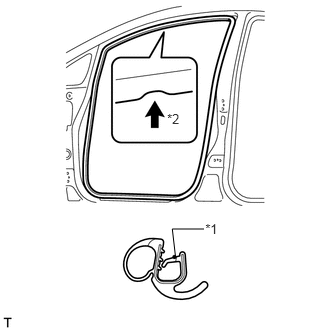
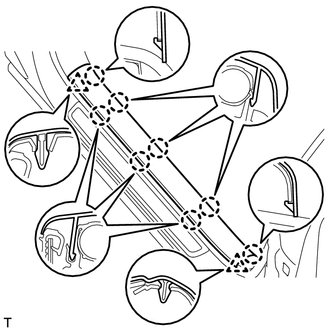
INSTALL REAR DOOR OPENING TRIM WEATHERSTRIP LH
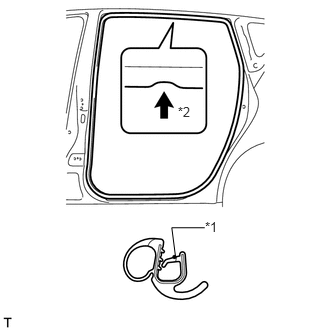
Align the paint mark on the rear door opening trim weatherstrip with the mark position on the vehicle and install the weatherstrip as shown in the illustration.
Table 5. Text in Illustration *1
Paint Mark
*2
Mark Position
INSTALL REAR DOOR OPENING TRIM WEATHERSTRIP RH
Tip:Use the same procedure described for the LH side.
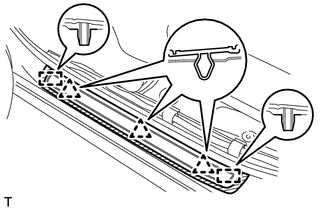
INSTALL REAR DOOR SCUFF PLATE LH
Attach the 9 claws and 2 clips to install the rear door scuff plate.
INSTALL REAR DOOR SCUFF PLATE RH
Tip:Use the same procedure described for the LH side.
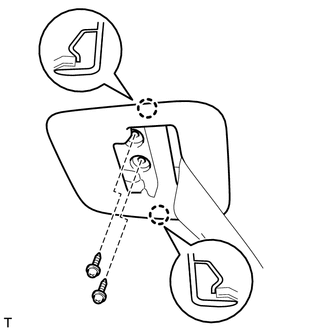
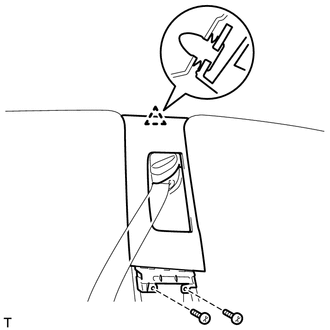
INSTALL FRONT PILLAR GARNISH LH
Remove the protective cover.
Install a new front pillar garnish clip to the front pillar garnish.
Tip:Install the front pillar garnish clip so that it faces as shown in the illustration.
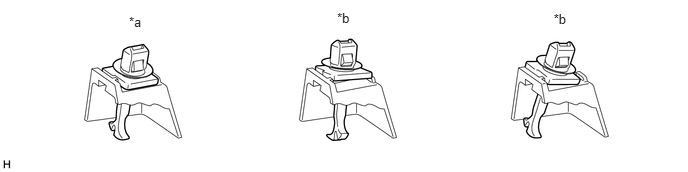
Table 6. Text in Illustration *a
CORRECT
*b
INCORRECT
-
Attach the 2 claws.
-
Attach the 2 clips to install the front pillar garnish.
*1
Front Pillar Garnish Clip
INSTALL FRONT PILLAR GARNISH RH
Tip:Use the same procedure described for the LH side.
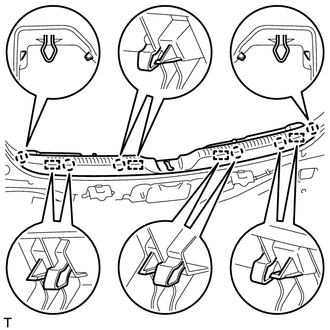
INSTALL FRONT DOOR OPENING TRIM WEATHERSTRIP LH
Align the paint mark on the front door opening trim weatherstrip with the mark position on the vehicle and install the weatherstrip as shown in the illustration.
Table 7. Text in Illustration *1
Paint Mark
*2
Mark Position
INSTALL FRONT DOOR OPENING TRIM WEATHERSTRIP RH
Tip:Use the same procedure described for the LH side.
INSTALL COWL SIDE TRIM BOARD LH
Attach the 2 clips and guide to install the cowl side trim board.
INSTALL COWL SIDE TRIM BOARD RH
Tip:Use the same procedure described for the LH side.
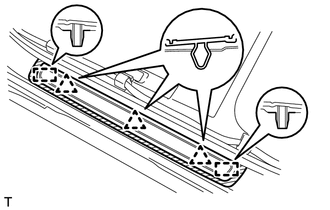
INSTALL FRONT DOOR SCUFF PLATE LH
Attach the 8 claws and 2 clips to install the front door scuff plate.
INSTALL FRONT DOOR SCUFF PLATE RH
Tip:Use the same procedure described for the LH side.
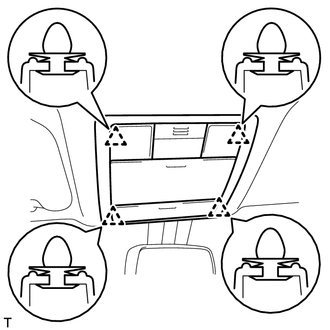
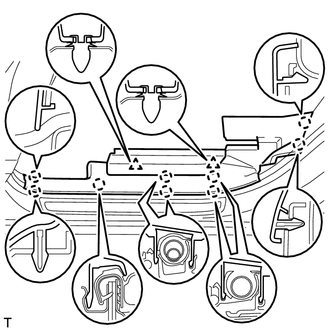
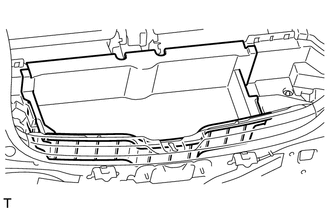
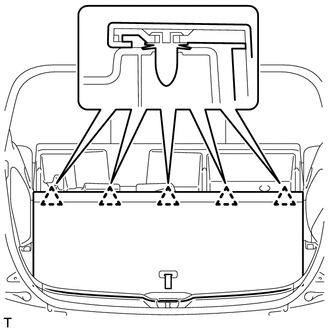
INSTALL REAR DECK TRIM COVER
Attach the 6 claws and 4 guides to install the rear deck trim cover.
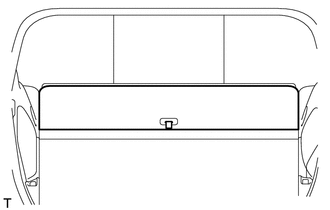
INSTALL REAR DECK FLOOR BOX (w/o Rear No. 2 Seat)
Install the rear deck floor box.
INSTALL REAR NO. 2 SEAT ASSEMBLY (w/ Rear No. 2 Seat)
INSTALL REAR NO. 2 SEAT TRACK COVER (w/ Rear No. 2 Seat)
INSTALL REAR NO. 2 SEAT TRACK BRACKET COVER (w/ Rear No. 2 Seat)
INSTALL DECK TRIM SIDE BELT HOLE COVER LH (w/ Rear No. 2 Seat)
Slide the deck trim side belt hole cover in the direction indicated by the arrow in the illustration and attach the 2 claws and 6 guides to install it.
INSTALL DECK TRIM SIDE BELT HOLE COVER RH (w/ Rear No. 2 Seat)
Tip:Use the same procedure described for the LH side.
INSTALL DECK FLOOR BOX LH

w/o Rear No. 2 Seat:
Attach the 4 claws to install the deck floor box.
-

w/ Rear No. 2 Seat:
Attach the 3 claws and guide to install the deck floor box.
Install the bolt.
INSTALL DECK FLOOR BOX RH
w/o Rear No. 2 Seat:
Attach the 2 claws and guide to install the deck floor box.
-
w/ Rear No. 2 Seat:
Attach the 2 claws and guide to install the deck floor box.
Install the bolt.
INSTALL LOWER DECK TRIM SIDE BOARD LH (w/o Rear No. 2 Seat)

Attach the claw and 2 guides to install the lower deck trim side board.
INSTALL LOWER DECK TRIM SIDE BOARD RH (w/o Rear No. 2 Seat)
Tip:Use the same procedure described for the LH side.
INSTALL DECK RAIL COVER (w/ Rear No. 2 Seat, w/o Spare Tire)
Attach the 2 claws and 2 guides to install the deck rail cover.
Install the clip.
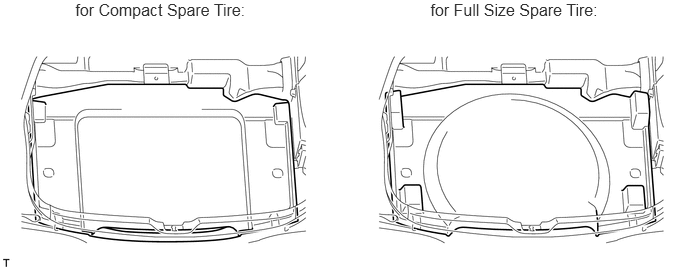
INSTALL LUGGAGE COMPARTMENT TRAY (w/ Rear No. 2 Seat, w/ Spare Tire)
Install the luggage compartment tray.
INSTALL FRONT DECK FLOOR BOX (w/o Rear No. 2 Seat)

Install the front deck floor box with the 3 bolts.
INSTALL DECK BOARD ASSEMBLY (w/ Rear No. 2 Seat)
Attach the 4 claws and 6 clips to install the deck board.
INSTALL NO. 2 DECK BOARD (w/o Rear No. 2 Seat)
Attach the 5 clips to install the No. 2 deck board.
INSTALL NO. 1 DECK BOARD (w/o Rear No. 2 Seat)
Install the No. 1 deck board.
INSTALL TONNEAU COVER ASSEMBLY (w/ Tonneau Cover)
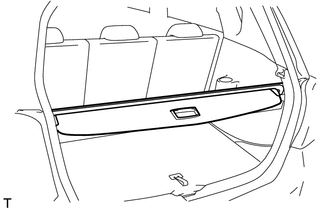
Install the tonneau cover.
CONNECT CABLE TO NEGATIVE BATTERY TERMINAL
Note:When disconnecting the cable, some systems need to be initialized after the cable is reconnected (Click here).