ЖИДКОСТЬ БЕССТУПЕНЧАТОЙ ТРАНСМИССИИ ЗАМЕНА

PROCEDURE
-
REMOVE REAR ENGINE UNDER COVER LH
-
REPLACE CONTINUOUSLY VARIABLE TRANSAXLE FLUID
-
Lift the vehicle. [*1]
Note
Set the vehicle on a lift so that the vehicle is kept level when it is lifted up (make sure that the tilt angle from the front to rear of the vehicle is within +/- 1°).
-
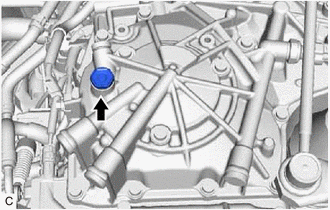
Remove the refill plug and gasket from the rear transaxle case. [*2]
-
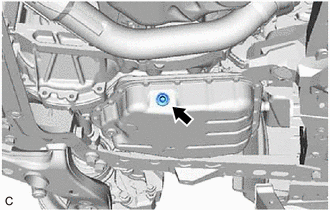
Using a 10 mm hexagon socket wrench, remove the drain plug and gasket from the transaxle oil (CVT) pan sub-assembly. [*3]
-
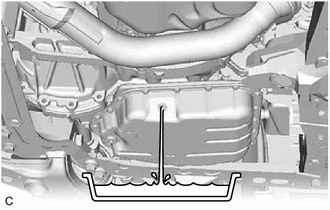
Measure the amount of fluid drained. [*4]
Tech Tips
Add the same amount of fluid in step [*6].
-
Using a 10 mm hexagon socket wrench, temporarily install the gasket and drain plug to the transaxle oil (CVT) pan sub-assembly. [*5]
Tech Tips
Reuse the old gasket as the drain plug will be removed again when flushing the CVT fluid.
-
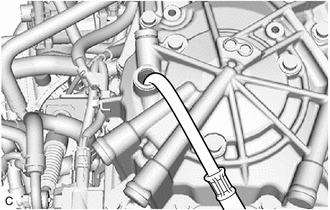
Add fluid to the refill hole using the same amount of fluid drained in step [*4]. [*6]
Note
Use Toyota Genuine CVT Fluid FE.
-
Temporarily install the gasket and refill plug to the rear transaxle case. [*7]
Tech Tips
Reuse the old gasket as the refill plug will be removed again when flushing the CVT fluid.
-
Lower the vehicle. [*8]
-
Start the engine. [*9]
-
Slowly move the shift lever from P to D, and then back to P (keep the shift lever in each position for approximately 3 seconds). [*10]
Tech Tips
Slowly move the shift lever to circulate the fluid through each part of the continuously variable transaxle assembly.
-
Allow the engine assembly to idle for 30 seconds to warm it up. [*11]
-
Turn the engine switch off. [*12]
-
Repeat steps [*1] to [*12].
-
Repeat steps [*1] to [*12].
-
Using a 10 mm hexagon socket wrench, install a new gasket and the drain plug to the transaxle oil (CVT) pan sub-assembly.
- Torque:
- 49 N*m { 500 kgf*cm, 36 ft.*lbf }
-
-
ADD SPECIFIED AMOUNT OF FLUID
-
AIR BLEED OIL PUMP WITH MOTOR ASSEMBLY (CONTINUOUSLY VARIABLE TRANSAXLE ASSEMBLY)
-
ADJUST FLUID TEMPERATURE (when Using the GTS)
-
ADJUST FLUID TEMPERATURE (when Not Using the GTS)
-
ADJUST FLUID LEVEL
-
REBUILD WORK
-
INSTALL REAR ENGINE UNDER COVER LH