STOP LIGHT SWITCH REMOVAL
CAUTION / NOTICE / HINT
Tech Tips
-
Use the same procedure for RHD and LHD vehicles.
-
The procedure listed below is for LHD vehicles.
PROCEDURE
-
REMOVE DOOR SCUFF PLATE ASSEMBLY LH
-
REMOVE COWL SIDE TRIM BOARD LH
-
REMOVE NO. 1 INSTRUMENT PANEL UNDER COVER SUB-ASSEMBLY
-
REMOVE STOP LIGHT SWITCH ASSEMBLY
-
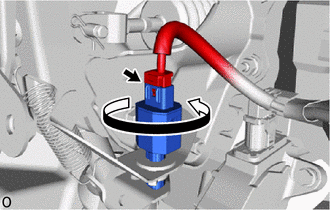
for Plastic Type:
-
Disconnect the connector.
-
Turn the stop light switch assembly counterclockwise and remove it.
-
-
for Metal Type:
-
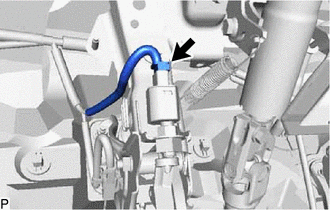
Disconnect the connector.
-
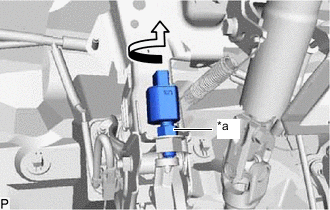
*a Lock Nut Loosen the lock nut.
-
Turn the stop light switch assembly counterclockwise and remove it.
-
-
-
REMOVE STOP LIGHT SWITCH MOUNTING ADJUSTER (for Plastic Type)
-
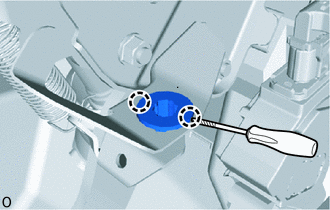

Protective Tape Using a screwdriver, detach the 2 claws and remove the stop light switch mounting adjuster.
Note
The stop light switch mounting adjuster must not be reused.
Tech Tips
Tape the screwdriver tip before use.
-