REAR SEAT ASSEMBLY INSTALLATION
CAUTION / NOTICE / HINT
Wear protective gloves. Sharp areas on the parts may injure your hands.
PROCEDURE
INSTALL NO. 1 SEAT LEG ASSEMBLY
-
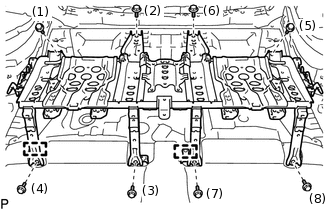
Attach the 2 guides to temporarily install the No. 1 seat leg assembly.
Tighten the 8 bolts in the order indicated in the illustration to install the No. 1 seat leg assembly.
42 N*m
428 kgf*cm
31 ft.*lbf
-
INSTALL REAR NO. 1 FLOOR MAT SUPPORT SIDE PLATE
INSTALL DECK FLOOR BOX LH
INSTALL DECK TRIM SIDE COVER BASE LH
INSTALL REAR NO. 3 FLOOR BOARD
INSTALL REAR NO. 2 FLOOR BOARD
INSTALL TONNEAU COVER ASSEMBLY (w/ Tonneau Cover)
INSTALL PACKAGE TRAY TRIM POCKET SUB-ASSEMBLY (w/ Partition Net)
INSTALL DECK BOARD ASSEMBLY
INSTALL BATTERY SERVICE COVER BOARD
-
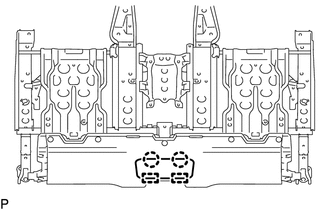
Attach the 2 guides to install the battery service cover board.
Install the 5 clips.
-
INSTALL BATTERY SERVICE HOLE COVER
-
Attach the 2 guides and 2 claws to install the battery service hole cover.
-
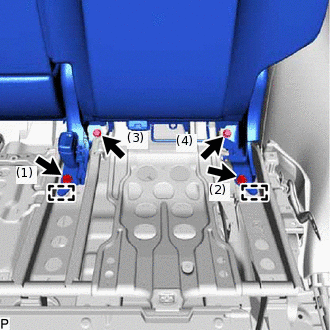
INSTALL REAR SEATBACK ASSEMBLY RH
-
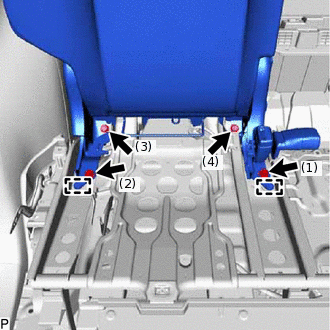
Attach the 2 guides and temporarily install the rear seatback assembly RH with the 4 bolts.
Tighten the 4 bolts in the order indicated in the illustration.
42 N*m
428 kgf*cm
31 ft.*lbf
-
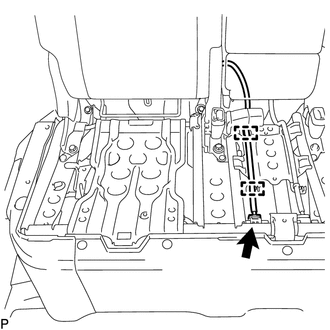
w/ Seat Belt Warning System:
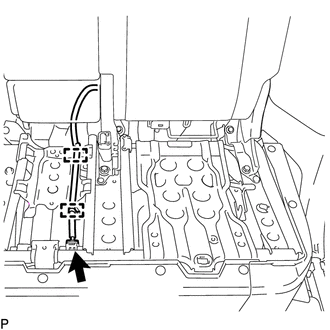
Attach the 2 clamps and connect the connector.
-
w/ Seat Belt Warning System, w/ Seat Heater System:
Attach the 3 clamps and connect the connector.
-

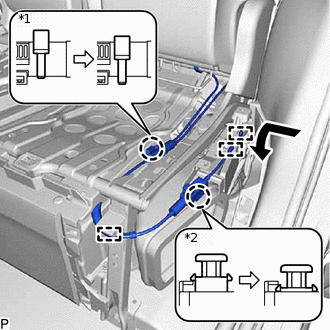
*1
Lock Pin
*2
Lock Piece
Attach the cable end.
Attach the 2 cable clamps and 2 claws to connect the rear seat reclining control cable.
When replacing the rear seat reclining control cable:
Push in the lock pin and lock piece after connecting the cable.
Operate the reclining adjuster release handle to fold down the rear seatback assembly RH.
-
Attach the 3 clips.
Return the rear seatback assembly RH to the upright position.
-
INSTALL REAR SEATBACK ASSEMBLY LH
-
Attach the 2 guides and temporarily install the rear seatback assembly LH with the 4 bolts.
Tighten the 4 bolts in the order indicated in the illustration.
42 N*m
428 kgf*cm
31 ft.*lbf
-
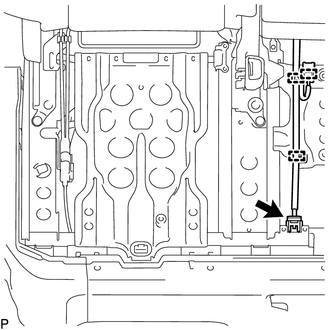
w/ Seat Belt Warning System:
Attach the 2 clamps and connect the connector.
-

w/ Seat Belt Warning System, w/ Seat Heater System:
Attach the 3 clamps and connect the connector.
-
*1
Lock Pin
*2
Lock Piece
Attach the cable end.
Attach the 2 cable clamps and 2 claws to connect the rear seat reclining control cable.
When replacing the rear seat reclining control cable:
Push in the lock pin and lock piece after connecting the cable.
Operate the reclining adjuster release handle to fold down the rear seatback assembly LH.
-
Attach the 4 clips.
Return the rear seatback assembly LH to the upright position.
-
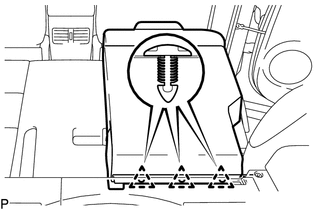
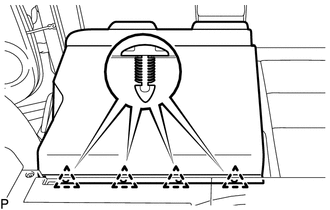
INSTALL NO. 3 BATTERY SERVICE COVER BOARD
-
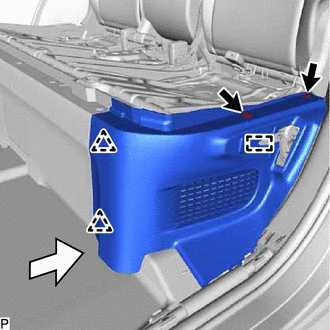
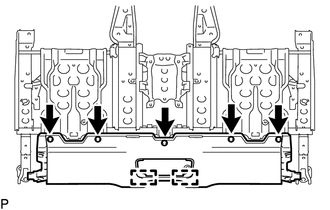
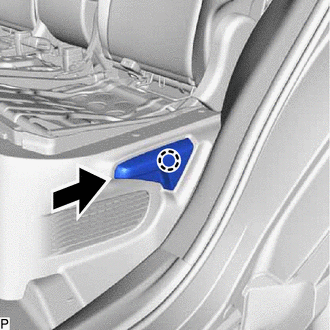
Move the No. 3 battery service cover board in the direction indicated by the arrow shown in the illustration to attach the guide and 2 clips to install the No. 3 battery service cover board.
Install the 2 clips.
-
INSTALL NO. 2 BATTERY SERVICE COVER BOARD
Tip:Use the same procedure described for the No. 3 battery service cover board.
INSTALL REAR DOOR SCUFF PLATE LH
INSTALL REAR DOOR SCUFF PLATE RH
INSTALL RECLINING ADJUSTER RELEASE HANDLE LH
-
Attach the claw to install the reclining adjuster release handle LH.
-
INSTALL RECLINING ADJUSTER RELEASE HANDLE RH
Tip:Use the same procedure described for the LH side.
INSTALL BENCH TYPE REAR SEAT CUSHION ASSEMBLY
Pass the rear seat inner with center belt assembly RH through the rubber band of the rear seat cushion assembly.
-
w/ Seat Heater System:
Connect the 2 connectors.
-
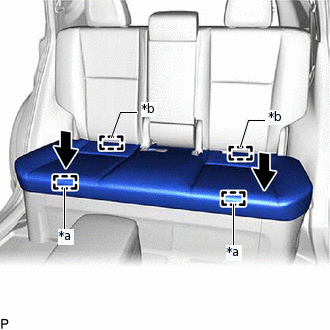
*a
Rear seat cushion lock hook section
*b
Hook section at rear of rear seat cushion frame
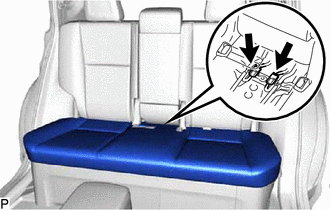
Attach the 2 hooks on the rear of the rear seat cushion frame.
Attach the 2 rear seat cushion lock hooks to install the rear seat cushion assembly.
Note:Check that the rear seat cushion lock hook and the rear seat cushion frame are securely inserted.