FRONT BUMPER DISASSEMBLY
-
REMOVE FRONT BUMPER EXTENSION LH (w/ Outside Moulding)
-
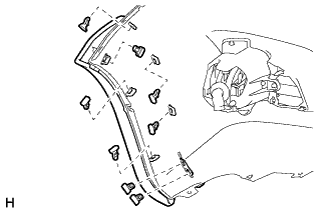
Remove the 8 retainers and front bumper extension.
-
-
REMOVE FRONT BUMPER EXTENSION RH (w/ Outside Moulding)
Tech Tips
Use the same procedure described for the LH side.
-
REMOVE TYPE 1 HEADLIGHT WASHER NOZZLE SUB-ASSEMBLY LH (w/ Headlight Cleaner System)
-
Extend the headlight washer nozzle by hand.
Note
Be careful not to damage the headlight washer actuator sub-assembly or headlight washer nozzle sub-assembly LH.
-
Detach the 2 claws and remove the type 1 headlight washer nozzle sub-assembly LH.
-
-
REMOVE TYPE 1 HEADLIGHT WASHER NOZZLE SUB-ASSEMBLY RH (w/ Headlight Cleaner System)
Tech Tips
Use the same procedure described for the LH side.
-
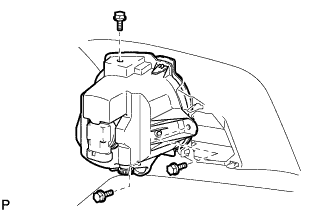
REMOVE HEADLIGHT WASHER ACTUATOR SUB-ASSEMBLY LH (w/ Headlight Cleaner System)
-

Disconnect the washer hose.
-
Remove the bolt.
-
Detach the 2 claws and remove the headlight washer actuator sub-assembly LH.
-
-
REMOVE HEADLIGHT WASHER ACTUATOR SUB-ASSEMBLY RH (w/ Headlight Cleaner System)
Tech Tips
Use the same procedure described for the LH side.
-
REMOVE NO. 1 HEADLIGHT CLEANER HOSE (w/ Headlight Cleaner System)
-

Detach the 3 clamps and remove the No. 1 headlight cleaner hose from the front bumper cover.
-
-
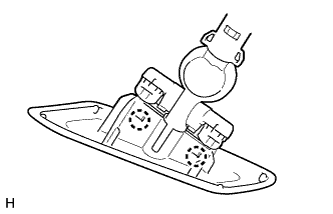
REMOVE FOG LIGHT ASSEMBLY LH (w/ Fog Light)
-
Remove the 3 bolts and fog light assembly LH.
-
-
REMOVE FOG LIGHT ASSEMBLY RH (w/ Fog Light)
Tech Tips
Use the same procedure described for the LH side.
-
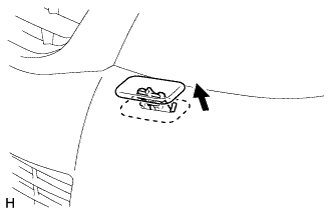
REMOVE FRONT BUMPER HOLE COVER LH
-

Detach the 3 claws and remove the front bumper hole cover.
-
-
REMOVE FRONT BUMPER HOLE COVER RH
Tech Tips
Use the same procedure described for the LH side.
-
REMOVE NO. 1 LOWER RADIATOR GRILLE
-
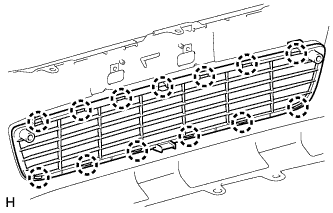
Detach the 13 claws and remove the No. 1 lower radiator grille.
-
-
REMOVE NO. 1 RADIATOR GRILLE SEAL
-
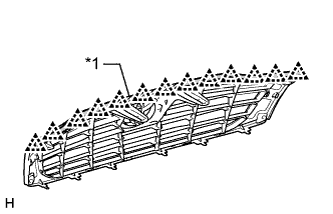
Text in Illustration *1 Double-sided Tape Detach the 13 clips and remove the double-sided tape and No. 1 radiator grille seal.
-
-
REMOVE RADIATOR GRILLE MOULDING
-
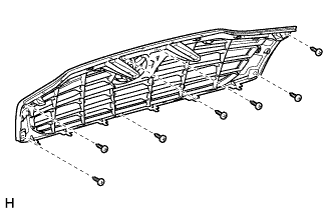
Remove the 7 screws.
-
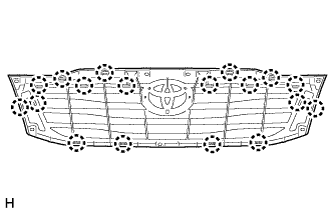
Detach the 18 claws and remove the radiator grille moulding.
-
-
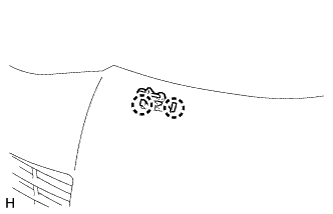
REMOVE RADIATOR GRILLE (OR FRONT PANEL) EMBLEM
-
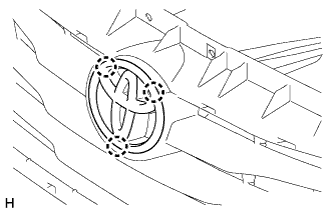
Detach the 3 claws and remove the radiator grille (or front panel) emblem.
-