AIR CONDITIONING AMPLIFIER (for Automatic Air Conditioning System) REMOVAL
Tech Tips
-
Use the same procedure for RHD and LHD vehicles.
-
The procedure listed below is for LHD vehicles.
-
REMOVE CENTER INSTRUMENT CLUSTER FINISH PANEL ASSEMBLY
-
for Manual Air Conditioning System:
-
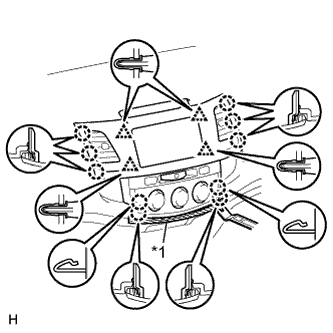
Text in Illustration *1 Protective Tape Put protective tape around the center instrument cluster finish panel.
-
Using a moulding remover, detach the 10 claws and 4 clips.
-
Detach the 4 claws and disconnect the air conditioner control.
-
Disconnect the connectors and remove the center instrument cluster finish panel.
-
-
for Automatic Air Conditioning System:
-
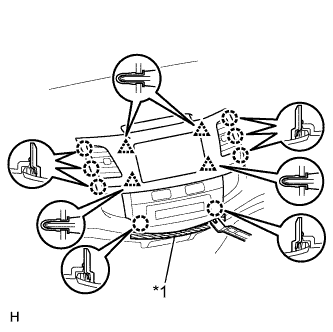
Text in Illustration *1 Protective Tape Put protective tape around the center instrument cluster finish panel.
-
Using a moulding remover, detach the 8 claws and 4 clips.
-
Disconnect the connectors and remove the center instrument cluster finish panel.
-
-
-
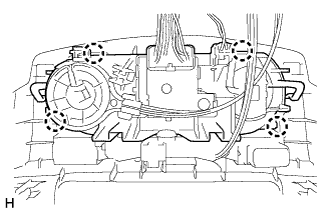
REMOVE LOWER HEATER CONTROL BASE
-

Remove the 4 screws.
-
Remove the 4 screws.
-
Detach the 3 claws and disconnect the lower heater control base.
-
-
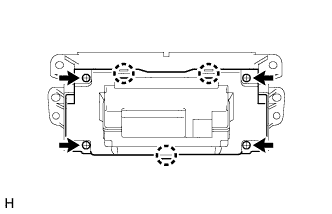
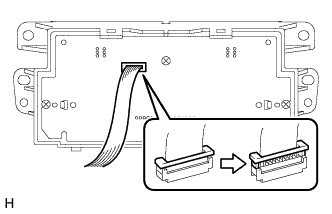
DISCONNECT NO. 1 COOLER WIRE
-
Disconnect the No. 1 cooler wire as shown in the illustration.
-
-
REMOVE HEATER CONTROL BASE
-
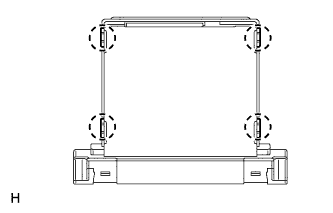
Detach the 4 claws and remove the heater control base.
-
-
REMOVE AIR CONDITIONING AMPLIFIER ASSEMBLY
-
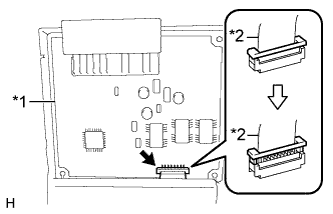
Text in Illustration *1 Air Conditioning Amplifier Assembly *2 No. 1 Cooler Wire Disconnect the No. 1 cooler wire from the air conditioning amplifier assembly as shown in the illustration.
-
Remove the air conditioning amplifier assembly.
-