FRONT SEAT ASSEMBLY REMOVAL
CAUTION / NOTICE / HINT
Tech Tips
-
Use the same procedure for RHD and LHD vehicles.
-
The procedure listed below is for LHD vehicles.
-
Use the same procedure for the RH and LH sides.
-
The procedure listed below is for the LH side.
PROCEDURE
-
PRECAUTION
CAUTION:
-
Be sure to read Precaution thoroughly before servicing Click here.
-
If the side airbag was deployed, replace the front seat airbag assembly, separate type front seatback pad and separate type front seatback cover with the necessary parts in accordance with the extent of the collision damage.
Note
After turning the ignition switch off, waiting time may be required before disconnecting the cable from the negative (-) battery terminal. Therefore, make sure to read the disconnecting the cable from the negative (-) battery terminal notices before proceeding with work Click here.
-
-
DISCONNECT CABLE FROM NEGATIVE BATTERY TERMINAL
CAUTION:
Wait at least 90 seconds after disconnecting the cable from the negative (-) battery terminal to disable the SRS system.
Note
The power window system utilizes a mechanism that the door glass moves down slightly when the door is opened, and that the glass moves up when closing the door in order to prevent the door molding from being damaged. When the battery negative (-) terminal needs to be disconnected for servicing, fully open the driver and passenger door glasses in advance.
-
REMOVE FRONT SEAT HEADREST ASSEMBLY
-
REMOVE FRONT SEAT ASSEMBLY
-
Operate the reclining adjuster release handle and move the seatback to the upright position.
-
Lift up the seat track adjusting handle and move the seat to the foremost position.
-
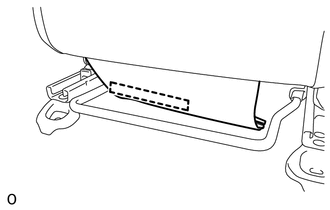
Disengage the hook of the separate type front seat cushion cover.
-
Disconnect each connector and clamp under the seat.
-
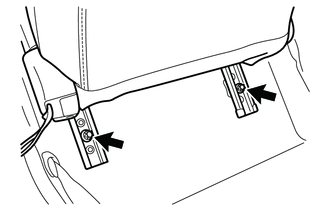
Remove the 2 bolts on the rear side of the seat.
Tech Tips
For vehicles used with the TORX type bolts, use an E10 "TORX" socket wrench.
-
Lift up the seat track adjusting handle and move the seat to the rearmost position.
-
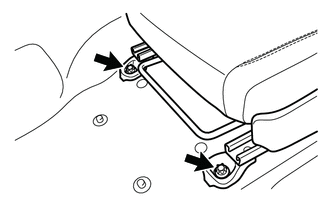
Remove the 2 bolts on the front side of the seat.
Tech Tips
For vehicles used with the TORX type bolts, use an E10 "TORX" socket wrench.
-
Remove the front seat assembly.
Note
-
Be careful not to damage the vehicle body.
-
Always work in teams of multiple people when removing seats from the vehicle.
-
-