SHIFT LEVER REMOVAL
PROCEDURE
-
SECURE VEHICLE
-
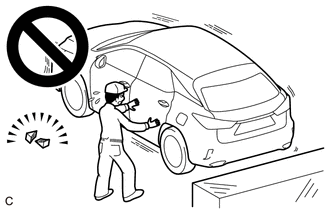
Fully apply the parking brake and chock a wheel.
CAUTION:
-
Make sure to apply the parking brake and chock a wheel before performing this procedure.
-
If the vehicle is not secure and the shift lever is moved to N, the vehicle may suddenly move, possibly resulting in an accident or serious injury.
-
-
-
REMOVE SHIFT LEVER CAP
-
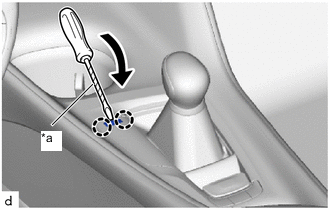
*a Protective Tape Using a screwdriver with its tip wrapped in protective tape, disengage the 2 claws to remove the shift lever cap from the shift position indicator.
Note
Be careful not to damage the shift lever cap and instrument panel ornament.
-
Move the shift lever to N.
-
-
REMOVE SHIFT LEVER KNOB SUB-ASSEMBLY
-
REMOVE REAR CONSOLE BOX ASSEMBLY
-
REMOVE TELEMATICS TRANSCEIVER (w/ Telematics Transceiver)
-
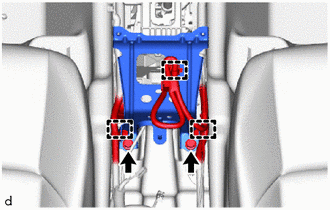
REMOVE NO. 1 CONSOLE BOX MOUNTING BRACKET
-
w/ Stereo Component Amplifier:
-
Disengage the 3 clamps to separate the wire harness from the No. 1 console box mounting bracket.
-
Remove the 2 bolts and No. 1 console box mounting bracket from the vehicle body.
-
-
w/o Stereo Component Amplifier:
-
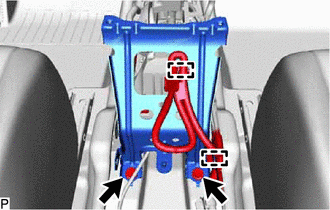
Disengage the 2 clamps to separate the wire harness from the No. 1 console box mounting bracket.
-
Remove the 2 bolts and No. 1 console box mounting bracket from the vehicle body.
-
-
-
DISCONNECT TRANSMISSION CONTROL CABLE ASSEMBLY
-
for TMMT Made:
-
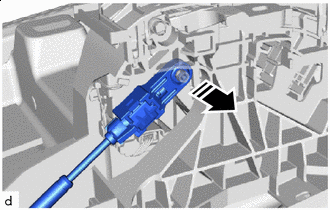

Remove in this Direction Disconnect the end of the transmission control cable assembly from the shift lever assembly.
-
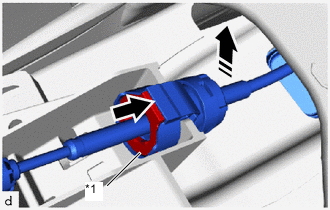
*1 Slider 
Push Remove in this Direction Push in the slider and remove the transmission control cable from the shift lever assembly as shown in the illustration.
-
-
for TMC Made:
-
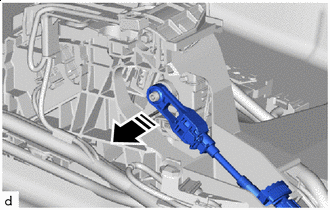
Remove in this Direction Disconnect the end of the transmission control cable assembly from the shift lever assembly.
-

*1 Slider Turn approximately 180° Remove in this Direction Rotate the nut approximately 180° in the direction shown in the illustration, and while holding the nut in that position, disconnect the transmission control cable assembly from the shift lever plate.
Note
Rotating the nut too much will damage the internal spring, and the transmission control cable assembly will not be reusable. Do not turn the nut too far.
-
-
-
REMOVE FLOOR SHIFT SHIFT LEVER ASSEMBLY (for LHD)
-
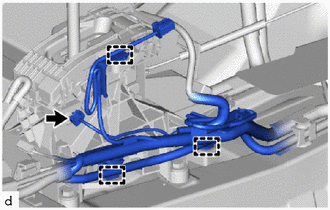
Disconnect the 2 connectors from the floor shift shift lever assembly.
-
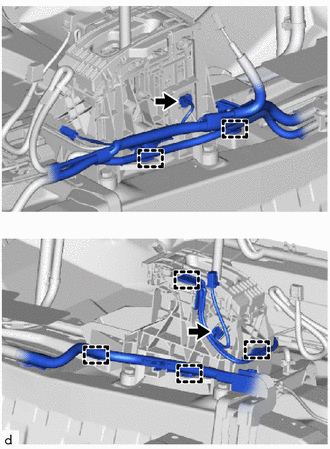
Disengage the 6 clamps to separate the wire harness from the floor shift shift lever assembly.
-
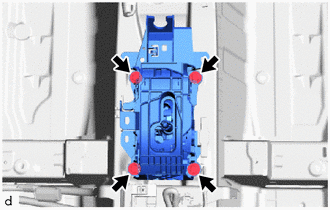
Remove the 4 bolts and floor shift shift lever assembly from the vehicle body.
-
-
REMOVE FLOOR SHIFT SHIFT LEVER ASSEMBLY (for RHD)
-
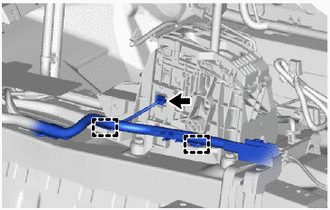
Disconnect the connector from the floor shift shift lever assembly.
-
Disengage the 3 clamps to separate the wire harness from the floor shift shift lever assembly.
-
w/ Stereo Component Amplifier:
-
Disconnect the connector from the floor shift shift lever assembly.
-
Disengage the 2 clamps to separate the wire harness from the floor shift shift lever assembly.
-
-
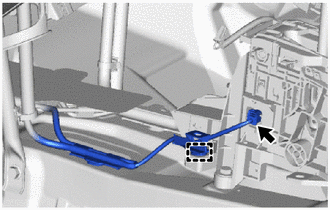
w/o Stereo Component Amplifier:
-
Disconnect the connector from the floor shift shift lever assembly.
-
Disengage the clamp to separate the wire harness from the floor shift shift lever assembly.
-
-
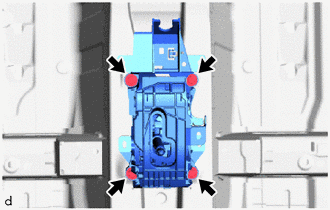
Remove the 4 bolts and floor shift shift lever assembly from the vehicle body.
-