WINDSHIELD DEICER SWITCH ON-VEHICLE INSPECTION
PROCEDURE
CHECK FRONT WIPER DEICER SWITCH
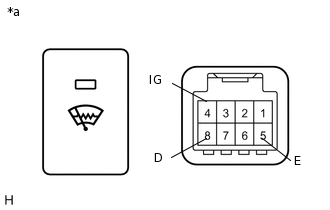
Disconnect the windshield deicer switch connector.
-

*a
Rear view wireharness connector
(to Front Wiper Deicer Switch)
Measure the voltage and resistance according to the value(s) in the table below.
Standard Voltage
Tester Connection
Condition
Specified Condition
1 (ILL+) - 6 (ILL-)
Headlight dimmer switch OFF → ON
Below 1 V → 10 to 14 V
8 (D) - 5 (E)
Ignition switch ON
10 to 14 V
4 (IG) - 5 (E)
Ignition switch ON
10 to 14 V
Standard Resistance
Tester Connection
Condition
Specified Condition
6 (ILL-) - Body ground
Always
Below 1 Ω
5 (E) - Body ground
Always
Below 1 Ω
Reconnect the windshield deicer connector.
-
*a
Component with harness connected
(Front Wiper Deicer Switch)
Measure the voltage according to the value(s) in the table below.
Standard Voltage
Tester Connection
Condition
Specified Condition
8 (D) - 5 (E)
Ignition switch ON, windshield deicer switch OFF → ON
10 to 14 V → Below 1 V (after 15 +/- 3 minutes: 10 to 14 V)
4 (IG) - 5 (E)
Ignition switch ON, windshield deicer switch ON
10 to 14 V → Below 1 V
-
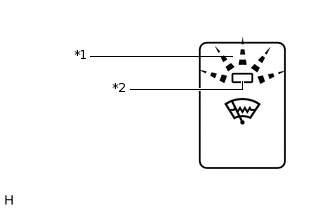
*1
Illumination Area
*2
ON/OFF Indicator
Check the ON/OFF indicator of the switch.
Push the switch several times. Check that the ON/OFF indicator illuminates or turns off according to the switch operation.
-
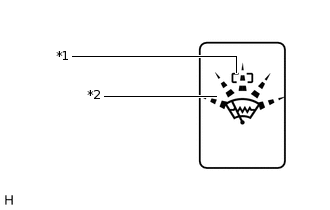
*1
ON/OFF Indicator
*2
Illumination Area
Check the illumination area of the switch.
Check that the ON/OFF indicator illuminates or turns off according to the switch operation.