FUEL FILTER INSTALLATION
-
INSTALL FUEL FILTER ELEMENT
-
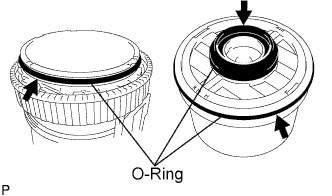
Attach 2 new O-ring to a new fuel filter element sub-assembly and a new O-ring to the fuel filter case sub-assembly.
-
Install the fuel filter element sub-assembly to fuel filter case sub-assembly.
-
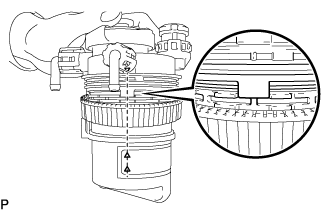
Align the matchmark on fuel filter cap assembly with the 2 matchmarks on the fuel filter case sub-assembly.
-
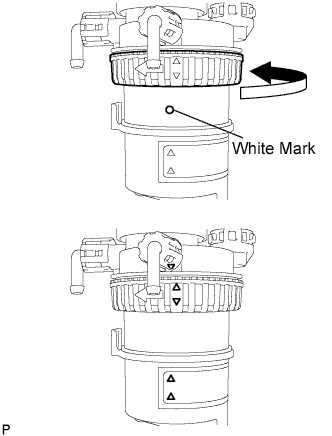
Turn the fastener nut until a 'click' sound is heard.
Tech Tips
Just before the marks of the case and nut align, the turning difficulty of the fastener nut will increase. Use a screwdriver as a lever to turn the fastener nut.
-
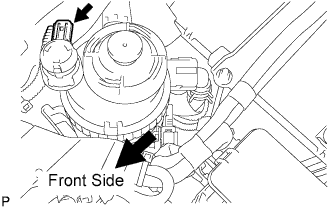
Install the fuel filter assembly.
-
Install the 2 fuel hoses.
-
Install the 2 fuel heater hoses. (w/ fuel heater)
-
-
INSTALL FUEL TANK CAP ASSEMBLY
-
CONNECT BATTERY NEGATIVE CABLE
-
RESET FUEL FILTER AND FILTER WARNING LAMP
-
Turn the ignition switch on.
-
After turning the ignition switch on, connect the clogging sensor connector within 3 to 60 seconds.
-
Check that the combination meter's filter warning light turns off.
-
-
BLEED FUEL LINE
-
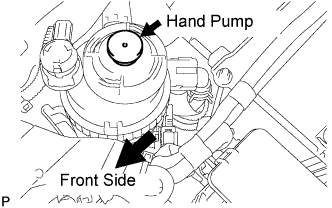
Using the hand pump, bleed air from the fuel system until pumping becomes difficult.
-
-
PREFORM INITIALIZATION
-
CHECK FOR FUEL LEAKS
-
PERFORM ACTIVE TEST
-
Connect the GTS to the DLC3.
-
Turn the ignition switch on.
-
Turn the GTS on.
-
Enter the following menus: Powertrain / Engine and ECT / Active Test.
-
Perform the Active Test.
Tester Display Test Details Control Range Diagnostic Notes Test the Fuel Leak Pressurizes common rail internal fuel pressure, and checks for fuel leaks Stop/Start
-
Fuel pressure inside common rail pressurized to specified value and engine speed increased to 2,000 rpm when ON is selected
-
Above conditions preserved while test is ON
-
-
-