FRONT ACCELERATION SENSOR INSTALLATION
CAUTION / NOTICE / HINT
Tech Tips
-
Use the same procedure for the RH and LH side.
-
The following procedure is for the LH side.
PROCEDURE
-
INSTALL ACCELERATION SENSOR ASSEMBLY
-
for LH Side:
-
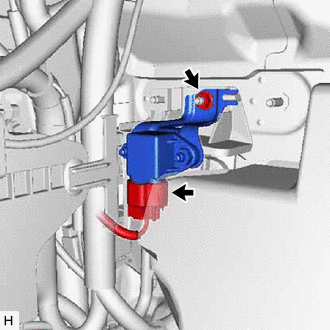
Connect the connector.
-
Install the acceleration sensor with the 2 nuts.
- Torque:
- 7.5 N*m { 76 kgf*cm, 66 in.*lbf }
Note
-
Avoid any impact to the acceleration sensor.
-
Do not drop the acceleration sensor. If it is dropped, replace it with a new one.
-
Return the floor carpet to its original position.
-
-
for RH Side:
-
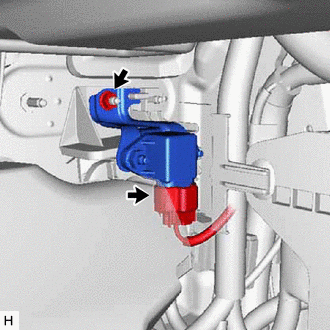
Connect the connector.
-
Install the acceleration sensor with the 2 nuts.
- Torque:
- 7.5 N*m { 76 kgf*cm, 66 in.*lbf }
Note
-
Avoid any impact to the acceleration sensor.
-
Do not drop the acceleration sensor. If it is dropped, replace it with a new one.
-
Return the floor carpet to its original position.
-
-
-
INSTALL COWL SIDE TRIM BOARD LH
-
INSTALL NO. 1 INSTRUMENT PANEL UNDER COVER SUB-ASSEMBLY
-
INSTALL INSTRUMENT SIDE PANEL LH
-
INSTALL FRONT DOOR SCUFF PLATE LH
-
INSTALL COWL SIDE TRIM BOARD RH
-
INSTALL NO. 2 INSTRUMENT PANEL UNDER COVER SUB-ASSEMBLY
-
INSTALL INSTRUMENT SIDE PANEL RH
-
INSTALL FRONT DOOR SCUFF PLATE RH
-
CONNECT CABLE TO NEGATIVE BATTERY TERMINAL
Note
When disconnecting the cable, some systems need to be initialized after the cable is reconnected.