AIR CONDITIONING UNIT DISASSEMBLY
PROCEDURE
-
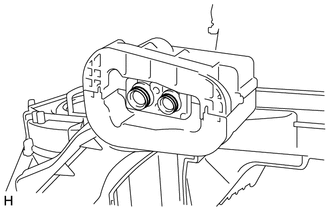
REMOVE ASPIRATOR (for Automatic Air Conditioning System)
-
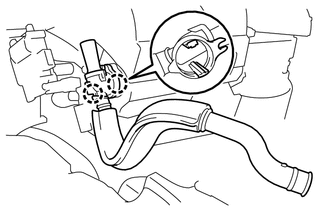
Disengage the 2 claws and remove the aspirator with aspirator pipe as a unit.
-
-
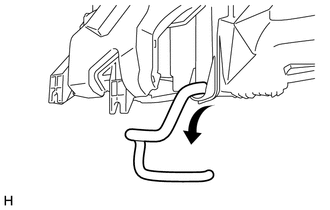
REMOVE ASPIRATOR PIPE (for Automatic Air Conditioning System)
-
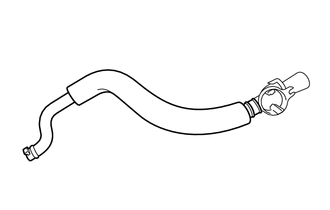
Remove the aspirator pipe.
-
-
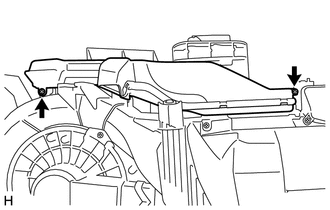
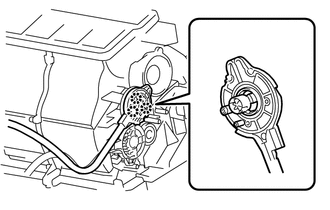
REMOVE NO. 1 AIR CONDITIONING RADIATOR DAMPER SERVO SUB-ASSEMBLY
-
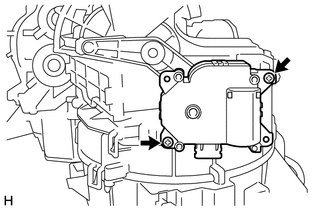
Remove the 2 screws and No. 1 air conditioning radiator damper servo sub-assembly.
-
-
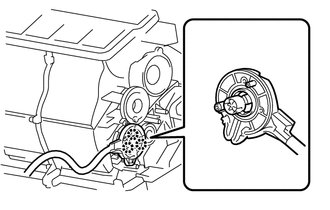
REMOVE NO. 5 AIR CONDITIONING RADIATOR DAMPER SERVO SUB-ASSEMBLY (for Automatic Air Conditioning System)
-
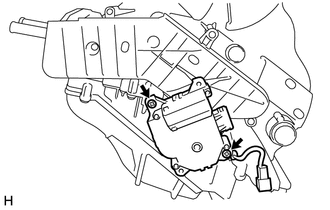
Remove the 2 screws and No. 5 air conditioning radiator damper servo sub-assembly.
Note
When re-using the No. 5 air conditioner damper servo sub-assembly, set the temperature adjustment dial to MAX COOL before removing the sub-assembly, and then wait for 30 seconds before beginning work.
-
-
REMOVE HEATER COVER (for Automatic Air Conditioning System)
-
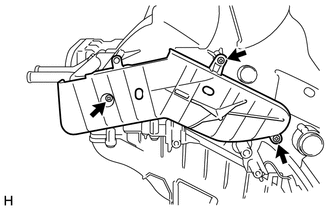
Remove the 3 screws and heater cover.
-
-
REMOVE HEATER COVER (for Manual Air Conditioning System)
Tech Tips
Use the same procedure as for the automatic air conditioning system.
-
REMOVE HEATER COVER (w/o Airbag System)
Tech Tips
Use the same procedure as for the automatic air conditioning system.
-
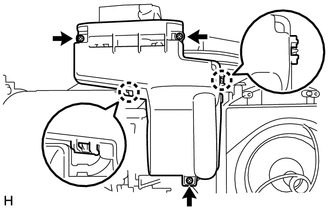
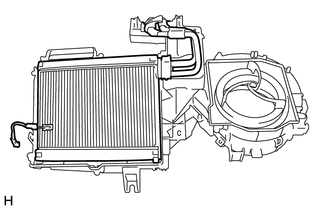
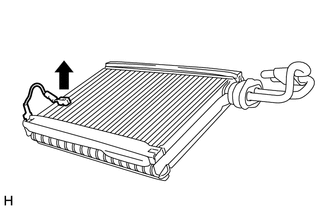
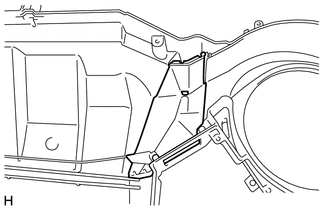
REMOVE HEATER RADIATOR UNIT SUB-ASSEMBLY (for Automatic Air Conditioning System)
-
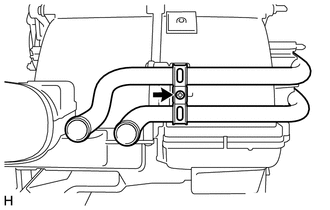
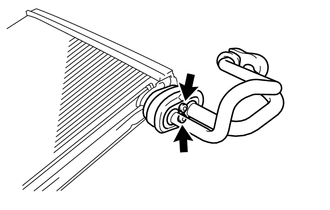
Remove the screw and the clamp.
-
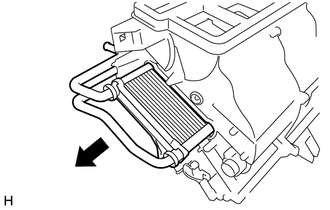
Remove the heater radiator unit sub-assembly as shown in the illustration.
-
-
REMOVE HEATER RADIATOR UNIT SUB-ASSEMBLY (for Manual Air Conditioning System)
Tech Tips
Use the same procedure as for the automatic air conditioning system.
-
REMOVE HEATER RADIATOR UNIT SUB-ASSEMBLY (w/o Air Conditioning System)
Tech Tips
Use the same procedure as for the automatic air conditioning system.
-
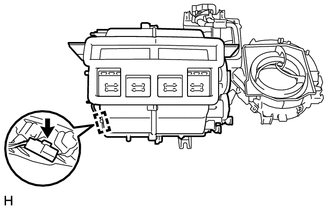
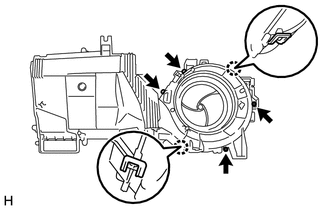
REMOVE AIR FILTER CASE
-
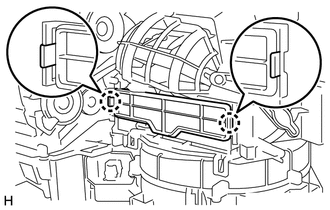
Disengage the 2 claws and remove the air filter case.
-
-
REMOVE CLEAN AIR FILTER
-
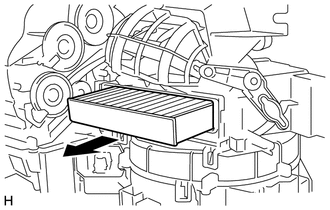
Remove the clean air filter as shown in the illustration.
-
-
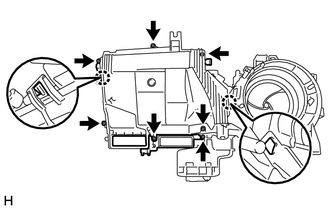
REMOVE COOLING UNIT CASE
-
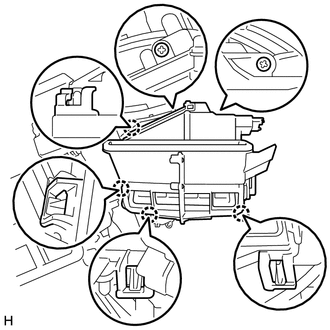
Remove the 2 screws.
-
Disengage the 4 claws and remove the cooling unit case.
-
-
REMOVE COOLER EXPANSION VALVE (for Automatic Air Conditioning System)
-
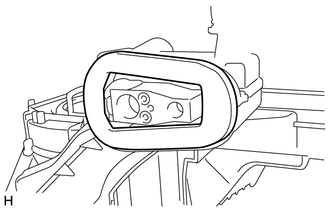
Remove the gasket.
-
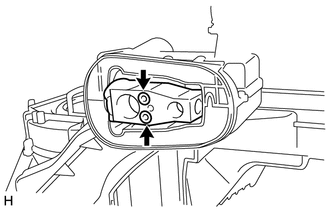
Using a 4 mm hexagon socket wrench, remove the 2 hexagon bolts and cooler expansion valve.
-
Remove the 2 O-rings from the evaporator pipe.
-
-
REMOVE COOLER EXPANSION VALVE (for Manual Air Conditioning System)
Tech Tips
Use the same procedure as for the automatic air conditioning system.
-
REMOVE COVER
-
Remove the 3 screws.
-
Disengage the 2 claws and remove the cover.
-
-
REMOVE NO. 1 COOLER UNIT DRAIN HOSE
-
Remove the No. 1 cooler unit drain hose.
-
-
REMOVE NO. 1 AIR DUCT SUB-ASSEMBLY
-
Remove the 2 screws and remove the No. 1 air duct sub-assembly.
-
-
REMOVE BLOWER MOTOR WITH FAN SUB-ASSEMBLY
-
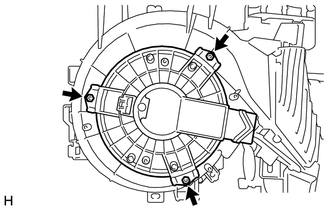
Remove the 3 screws and remove the blower motor with fan sub-assembly.
-
-
REMOVE NO. 2 AIR DUCT SUB-ASSEMBLY
-
Remove the 3 screws and remove the No. 2 air duct sub-assembly.
-
-
REMOVE NO. 4 AIR CONDITIONING RADIATOR DAMPER SERVO SUB-ASSEMBLY (for Automatic Air Conditioning System)
-
Remove the 2 screws and remove the No. 4 air conditioning radiator damper servo sub-assembly.
Note
When re-using the No. 4 air conditioner damper servo sub-assembly, set the temperature adjustment dial to MAX COOL before removing the sub-assembly, and then wait for 30 seconds before beginning work.
-
-
REMOVE NO. 3 AIR CONDITIONING RADIATOR DAMPER SERVO SUB-ASSEMBLY (for Automatic Air Conditioning System)
-
Remove the 3 screws and remove the No. 3 air conditioning radiator damper servo sub-assembly.
-
-
REMOVE AIR INLET DAMPER CONTROL CABLE SUB-ASSEMBLY (for Manual Air Conditioning System)
-
Disengage the 3 claws and remove the air inlet damper control cable sub-assembly.
Note
Hold the control cable and remove the drive gear on the unit side slowly, without pulling it.
-
-
REMOVE AIR INLET DAMPER CONTROL CABLE SUB-ASSEMBLY (w/o Air Conditioning System)
Tech Tips
Use the same procedure as for the manual air conditioning system.
-
REMOVE HEATER CONTROL CABLE SUB-ASSEMBLY (for Automatic Air Conditioning System)
-
Disengage the 3 claws and remove the heater control cable sub-assembly.
Note
Hold the control cable and remove the drive gear on the unit side slowly, without pulling it.
-
-
REMOVE HEATER CONTROL CABLE SUB-ASSEMBLY (w/o Air Conditioning System)
Tech Tips
Use the same procedure as for the manual air conditioning system.
-
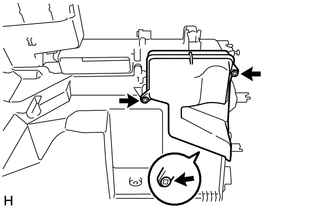
REMOVE COOLING UNIT CASE SUB-ASSEMBLY (for Automatic Air Conditioning System)
-
Disengage the clamp.
-
Remove the 7 screws.
-
Disengage the 2 claws and remove the cooling unit case sub-assembly.
-
-
REMOVE COOLING UNIT CASE SUB-ASSEMBLY (for Manual Air Conditioning System)
Tech Tips
Use the same procedure as for the automatic air conditioning system.
-
REMOVE COOLING UNIT CASE SUB-ASSEMBLY (w/o Air Conditioning System)
-
Remove the 7 screws.
-
Disengage the 2 claws and remove the cooling unit case sub-assembly.
-
-
REMOVE NO. 1 COOLER EVAPORATOR SUB-ASSEMBLY (for Automatic Air Conditioning System)
-
Remove the No. 1 cooler evaporator sub-assembly with evaporator pipe as a unit.
-
-
REMOVE NO. 1 COOLER EVAPORATOR SUB-ASSEMBLY (for Manual Air Conditioning System)
Tech Tips
Use the same procedure as for the automatic air conditioning system.
-
REMOVE COVER PLATE (w/o Air Conditioning System)
-
Remove the cover plate.
-
-
REMOVE NO. 1 COOLER THERMISTOR (for Automatic Air Conditioning System)
-
Remove the No. 1 cooler thermistor.
-
-
REMOVE NO. 1 COOLER THERMISTOR (for Manual Air Conditioning System)
Tech Tips
Use the same procedure as for the automatic air conditioning system.
-
REMOVE AIR CONDITIONER TUBE ASSEMBLY (for Automatic Air Conditioning System)
-
Using a 4 mm hexagon socket wrench, remove the 2 hexagon bolts and air conditioner tube assembly.
-
-
REMOVE AIR CONDITIONER TUBE ASSEMBLY (for Manual Air Conditioning System)
Tech Tips
Use the same procedure as for the automatic air conditioning system.
-
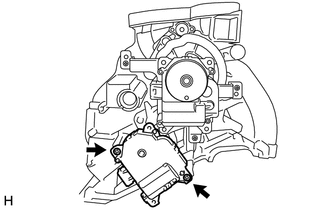
REMOVE BLOWER MOTOR CONTROL (for Automatic Air Conditioning System)
-

Remove the 2 screws and remove the blower motor control.
-
-
REMOVE BLOWER RESISTOR (for Manual Air Conditioning System)
Tech Tips
Use the same procedure as for the automatic air conditioning system.
-
REMOVE BLOWER RESISTOR (w/o Air Conditioning System)
Tech Tips
Use the same procedure as for the automatic air conditioning system.
-
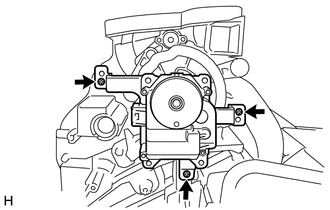
REMOVE COOLER BLOWER CASE
-
Remove the 4 screws and disengage the 2 claws.
-
Remove the cooler blower case from the lower heater case.
-
-
REMOVE COOLER UNIT CASE PACKING (for Automatic Air Conditioning System)
-

Remove the cooler unit case packing.
-
-
REMOVE COOLER UNIT CASE PACKING (for Manual Air Conditioning System)
Tech Tips
Use the same procedure as for the automatic air conditioning system.
-
REMOVE COVER PLATE
-
Remove the cover plate.
-