INTAKE MANIFOLD REMOVAL
PROCEDURE
-
REMOVE THROTTLE BODY WITH MOTOR ASSEMBLY
-
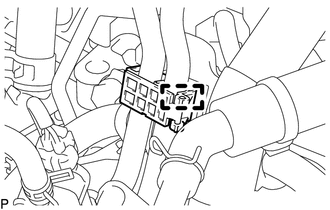
DISCONNECT INVERTER RESERVE TANK ASSEMBLY
-
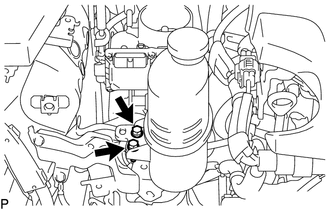
Remove the 2 bolts to disconnect the inverter reserve tank assembly from the No. 1 inverter reserve tank bracket.
-
-
REMOVE INJECTOR DRIVER
-
REMOVE VACUUM SENSOR ASSEMBLY
-
REMOVE PURGE VALVE (PURGE VSV)
-
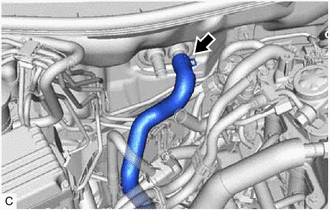
REMOVE OUTLET HEATER WATER HOSE A
-
Remove the heater water hose set from the outlet heater water hose A.
-
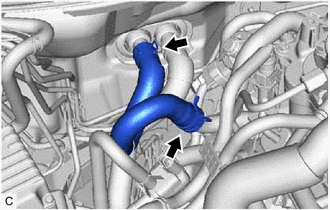
Using pliers, grip the tabs of the 2 clips and slide each clip to remove the outlet heater water hose A from the radiator unit sub-assembly and No. 2 water by-pass hose pipe.
Note
-
Do not apply excessive force to the outlet heater water hose A.
-
Prepare a drain pan or cloth in case the coolant leaks.
-
-
-
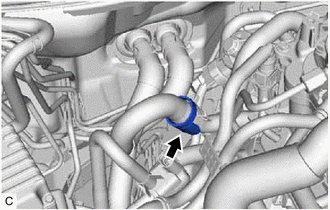
DISCONNECT INLET HEATER WATER HOSE A
-
Using pliers, grip the tabs of the clip and slide the clip to disconnect the inlet heater water hose A from the radiator unit sub-assembly.
Note
-
Do not apply excessive force to the inlet heater water hose A.
-
Prepare a drain pan or cloth in case the coolant leaks.
-
-
-
REMOVE NO. 2 EGR PIPE
-
REMOVE INTAKE MANIFOLD
-
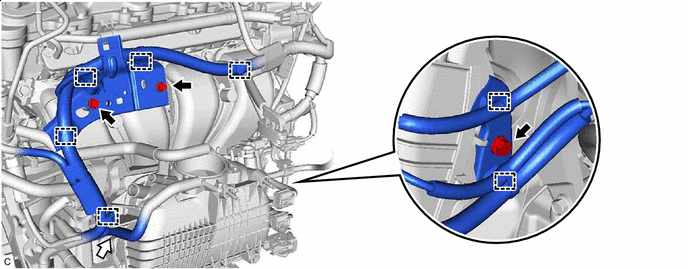
Disengage the No. 1 fuel pipe clamp and disconnect the No. 1 fuel pipe clamp from the wire harness clamp bracket.
-
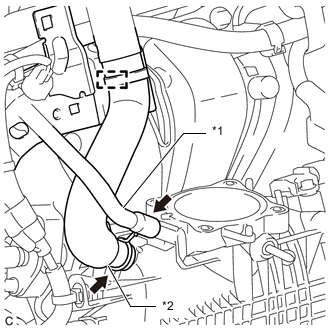
*1 No. 2 Fuel Vapor Feed Hose *2 Ventilation Hose Assembly Disconnect the No. 2 fuel vapor feed hose from the intake manifold.
-
Slide the clip and disconnect the ventilation hose assembly from the intake manifold.
-
Disconnect the ventilation hose assembly from the wire harness clamp bracket.
-
Disconnect the 7 wire harness clamps from the 2 wire harness clamp brackets and intake manifold.

Bolt 
No. 2 Water By-pass Hose -
Disconnect the No. 2 water by-pass hose from the intake manifold clamp.
-
Remove the 3 bolts and 2 wire harness clamp brackets from the intake manifold.
-

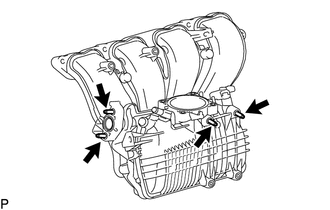
Remove the 7 bolts, intake manifold stay and intake manifold.
-
Remove the gasket from the intake manifold.
-
-
REMOVE STUD BOLT
Tech Tips
If a stud bolt is deformed or the threads are damaged, replace it.
-
Using an E6 "TORX" socket wrench, remove the 4 stud bolts from the intake manifold.
-