BLACK OUT TAPE(for Rear Door) INSTALLATION
CAUTION / NOTICE / HINT
Use the same procedure for the RH and LH sides.
The procedure described below is for the LH side.
PROCEDURE
REPAIR INSTRUCTION
INSTALL NO. 2 BLACK OUT TAPE (for Hatchback, Wagon)
for Hatchback:
-

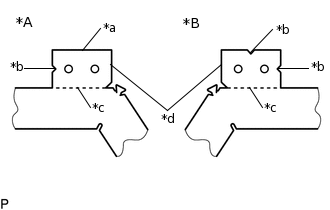
*A
for LH Side
*B
for RH Side
*a
Straight Line
*b
Triangle
*c
Perforation
*d
Remove
Remove the portion of the No. 2 black out tape at the perforation as shown in the illustration.
-
for Wagon:
-
*A
for LH Side
*B
for RH Side
*a
Straight Line
*b
Triangle
*c
Perforation
*d
Remove
Remove the portion of the No. 2 black out tape at the perforation as shown in the illustration.
-
Refer to the illustration to position a new No. 2 black out tape.
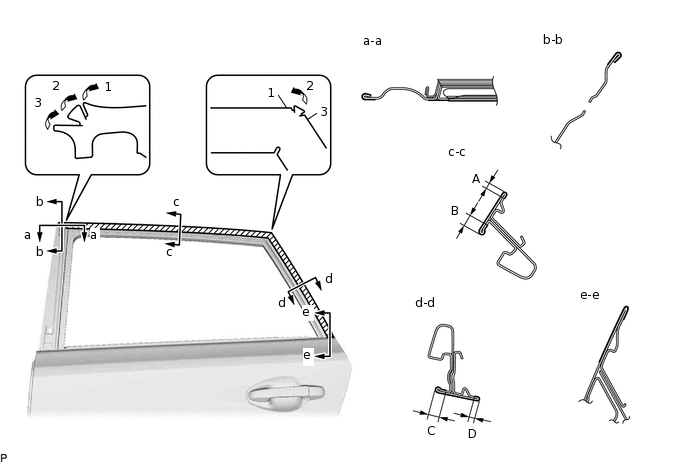
Table 1. Standard Measurement Dimension
Measurement
A
2.0 to 4.0 mm (0.0787 to 0.157 in.)
B
5.0 mm (0.197 in.)
C
5.0 mm (0.197 in.)
D
2.0 to 4.0 mm (0.0787 to 0.157 in.)
Remove the release paper and apply the No. 2 black out tape.
INSTALL NO. 2 BLACK OUT TAPE (for Sedan)
Refer to the illustration to position a new No. 2 black out tape.
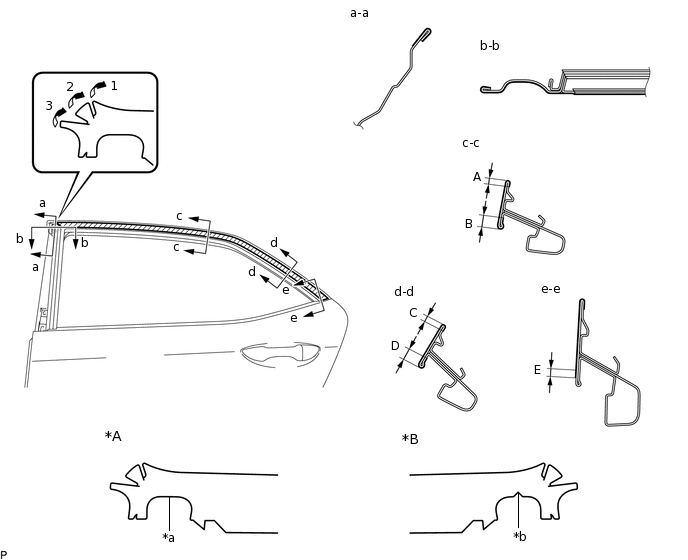
*A
for LH Side
*B
for RH Side
*a
Straight Line
*b
Triangle
Table 2. Standard Measurement Dimension
Measurement
A
2.0 to 4.0 mm (0.0787 to 0.157 in.)
B
5.0 mm (0.197 in.)
C
2.0 to 4.0 mm (0.0787 to 0.157 in.)
D
5.0 mm (0.197 in.)
E
4.0 mm (0.157 in.)
Remove the release paper and apply the No. 2 black out tape.
INSTALL REAR DOOR FRONT WINDOW FRAME MOULDING