BACK DOOR CLOSER ECU REMOVAL
CAUTION / NOTICE / HINT
The necessary procedures (adjustment, calibration, initialization, or registration) that must be performed after parts are removed and installed, or replaced during back door closer ECU removal/installation are shown below.
| Replaced Part or Performed Procedure | Necessary Procedure | Effect/Inoperative Function when Necessary Procedure not Performed | Link |
|---|---|---|---|
| Multiplex network door ECU | Reset Back Door Close Position | Power back door system |
Note
When the multiplex network door ECU is replaced, the back door automatic open stop position (memory stopped position) must be registered. Make sure to make a note of the automatic open stop position.
PROCEDURE
-
REMOVE BACK WINDOW UPPER PANEL TRIM (w/o Rear No. 2 Seat)
-
REMOVE BACK WINDOW UPPER PANEL TRIM (w/ Rear No. 2 Seat)
-
REMOVE BACK DOOR TRIM COVER LH (w/o Rear No. 2 Seat)
-
REMOVE BACK DOOR TRIM COVER LH (w/ Rear No. 2 Seat)
-
REMOVE BACK DOOR TRIM COVER RH
Tech Tips
Use the same procedure as for the LH side.
-
REMOVE BACK DOOR LOCK COVER (w/o Rear No. 2 Seat)
-
REMOVE BACK DOOR LOCK COVER (w/ Rear No. 2 Seat)
-
REMOVE BACK DOOR TRIM BASE
-
REMOVE DOOR PULL HANDLE
-
REMOVE NO. 1 LUGGAGE COMPARTMENT LIGHT ASSEMBLY
-
REMOVE BACK DOOR TRIM PANEL ASSEMBLY (w/o Rear No. 2 Seat)
-
REMOVE BACK DOOR TRIM PANEL ASSEMBLY (w/ Rear No. 2 Seat)
-
REMOVE MULTIPLEX NETWORK DOOR ECU
-
Disconnect the 2 connectors.
-
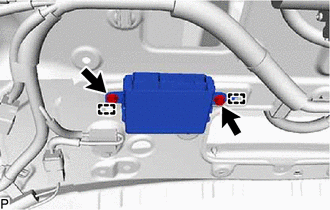
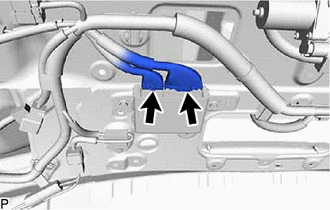
Remove the 2 bolts.
-
Disengage the 2 guides to remove the multiplex network door ECU.
-