WASHER MOTOR INSTALLATION
PROCEDURE
INSTALL HEADLIGHT CLEANER CONTROL RELAY (w/ Headlight Cleaner System)
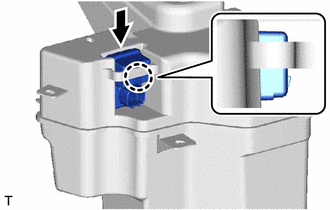
Attach the claw to install the headlight cleaner control relay.
INSTALL HEADLIGHT CLEANER MOTOR AND PUMP ASSEMBLY (w/ Headlight Cleaner System)

Install the headlight cleaner motor and pump.
INSTALL LEVEL WARNING SWITCH ASSEMBLY
Install the level warning switch assembly.
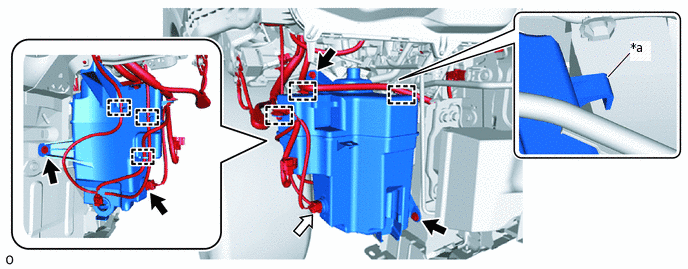
INSTALL WINDSHIELD WASHER JAR ASSEMBLY
w/ Headlight Cleaner System:
Attach the guide to install the windshield washer jar assembly with the 3 bolts.
5.0 N*m
51 kgf*cm
44 in.*lbf

*a
Guid
-
-
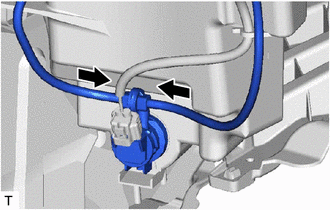
Connect the 3 connectors.
Attach the 6 clamps
w/o Headlight Cleaner System:
Attach the guide to install the windshield washer jar assembly with the 3 bolts.
5.0 N*m
51 kgf*cm
44 in.*lbf
*a
Guid
-
-

Bolt

Connector
Connect the connector.
Attach the 6 clamps
INSTALL WASHER INLET SUB-ASSEMBLY
-
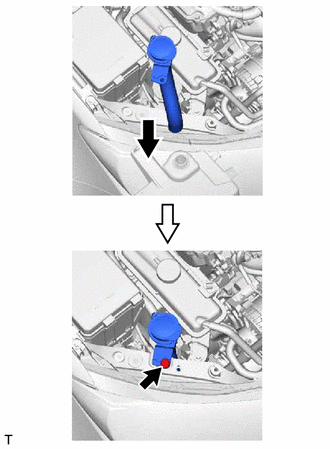
Install the washer inlet to the windshield washer jar and pump assembly.
Install the clip.
-
INSTALL FRONT BUMPER COVER
INSTALL WINDSHIELD WASHER MOTOR AND PUMP ASSEMBLY
-
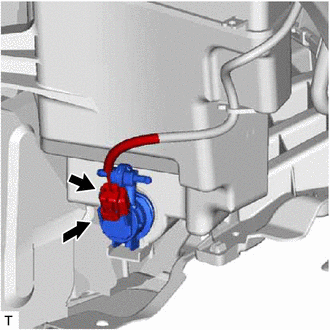
Install the windshield washer motor and pump assembly to the packing of the windshield washer jar assembly.
Connect the connector.
-
FILL UP WINDSHIELD WASHER JAR AND PUMP ASSEMBLY WITH WASHER FLUID
Connect the 2 washer hoses to the windshield washer motor and pump, and fill the washer jar with washer fluid.
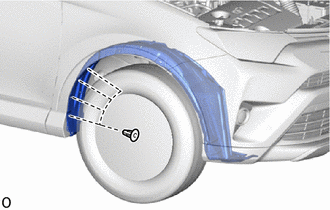
INSTALL FRONT FENDER LINER RH
-

Install the front fender liner RH with the 6 clips.
-
Install the new 4 grommets.
-
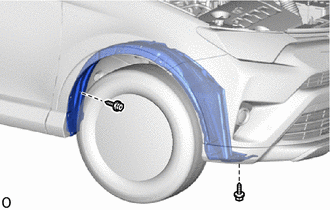
Install the 2 screws.
-
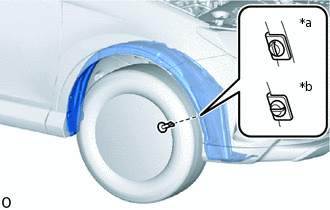
*a
Correct
*b
Incorrect
Install the pin hold clip and screw.
Tip:Insert the pin hold clip with the slot aligned vertically. Do not rotate the clip after inserting it. After installation, confirm that the slot is vertical.
-
INSTALL FRONT FENDER FRONT SPLASH SHIELD RH