ULTRASONIC SENSOR(for Rear) INSTALLATION
PROCEDURE
INSTALL NO. 2 ULTRASONIC SENSOR RETAINER
Tip:Use the same procedure for all No. 2 ultrasonic sensor retainers.
Determine the center of the sensor installation position.
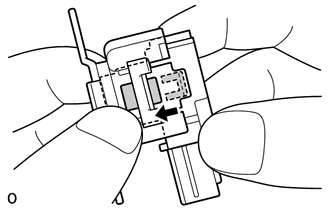
Wrap the rubber part of the sensor tip with masking tape 3 or 4 times.
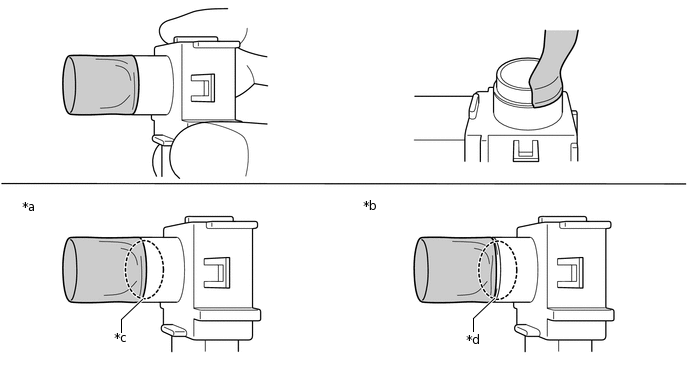
*a
CORRECT
*b
INCORRECT
*c
There is No Clearance
*d
There is Clearance
Note:Wrap masking tape so that there is no clearance between the sensor and tape as shown in the illustration.
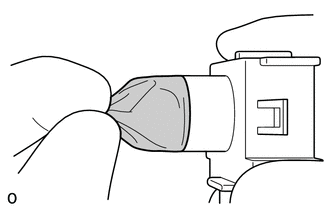
Wrap the tape so that it has no wrinkles.
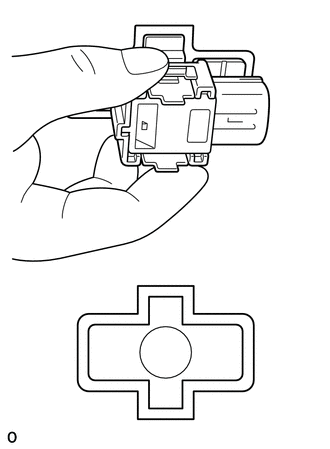
Tip:To make the tape application easier, lightly fold the tape so that it is roughly the shape of the sensor.
-
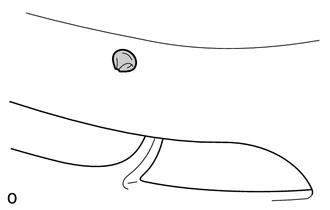
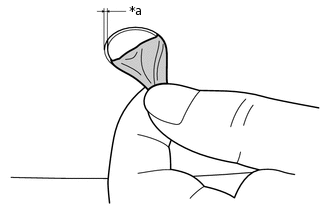
Pinch the tip of the tape to make it easier to insert it into the sensor installation hole of the rear bumper cover.
-
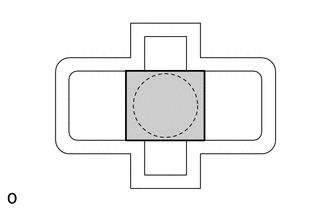
heck if there is clearance between the sensor tape and sensor installation hole.
Tip:If there is no clearance, adjust it by decreasing the number of times the tape is wrapped. If there is excessive clearance, adjust it by increasing the number of times the tape is wrapped.
-
Apply primer.
Cover the sensor installation hole with protective tape cut to a square with a length/width of 25 mm (0.98 in.).
Using a brush or felt, apply primer or equivalent to the retainer installation area.
Note:Use a clean brush or felt.
Do not allow primer to contact the front surface of the rear bumper cover.
Do not touch the rear bumper cover until the primer has dried.
Recommended drying time
10 minutes or more {23°C (73°F)}
Confirm that the primer has completely dried by touching the rear bumper cover. Then remove the protective tape.
-
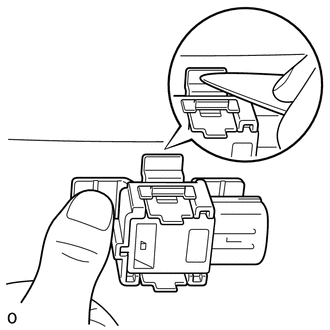
Install a new No. 2 ultrasonic sensor retainer.
Remove the peeling paper from the retainer.
Insert the sensor tip into the retainer hole area until the claws are attached.
Note:Do not touch the adhesive part of the double-sided tape.
Do not allow foreign matter to contact the adhesive part of the double-sided tape.
-
Confirm the direction of the connector's connection position. Then insert the tape on the sensor into the sensor installation hole of the rear bumper cover, and set the retainer on the rear bumper cover.
Note:Do not completely install the retainer at this time.
-
*a
0.3 mm (0.0118 in.)
Remove the tape on the sensor from the front surface of the rear bumper cover.
Check if the clearance between the sensor tip and sensor installation hole of the rear bumper cover is as shown in the illustration. (Check the entire circumference of the sensor tip.)
Tip:If the clearance is not as specified, adjust the sensor position by moving it vertically and horizontally.
-
Firmly press the retainer with your hands.
Tip:When it is difficult to press with your hands, use a resin spatula to press it.
Note:As the retainer's double-sided tape cannot be reused, make sure to confirm the sensor's installation position before the application.
The retainer's double-sided tape cannot be reused. If the retainer is not installed properly, remove the retainer and perform the installation procedures from the beginning again.
INSTALL ULTRASONIC SENSOR CLIP
Tip:Use the same procedure for both ultrasonic sensor clips.
Attach the 2 claws to install the ultrasonic sensor clip.
INSTALL NO. 5 FLOOR WIRE
INSTALL NO. 4 FLOOR WIRE
Tip:Use the same procedure described for the No. 5 floor wire.
INSTALL REAR BUMPER ENERGY ABSORBER
INSTALL NO. 1 REAR BUMPER PLATE
INSTALL REAR BUMPER COVER
INSTALL REAR BUMPER BAR PLATE
INSTALL JACK BOX HOLE COVER
INSTALL REAR QUARTER PANEL MUDGUARD LH
INSTALL REAR QUARTER PANEL MUDGUARD RH
Tip:Use the same procedure described for the LH side.