AIR CONDITIONING PANEL (for Manual Air Conditioning System) INSTALLATION
Tech Tips
-
Use the same procedure for RHD and LHD vehicles.
-
The procedure listed below is for LHD vehicles.
-
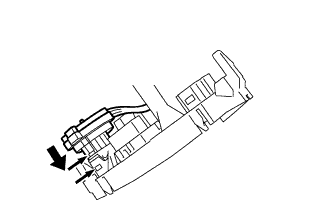
CONNECT AIR MIX DAMPER CONTROL CABLE SUB-ASSEMBLY (w/ Heater)
-
Attach the 2 claws to connect the air mix control cable sub-assembly.
-
-
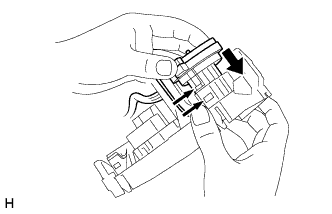
CONNECT HEATER CONTROL CABLE SUB-ASSEMBLY
-
Attach the 2 claws to install the heater control cable sub-assembly.
-
-
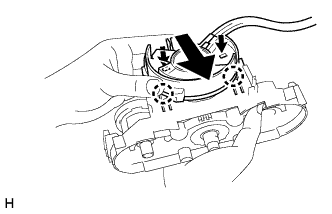
CONNECT AIR INLET DAMPER CONTROL CABLE SUB-ASSEMBLY
-
Attach the 2 claws to install the air inlet damper control cable sub-assembly.
-
-
INSTALL AIR CONDITIONING CONTROL ASSEMBLY
-
Connect the connector and install the air conditioning control assembly.
-
-
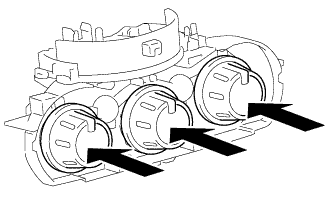
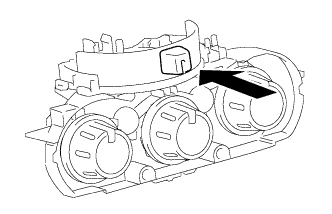
INSTALL HEATER CONTROL KNOB
-
Install the heater control knob as shown in the illustration.
-
-
INSTALL NO. 2 HEATER CONTROL KNOB
-
Install the No. 2 heater control knob as shown in the illustration.
-
-
INSTALL COOLER SWITCH
-
Attach the 2 claws to install the cooler switch (air conditioning switch).
-
-
INSTALL CENTER INSTRUMENT CLUSTER FINISH PANEL ASSEMBLY
-
for Manual Air Conditioning System:
-
Connect the connectors.
-
Attach the 4 claws to connect the air conditioner control.
-
Attach the 10 claws and 4 clips to install the center instrument cluster finish panel.
-
-
for Automatic Air Conditioning System:
-
Connect the connectors.
-
Attach the 8 claws and 4 clips to install the center instrument cluster finish panel.
-
-