ROOF DRIP SIDE FINISH MOULDING REMOVAL
CAUTION / NOTICE / HINT
Tech Tips
-
Use the same procedure for the RH and LH sides.
-
The procedure listed below is for the LH side.
PROCEDURE
-
REMOVE ROOF DRIP SIDE FINISH MOULDING LH
Tech Tips
When removing the roof drip side finish moulding LH, heat the vehicle body and roof drip side finish moulding LH using a heat light.
Standard Item Temperature Vehicle Body 40 to 60°C (104 to 140°F) Roof Drip Side Finish Moulding LH 20 to 30°C (68 to 86°F) CAUTION:
-
Do not touch the heat light and heated parts.
-
Touching the heat light may result in burns.
-
Touching heated parts for a long time may result in burns.
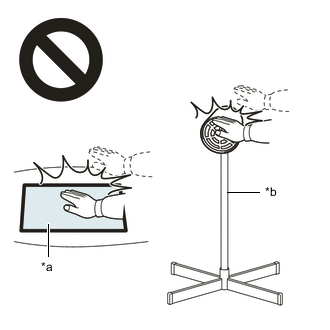
*a Heated Part *b Heat Light
-
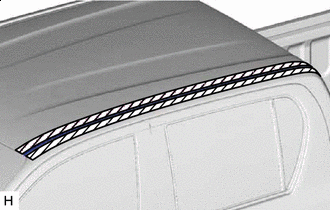
for Single Cab:
-
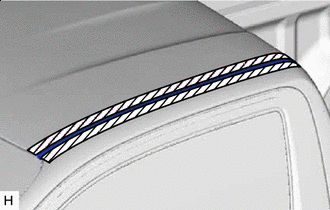

Protective Tape Put protective tape around the roof drip side finish moulding LH.
-
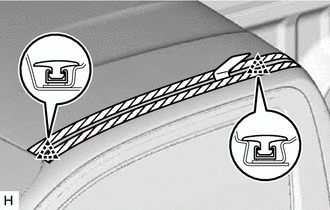
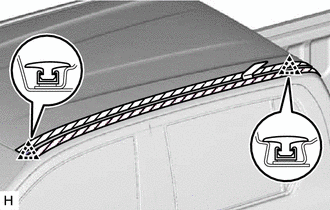
Using moulding remover D, detach the clip and remove the roof drip side finish moulding LH.
Note
-
When removing the roof drip side finish moulding LH, be careful not to damage the clips.
-
If a clip is damaged or becomes detached from the vehicle, replace it with a new one.
-
-
-
for Smart Cab:
-
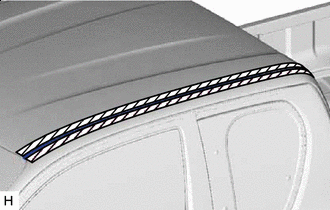
Protective Tape Put protective tape around the roof drip side finish moulding LH.
-

Using moulding remover D, detach the clip and remove the roof drip side finish moulding LH.
Note
-
When removing the roof drip side finish moulding LH, be careful not to damage the clips.
-
If a clip is damaged or becomes detached from the vehicle, replace it with a new one.
-
-
-
for Double Cab:
-
Protective Tape Put protective tape around the roof drip side finish moulding LH.
-
Using moulding remover D, detach the clip and remove the roof drip side finish moulding LH.
Note
-
When removing the roof drip side finish moulding LH, be careful not to damage the clips.
-
If a clip is damaged or becomes detached from the vehicle, replace it with a new one.
-
-
-