REAR LIGHT ASSEMBLY(except Sedan) REMOVAL
CAUTION / NOTICE / HINT
Use the same procedure for the RH and LH sides.
The procedure described below is for the LH side.
PROCEDURE
REMOVE BACK DOOR UPPER TRIM PANEL ASSEMBLY (for Wagon)
REMOVE BACK DOOR UPPER TRIM PANEL ASSEMBLY (for Hatchback)
w/o Back Door Side Garnish:Click here
w/ Back Door Side Garnish:Click here
REMOVE BACK DOOR SIDE GARNISH LH (for Wagon)
REMOVE BACK DOOR SIDE GARNISH LH (for Hatchback)
w/ Back Door Side Garnish:Click here
REMOVE BACK DOOR SIDE GARNISH RH (for Wagon)
Tip:Use the same procedure as for the LH side.
REMOVE BACK DOOR SIDE GARNISH RH (for Hatchback)
w/ Back Door Side Garnish:
Tip:Use the same procedure as for the LH side.
REMOVE DOOR PULL HANDLE (for Wagon)
REMOVE DOOR PULL HANDLE (for Hatchback)
REMOVE BACK DOOR TRIM PANEL ASSEMBLY (for Wagon)
REMOVE BACK DOOR TRIM PANEL ASSEMBLY (for Hatchback)
REMOVE REAR LIGHT ASSEMBLY
-
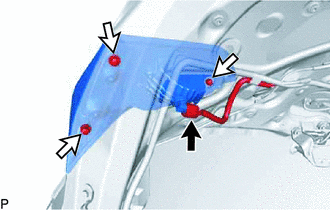
Disconnect the connector.
Remove the 3 nuts and rear light assembly.
-