RADIATOR INSTALLATION
PROCEDURE
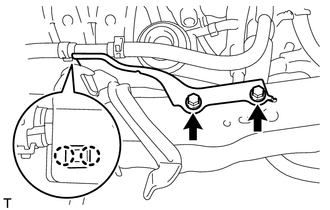
INSTALL FAN SHROUD
-
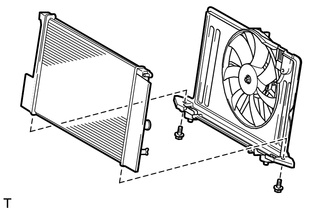
Install the fan shroud to the radiator with the 2 bolts.
7.0 N*m
71 kgf*cm
62 in.*lbf
-
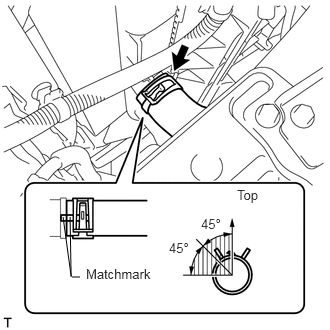
INSTALL NO. 3 WATER BY-PASS HOSE
-
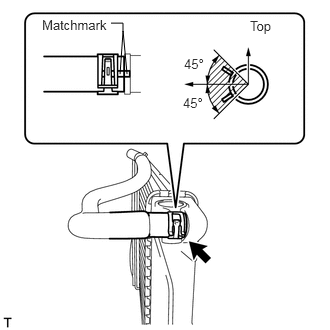
Align the matchmarks as shown in the illustration and install the No. 3 water by-pass hose to the radiator.
Tip:The direction of the hose clamp is indicated in the illustration.
-
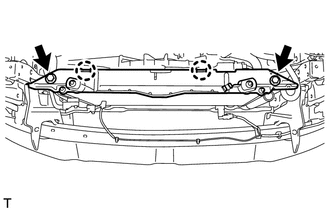
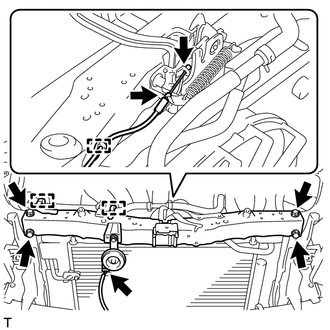
INSTALL RADIATOR ASSEMBLY

Install the 2 lower radiator supports.
Install the radiator together with the fan shroud.
-
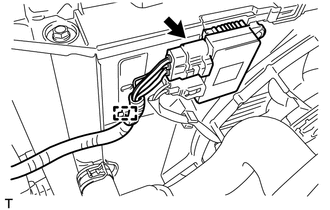
Connect the cooling fan ECU connector and wire harness clamp.
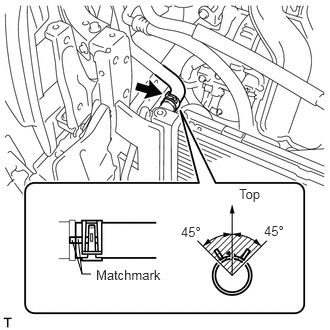
CONNECT NO. 2 RADIATOR HOSE
-
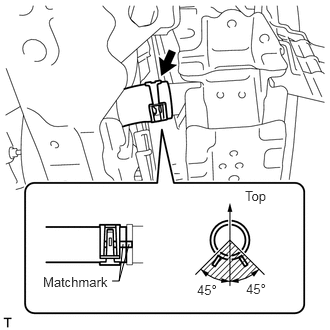
Align the matchmarks as shown in the illustration and connect the No. 2 radiator hose to the radiator with the clamp.
Tip:The direction of the hose clamp is indicated in the illustration.
-
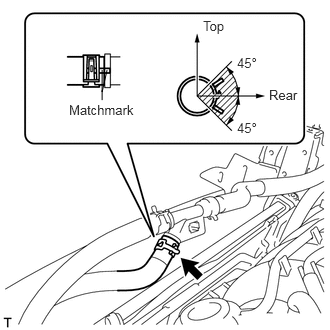
CONNECT NO. 3 RADIATOR HOSE
-
Align the matchmarks as shown in the illustration and connect the No. 3 radiator hose to the radiator with the clamp.
Tip:The direction of the hose clamp is indicated in the illustration.
-
CONNECT NO. 3 WATER BY-PASS HOSE
-
Align the matchmarks as shown in the illustration and connect the No. 3 water by-pass hose to the No. 2 water by-pass hose.
Tip:The direction of the hose clamp is indicated in the illustration.
-
CONNECT NO. 1 WATER BY-PASS HOSE
-
Align the matchmarks as shown in the illustration and connect the No. 1 water by-pass hose to the radiator with the clamp.
Tip:The direction of the hose clamp is indicated in the illustration.
-
INSTALL AMBIENT TEMPERATURE SENSOR (for Automatic Air Conditioning System)
INSTALL CONDENSER ASSEMBLY WITH RECEIVER (w/ Air Conditioning System)
CONNECT SUCTION PIPE SUB-ASSEMBLY (w/ Air Conditioning System)
CONNECT DISCHARGE HOSE SUB-ASSEMBLY (w/ Air Conditioning System)
INSTALL NO. 2 FAN SHROUD
-
Attach the 2 claws and install the No. 2 fan shroud to the radiator with the 2 bolts.
7.0 N*m
71 kgf*cm
62 in.*lbf
-
Attach the No. 3 water by-pass hose clamp.
-
INSTALL RADIATOR SUPPORT CUSHION
-
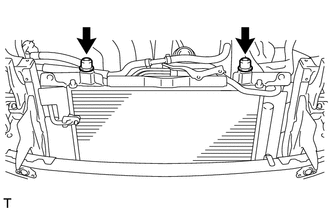
Install the 2 cushions.
-
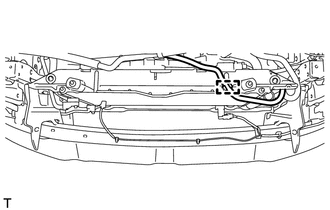
INSTALL UPPER RADIATOR SUPPORT
-
Install the upper radiator support with the 4 bolts.
13 N*m
127 kgf*cm
9 ft.*lbf
Attach the 2 clamps to connect the No. 2 water by-pass hose.
Connect the horn connector.
Connect the hood lock cable.
-
INSTALL BATTERY TRAY
INSTALL BATTERY
INSTALL BATTERY CLAMP SUB-ASSEMBLY
INSTALL NO. 1 WATER HOSE CLAMP BRACKET
Attach the 2 claws and install the water hose clamp bracket to the upper radiator support with the 2 bolts.
5.0 N*m
51 kgf*cm
44 in.*lbf
CONNECT CABLE TO NEGATIVE BATTERY TERMINAL
Note:When disconnecting the cable, some systems need to be initialized after the cable is reconnected (Click here).
INSTALL FRONT BUMPER COVER
Install the front bumper cover (Click here).
ADD ENGINE COOLANT
CHARGE REFRIGERANT (w/ Air Conditioning System)
WARM UP ENGINE (w/ Air Conditioning System)
CHECK FOR REFRIGERANT GAS LEAK (w/ Air Conditioning System)
INSPECT FOR COOLANT LEAK
INSTALL NO. 1 ENGINE UNDER COVER
Install the under cover with the 11 clips and 6 bolts.
INSPECT HOOD SUB-ASSEMBLY
ADJUST HOOD SUB-ASSEMBLY
INSTALL RADIATOR SUPPORT OPENING COVER
INSTALL NO. 2 CYLINDER HEAD COVER