1GD-FTV VACUUM PUMP REMOVAL

Tech Tips
The vacuum pump assembly is listed as one of the 200000 km (124000 mile) maintenance parts. Make sure to disassemble and inspect it every 200000 km (124000 mile) and replace parts as necessary.
-
REMOVE ENGINE ASSEMBLY
-
INSTALL ENGINE ASSEMBLY TO ENGINE STAND
Note
-
Pay attention to the angle of the sling device as the engine assembly or engine hangers may be damaged or deformed if the angle is incorrect.
-
With the exception of installing the engine assembly to an engine stand or removing the engine assembly from an engine stand, do not perform any work on the engine assembly while it is suspended, as doing so is dangerous.
-
Install the engine assembly to an engine stand with the bolts.
-
Remove the engine sling device and chain block.
-
Remove the 3 bolts, upper No. 1 engine hanger, and No. 2 engine hanger from the engine assembly.
-
-
DISCONNECT NO. 1 VACUUM TRANSMITTING HOSE
-
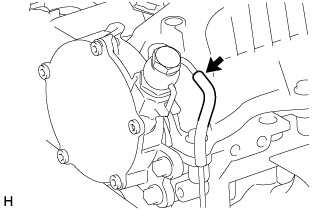
Disconnect the No. 1 vacuum transmitting hose from the vacuum pump assembly.
-
-
REMOVE VACUUM PUMP ASSEMBLY
-
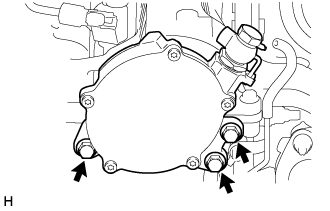
Remove the 3 bolts and vacuum pump assembly from the engine assembly.
-
Remove the No. 2 and No. 3 O-rings from the vacuum pump assembly.
-
-
REMOVE CAMSHAFT OIL SEAL RETAINER
-
REMOVE VACUUM PUMP UNION
-
Mount the vacuum pump assembly in a vise.
Note
Place aluminum plates on the vise to prevent damage to the vacuum pump assembly.
-
Remove the union bolt, vacuum pump union and 2 gaskets from the vacuum pump assembly.
-