UPPER INSTRUMENT PANEL REASSEMBLY
PROCEDURE
-
INSTALL NO. 1 SIDE DEFROSTER NOZZLE
-
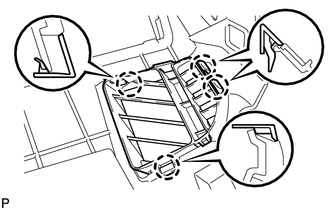
Attach the 4 claws to install the nozzle.
-
-
INSTALL NO. 2 SIDE DEFROSTER NOZZLE
-
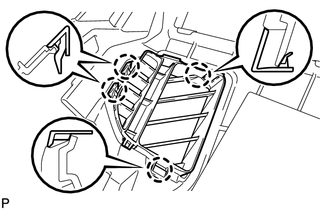
Attach the 4 claws to install the nozzle.
-
-
INSTALL NO. 1 INSTRUMENT PANEL REGISTER ASSEMBLY
-
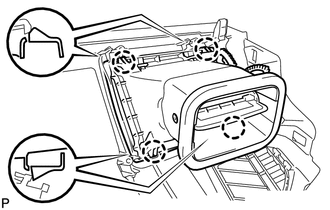
Attach the 4 claws to install the register.
-
-
INSTALL NO. 2 INSTRUMENT PANEL REGISTER ASSEMBLY
-
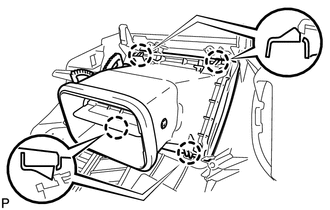
Attach the 4 claws to install the register.
-
-
INSTALL NO. 2 INSTRUMENT CLUSTER FINISH PANEL GARNISH
-
Install the garnish with the 6 screws <C>.
-
-
INSTALL NO. 1 INSTRUMENT CLUSTER FINISH PANEL GARNISH
-
Install the garnish with the 3 screws <C>.
-
-
INSTALL NO. 1 DEFROSTER NOZZLE GARNISH
-
Attach the 8 claws to install the garnish.
-
Install the 8 screws <C>.
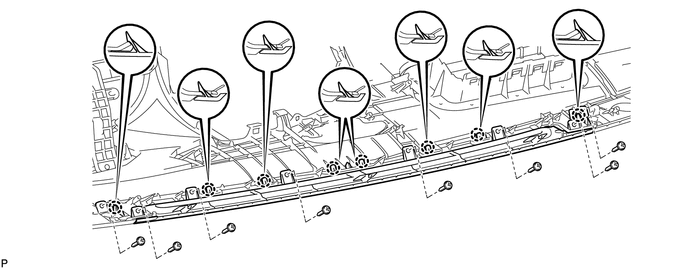
-
-
INSTALL NO. 1 INSTRUMENT PANEL CUSHION
-

Install a new cushion.
-
-
INSTALL INSTRUMENT PANEL PASSENGER AIRBAG ASSEMBLY
-
INSTALL NO. 1 SPEAKER HOLE COVER (for 11 Speakers)
-
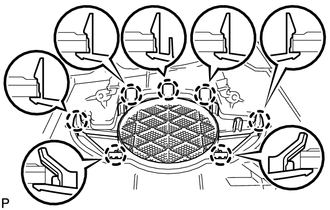
Attach the 7 claws to install the cover.
-
-
INSTALL FRONT NO. 3 SPEAKER ASSEMBLY (for 11 Speakers)
-
INSTALL NO. 3 HEATER TO REGISTER DUCT
-
Install the duct with the 3 screws <B>.
-
-
INSTALL NO. 1 HEATER TO REGISTER DUCT
-
Install the duct with the 3 screws <B>.
-
for 11 Speakers:
-
Connect the clamp.
-
-
-
INSTALL FRONT NO. 2 SPEAKER ASSEMBLY LH (for 11 Speakers)
-
INSTALL FRONT NO. 2 SPEAKER ASSEMBLY RH (for 11 Speakers)
Tech Tips
Use the same procedure described for the LH side.