REAR SEAT ASSEMBLY(for Manual Seat) REASSEMBLY
CAUTION / NOTICE / HINT
CAUTION:
Wear protective gloves. Sharp areas on the parts may injure your hands.
PROCEDURE
-
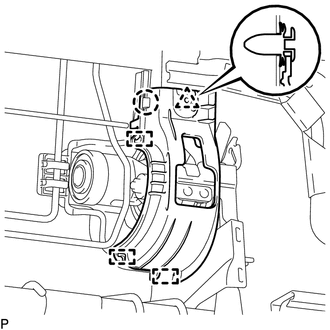
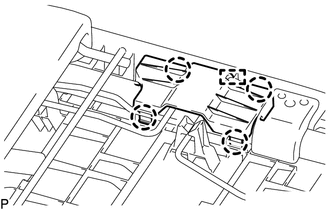
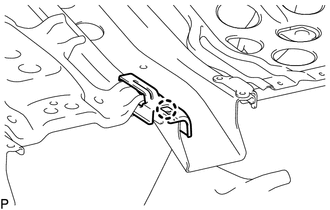
INSTALL REAR SEATBACK HOLDER (for LH Side)
-
Attach the 3 hooks to install the rear seatback holder.
-
-
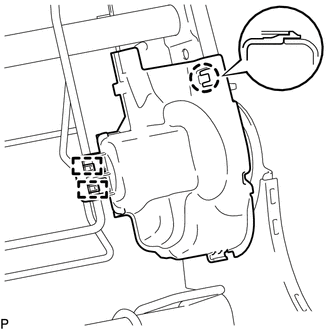
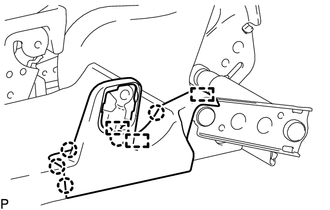
INSTALL RECLINING ADJUSTER INSIDE COVER LH (for LH Side)
-
Attach the 2 claws to install the reclining adjuster inside cover LH.
-
-
INSTALL RECLINING ADJUSTER INSIDE COVER LH (for LH Side)
-
Attach the 2 claws to install the reclining adjuster inside cover LH.
-
-
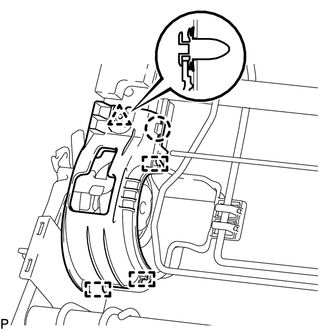
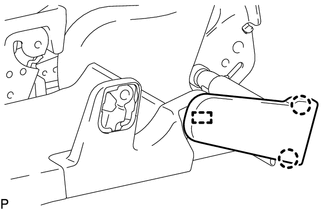
INSTALL REAR SEATBACK COVER RH (for LH Side)
-
Attach the 2 guides and claw to install the rear seatback cover RH.
-
-
INSTALL REAR SEATBACK COVER RH (for LH Side)
-
Attach the 3 guides and claw.
-
Attach the clip to install the rear seatback cover RH.
-
-
INSTALL REAR SEATBACK COVER LH (for LH Side)
-
Attach the 2 guides and claw to install the rear seatback cover LH.
-
-
INSTALL REAR SEATBACK COVER LH (for LH Side)
-
Attach the 3 guides and claw.
-
Attach the clip to install the rear seatback cover LH.
-
Install the rear seatback protector LH.
-
-
INSTALL REAR SEAT WIRE LH (for LH Side, w/ Seat Heater System)
-
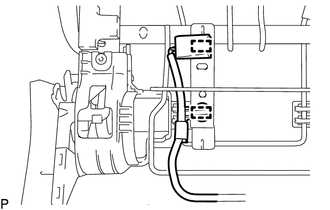
Attach the 2 clamps and install the rear seat wire LH.
-
-
INSTALL SEAT HEATER CONTROL SUB-ASSEMBLY (for LH Side, w/ Seat Heater System)
-
INSTALL SEAT COVER WIRE (for LH Side)
-
Install the seat cover wire.
Tech Tips
-
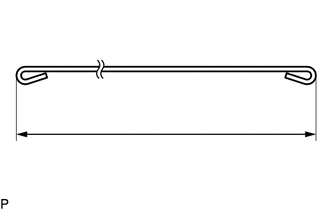
Wire 1000 mm (3.28 ft.) or longer and shaped wire are available as supplied parts.
-
For wire 1000 mm (3.28 ft.) or less in length, cut or shape 1000 mm (3.28 ft.) wire into the dimensions shown in the illustration.
-
Make sure to read the precautions before preparing the wire.
Length A 120 mm (4.72 in.) B 180 mm (7.09 in.) Tech Tips
The dimensions shown in the illustration are the lengths.
-
-
-
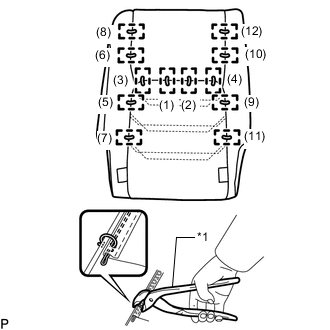
INSTALL SEPARATE TYPE REAR SEATBACK COVER LH (for LH Side)
Tech Tips
-
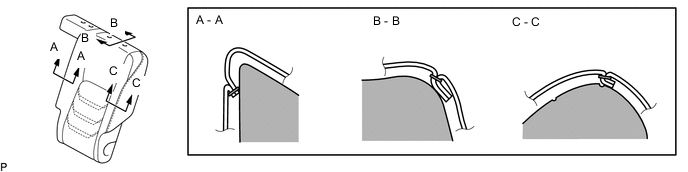
When installing the seat cover, refer to the precautions in order to prevent wrinkles from forming.
-
Align the seam allowance in a single direction as shown in the illustration.
-

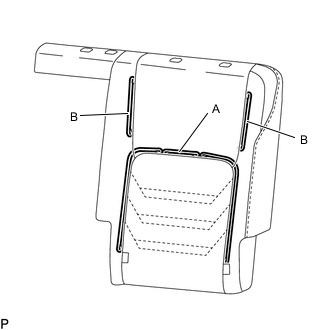
*1 Hog Ring Pliers Using hog ring pliers, install the separate type rear seatback cover LH to the separate type rear seatback pad LH with 12 new hog rings in the order indicated in the illustration.
Note
-
Be careful not to damage the separate type rear seatback cover.
-
Be sure to securely install the hog rings as shown in the illustration while preventing wrinkles from forming on the separate type rear seatback cover.
-
-
-
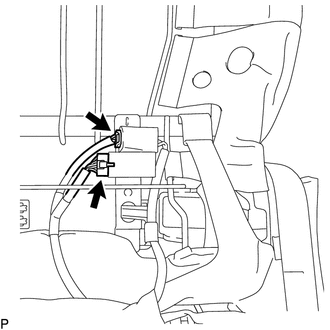
INSTALL SEPARATE TYPE REAR SEATBACK COVER WITH PAD (for LH Side)
-
Install the separate type rear seatback cover with pad to the rear seatback frame sub-assembly LH.
-
w/ Seat Heater System:
-
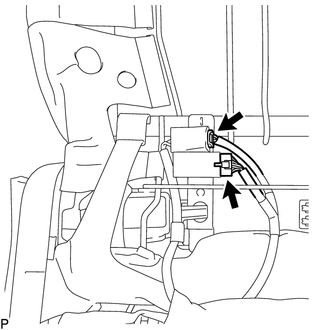
Connect the 2 connectors.
-
-
-
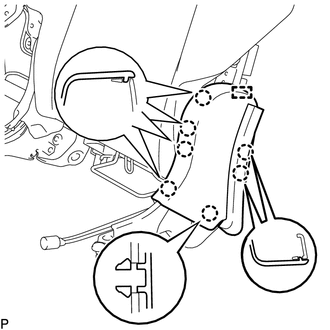
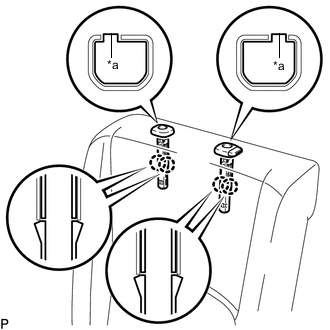
INSTALL REAR NO. 1 SEAT HEADREST SUPPORT ASSEMBLY (for LH Side)
-
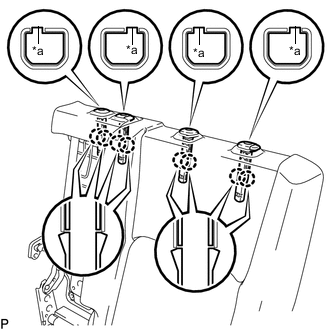
*a Protrusion Align the rear No. 1 seat headrest support assembly protrusions with the grooves in the rear seatback frame sub-assembly.
-
Attach the 8 claws to install the 4 rear No. 1 seat headrest support assemblies.
-
Attach the 20 hooks.
-
-
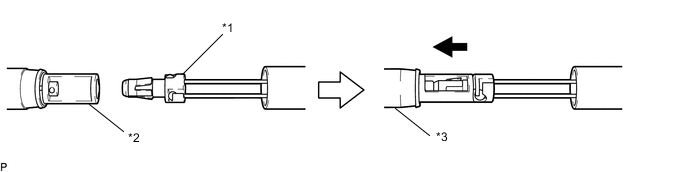
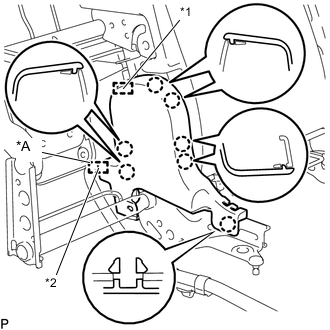
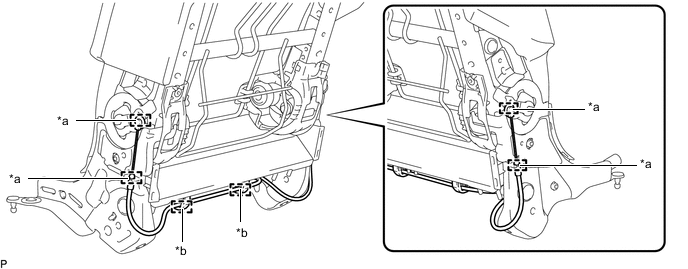
INSTALL REAR SEAT NO. 2 RECLINING CONTROL CABLE (for LH Side)
-
When reusing the rear seat No. 2 reclining control cable and rear seat reclining control cable:
-
Connect the cable to the joint end, and then insert the joint piece into the rear seat reclining control cable.
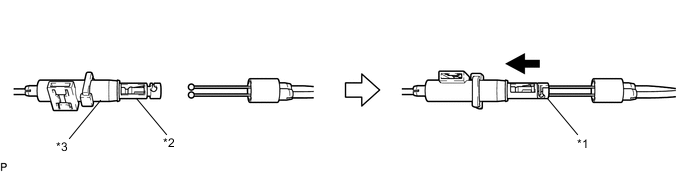
*1 Joint End *2 Joint Piece *3 Rear Seat Reclining Control Cable - -
-
-
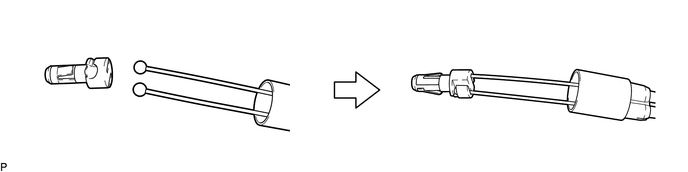
When using a new rear seat No. 2 reclining control cable:
-
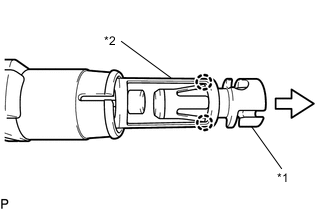
*1 Joint End *2 Joint Piece Detach the 2 claws to remove the joint end from the joint piece.
-
Connect a new rear seat No. 2 reclining control cable joint end and rear seat reclining control cable joint piece, and then insert them into the rear seat reclining control cable.
*1 Joint End *2 Joint Piece *3 Rear Seat Reclining Control Cable - -
-
-
When using a new rear seat reclining control cable:
-
*1 Joint End *2 Joint Piece Detach the 2 claws to remove the joint end from the joint piece.
-
Connect the cable to the removed joint end.
-
Connect the joint end and new rear seat reclining control cable joint piece, and then insert them into the rear seat reclining control cable.
*1 Joint End *2 Joint Piece *3 Rear Seat Reclining Control Cable - -
-
-
When using a new rear seat No. 2 reclining control cable and new rear seat reclining control cable:
-
Connect the joint end and joint piece, and then insert them into the rear seat reclining control cable.
*1 Joint End *2 Joint Piece *3 Rear Seat Reclining Control Cable - -
-
-
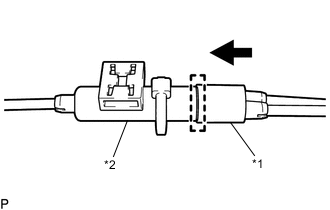
*1 Casing Cap *2 Connector Case Attach the guide to connect the casing cap to the connector case.
-
Attach the 2 guides to connect the rear seat No. 2 reclining control cable.
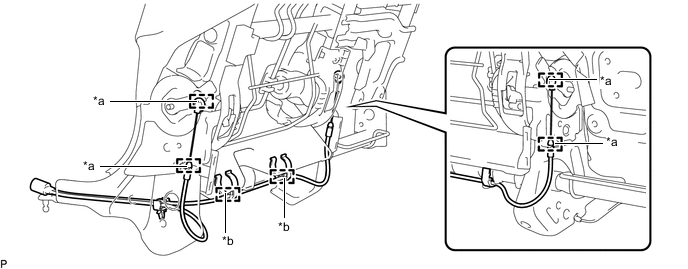
*a Cable Clamp *b Guide -
Connect the 4 cable clamps.
-
-
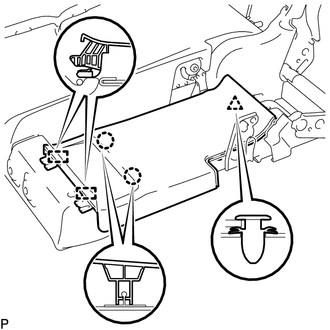
INSTALL REAR SEAT CUSHION MOULDING LH (for LH Side)
-
*A w/ Seat Heater System *1 Guide *2 Clamp Attach the guide and 7 claws to install the rear seat cushion moulding LH.
-
w/ Seat Heater System:
-
Attach the clamp.
-
-
-
INSTALL REAR SEAT CUSHION MOULDING LH (for LH Side)
-
Attach the guide and 7 claws to install the rear seat cushion moulding LH.
-
-
INSTALL REAR NO. 1 SEAT CENTER ARMREST PLATE (for LH Side)
-
Install the rear No. 1 seat center armrest plate to the rear seat center armrest assembly.
-
-
INSTALL NO. 1 SEATBACK COVER (for LH Side)
-
Attach the 2 guides.
-
Attach the 2 claws and clip to install the No. 1 seatback cover.
-
-
INSTALL NO. 1 SEATBACK COVER (for LH Side)
-
Attach the guide and 4 claws to install the No. 1 seatback cover.
-
-
INSTALL CENTER ARMREST HINGE COVER (for LH Side)
-
Attach the 3 guides and 5 claws to install the center armrest hinge cover.
-
-
INSTALL CENTER SEAT HINGE COVER (for LH Side)
-
Attach the guide and 2 claws to install the center seat hinge cover.
-
-
INSTALL NO. 1 SEAT ARMREST ASSEMBLY (for LH Side)
-
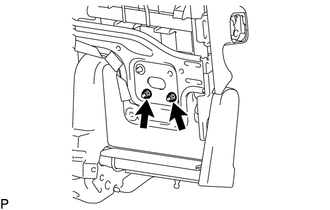
Install the No. 1 seat armrest assembly with the 2 nuts.
- Torque:
- 21 N*m { 214 kgf*cm, 15 ft.*lbf }
-
-
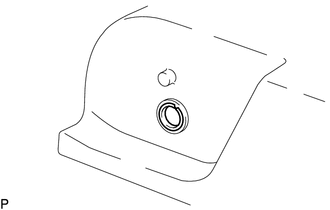
INSTALL CUP HOLDER ASSEMBLY (for LH Side)
-
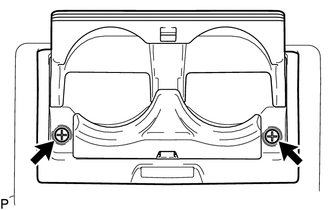
Install the cup holder assembly with the 2 screws.
-
-
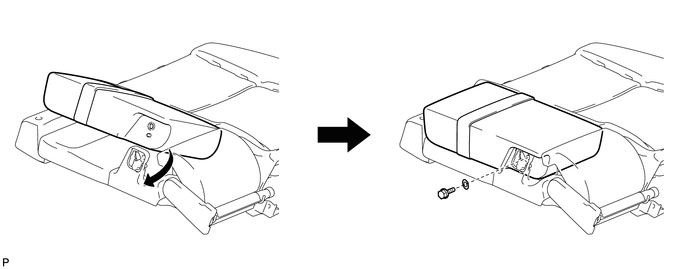
INSTALL REAR SEAT CENTER ARMREST COVER (for LH Side)
-

Install the 2 rear seat center armrest covers.
-
-
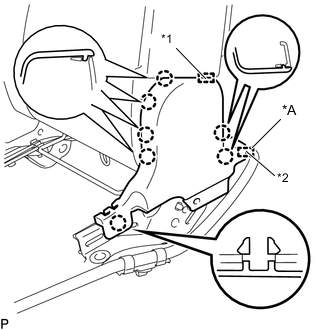
INSTALL REAR SEAT CENTER ARMREST ASSEMBLY (for LH Side)
-
Install the rear seatback protector shaft bush to the rear seat center armrest assembly.
-
Rotate the rear seat center armrest assembly and insert the 2 pins as shown in the illustration to install the rear seat center armrest assembly.
-
Install the bolt and washer.
- Torque:
- 21 N*m { 214 kgf*cm, 15 ft.*lbf }
-
-
INSTALL REAR SEAT ARMREST HOLE COVER (for LH Side)
-
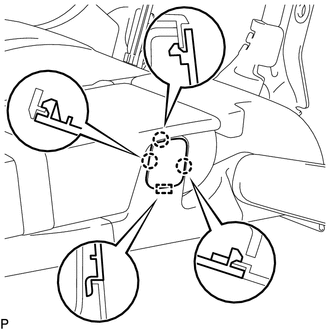
Attach the guide and 3 claws to install the rear seat armrest hole cover.
-
-
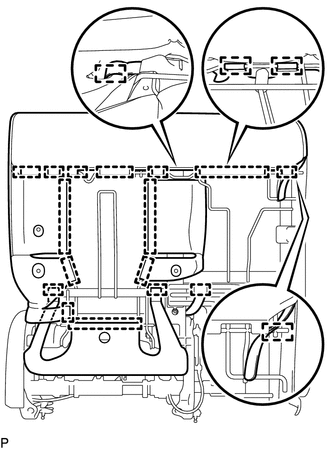
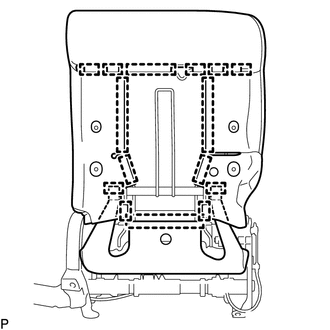
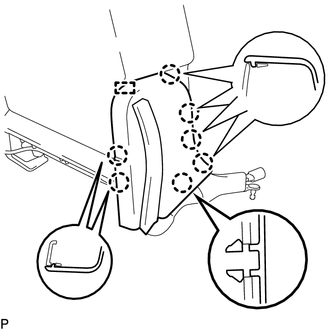
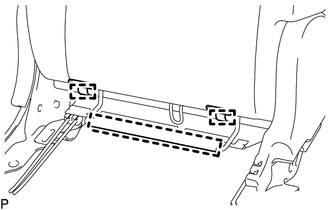
INSTALL REAR SEATBACK BOARD CARPET ASSEMBLY LH (for LH Side)
-
Move the rear seatback board carpet assembly LH in the direction of the arrow to attach the 5 guides.
-
Attach the 5 claws and 6 clips to install the rear seatback board carpet assembly LH.
-
Attach the 3 hooks.
-
-
INSTALL REAR SEAT CENTER HEADREST ASSEMBLY (for LH Side)
-
Install the rear seat center headrest assembly.
-
-
INSTALL REAR SEAT HEADREST ASSEMBLY (for LH Side)
-
Install the rear seat headrest assembly.
-
-
INSTALL REAR SEAT CENTER LAP TYPE BELT ASSEMBLY LH (for LH Side)
-
INSTALL REAR SEAT INNER BELT ASSEMBLY LH (for LH Side)
-
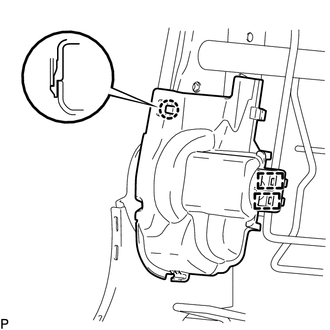
INSTALL RECLINING ADJUSTER INSIDE COVER RH (for RH Side)
-
Attach the 2 claws to install the reclining adjuster inside cover RH.
-
-
INSTALL RECLINING ADJUSTER INSIDE COVER RH (for RH Side)
-
Attach the 2 claws to install the reclining adjuster inside cover RH.
-
-
INSTALL REAR SEATBACK COVER RH (for RH Side)
-
Attach the 2 guides and claw to install the rear seatback cover RH.
-
-
INSTALL REAR SEATBACK COVER RH (for RH Side)
-

Attach the 3 guides and claw.
-
Attach the clip to install the rear seatback cover RH.
-
-
INSTALL REAR SEATBACK COVER LH (for RH Side)
-
Attach the 2 guides and claw to install the rear seatback cover LH.
-
-
INSTALL REAR SEATBACK COVER LH (for RH Side)
-
Attach the 3 guides and claw.
-
Attach the clip to install the rear seatback cover LH.
-
Install the rear seatback protector RH.
-
-
INSTALL REAR SEAT WIRE RH (for RH Side, w/ Seat Heater System)
-
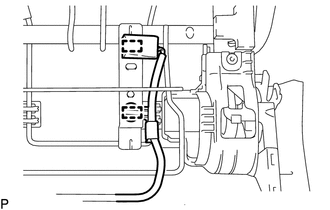
Attach the 2 clamps and install the rear seat wire RH.
-
-
INSTALL SEAT HEATER CONTROL SUB-ASSEMBLY (for RH Side, w/ Seat Heater System)
-
INSTALL SEAT COVER WIRE (for RH Side)
-
Install the seat cover wire.
Tech Tips
-
Wire 1000 mm (3.28 ft.) or longer and shaped wire are available as supplied parts.
-
For wire 1000 mm (3.28 ft.) or less in length, cut or shape 1000 mm (3.28 ft.) wire into the dimensions shown in the illustration.
-
Make sure to read the precautions before preparing the wire.
Length A 120 mm (4.72 in.) B 180 mm (7.09 in.) Tech Tips
The dimensions shown in the illustration are the lengths.
-
-
-
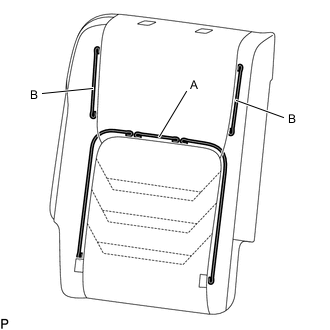
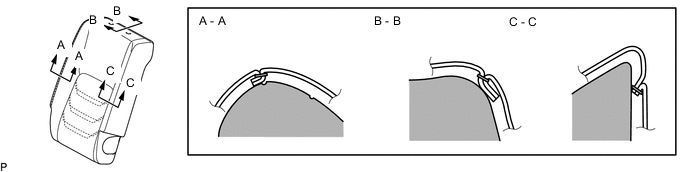
INSTALL SEPARATE TYPE REAR SEATBACK COVER RH (for RH Side)
Tech Tips
-
When installing the seat cover, refer to the precautions in order to prevent wrinkles from forming.
-
Align the seam allowance in a single direction as shown in the illustration.
-
*1 Hog Ring Pliers Using hog ring pliers, install the separate type rear seatback cover RH to the separate type rear seatback pad RH with 12 new hog rings in the order indicated in the illustration.
Note
-
Be careful not to damage the separate type rear seatback cover.
-
Be sure to securely install the hog rings as shown in the illustration while preventing wrinkles from forming on the separate type rear seatback cover.
-
-
-
INSTALL SEPARATE TYPE REAR SEATBACK COVER WITH PAD (for RH Side)
-
Install the separate type rear seatback cover with pad to the rear seatback frame sub-assembly RH.
-
w/ Seat Heater System:
-
Connect the 2 connectors.
-
-
-
INSTALL REAR NO. 1 SEAT HEADREST SUPPORT ASSEMBLY (for RH Side)
-
*a Protrusion Align the rear No. 1 seat headrest support assembly protrusions with the grooves in the rear seatback frame sub-assembly.
-
Attach the 4 claws to install the 2 rear No. 1 seat headrest support assemblies.
-
Attach the 15 hooks.
-
-
INSTALL REAR SEAT NO. 2 RECLINING CONTROL CABLE (for RH Side)
-
When reusing the rear seat No. 2 reclining control cable and rear seat reclining control cable:
-
Connect the cable to the joint end, and then insert the joint piece into the rear seat reclining control cable.
*1 Joint End *2 Joint Piece *3 Rear Seat Reclining Control Cable - -
-
-
When using a new rear seat No. 2 reclining control cable:
-
*1 Joint End *2 Joint Piece Detach the 2 claws to remove the joint end from the joint piece.
-
Connect a new rear seat No. 2 reclining control cable joint end and rear seat reclining control cable joint piece, and then insert them into the rear seat reclining control cable.
*1 Joint End *2 Joint Piece *3 Rear Seat Reclining Control Cable - -
-
-
When using a new rear seat reclining control cable:
-
*1 Joint End *2 Joint Piece Detach the 2 claws to remove the joint end from the joint piece.
-
Connect the cable to the removed joint end.
-
Connect the joint end and new rear seat reclining control cable joint piece, and then insert them into the rear seat reclining control cable.
*1 Joint End *2 Joint Piece *3 Rear Seat Reclining Control Cable - -
-
-
When using a new rear seat No. 2 reclining control cable and new rear seat reclining control cable:
-
Connect the joint end and joint piece, and then insert them into the rear seat reclining control cable.
*1 Joint End *2 Joint Piece *3 Rear Seat Reclining Control Cable - -
-
-
*1 Casing Cap *2 Connector Case Attach the guide to connect the casing cap to the connector case.
-
Attach the 2 guides to connect the rear seat No. 2 reclining control cable.
*a Cable Clamp *b Guide -
Connect the 4 cable clamps.
-
-
INSTALL REAR SEAT CUSHION MOULDING RH (for RH Side)
-
*A w/ Seat Heater System *1 Guide *2 Clamp Attach the guide and 7 claws to install the rear seat cushion moulding RH.
-
w/ Seat Heater System:
-
Attach the clamp.
-
-
-
INSTALL REAR SEAT CUSHION MOULDING RH (for RH Side)
-
Attach the guide and 7 claws to install the rear seat cushion moulding RH.
-
-
INSTALL REAR SEATBACK BOARD CARPET ASSEMBLY RH (for RH Side)
-
Move the rear seatback board carpet assembly RH in the direction of the arrow to attach the 4 guides.
-
Attach the 4 claws and 4 clips to install the rear seatback board carpet assembly RH.
-
Attach the 3 hooks.
-
-
INSTALL REAR SEAT HEADREST ASSEMBLY (for RH Side)
-
Install the rear seat headrest assembly.
-
-
INSTALL REAR SEAT INNER WITH CENTER BELT ASSEMBLY RH (for RH Side)
-
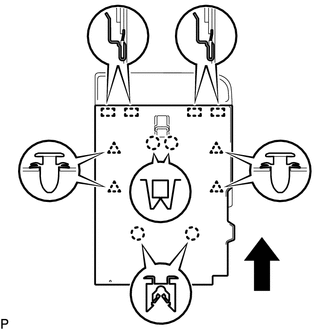
INSTALL REAR SEATBACK COVER
Tech Tips
Use the same procedure for both rear seatback covers.
-
Attach the 4 claws to install the rear seatback cover.
-
-
INSTALL SEAT ADJUSTER COVER CAP RH
Tech Tips
Use the same procedure for both seat adjuster cover caps.
-
Install the seat adjuster cover cap RH.
-
-
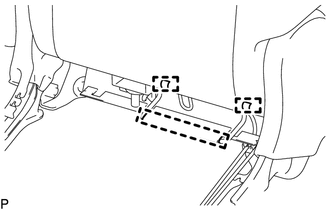
INSTALL SEAT COVER WIRE
-
Install the seat cover wire.
Tech Tips
-
Wire 1000 mm (3.28 ft.) or longer and shaped wire are available as supplied parts.
-
For wire 1000 mm (3.28 ft.) or less in length, cut or shape 1000 mm (3.28 ft.) wire into the dimensions shown in the illustration.
-
Make sure to read the precautions before preparing the wire.
Length A 170 mm (6.69 in.) B 260 mm (10.2 in.) C 450 mm (1.48 ft.) D 300 mm (11.8 in.) Tech Tips
The dimensions shown in the illustration are the lengths.
-
-
-
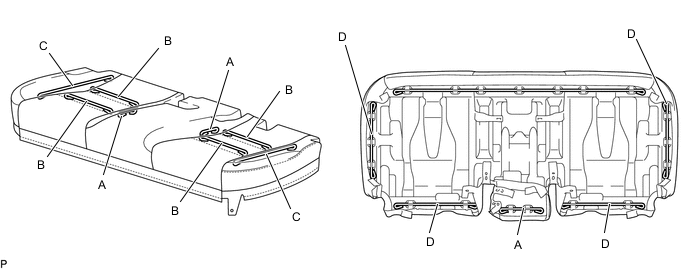
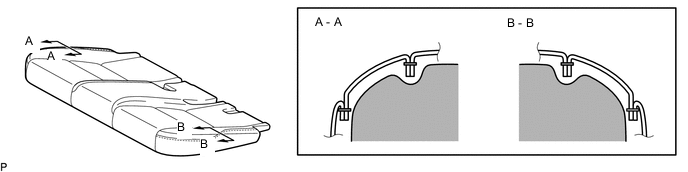
INSTALL BENCH TYPE REAR SEAT CUSHION COVER
Tech Tips
-
When installing the seat cover, refer to the precautions in order to prevent wrinkles from forming.
-
Align the seam allowance in a single direction as shown in the illustration.
-
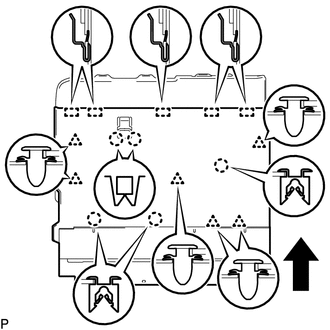
Using hog ring pliers, install the bench type rear seat cushion cover to the bench type rear seat cushion pad with 28 new hog rings in the order indicated in the illustration.
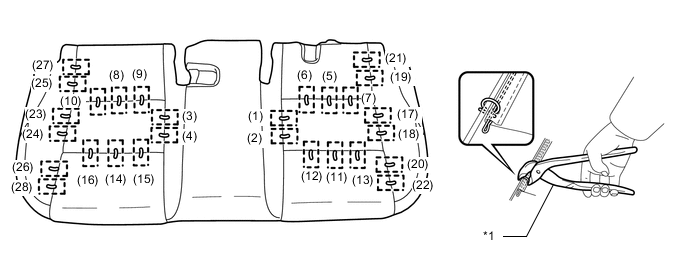
*1 Hog Ring Pliers - - Note
-
Be careful not to damage the bench type rear seat cushion cover.
-
Be sure to securely install the hog rings as shown in the illustration while preventing wrinkles from forming on the bench type rear seat cushion cover.
-
-
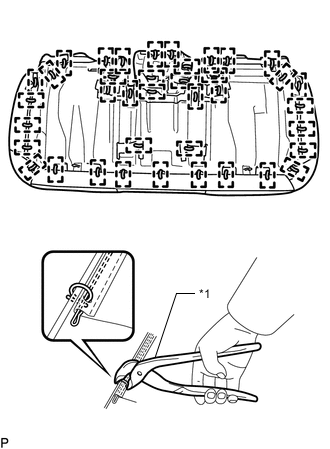
*1 Hog Ring Pliers Using hog ring pliers, install the bench type rear seat cushion cover with 39 new hog rings.
-
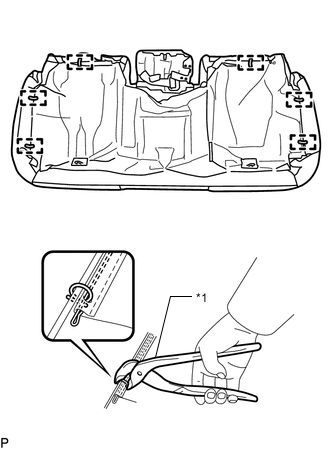
*1 Hog Ring Pliers Using hog ring pliers, install 6 new hog rings.
-
-
INSTALL SEAT ADJUSTER COVER CAP
-
Install the 2 seat adjuster cover caps.
-
-
INSTALL REAR SEAT CUSHION EDGE PROTECTOR
-
Attach the claw to install the rear seat cushion edge protector.
-
-
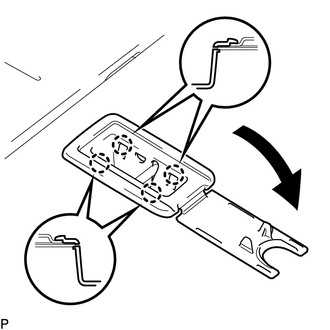
INSTALL REAR SEAT CUSHION LOCK HOOK
Note
-
Perform the following only when replacing the rear seat cushion lock hook.
-
Do not reuse the rear seat cushion lock hook after removing it.
Tech Tips
Use the same procedure for the other side.
-
Set a new rear seat cushion lock hook in place.
-
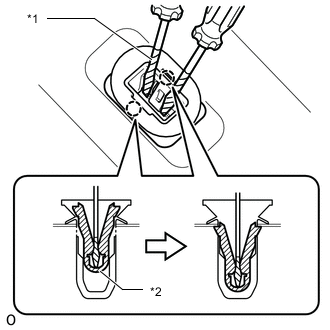
*1 Protective Tape *2 Sleeve Using 2 thin-bladed screwdrivers, push the sleeve to attach the 2 claws.
Note
Do not apply excessive force which may break the sleeve.
Tech Tips
Tape the screwdriver tip before use.
-
Check the installation condition.
OK The sleeve is installed properly. 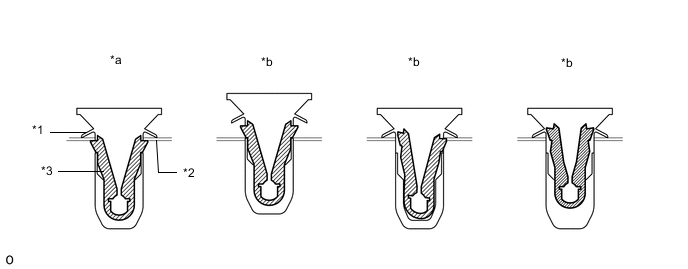
*1 Body *2 Vehicle *3 Sleeve - - *a Correct *b Incorrect
-