REAR SEAT ASSEMBLY(for Separate Seat Type) REASSEMBLY
CAUTION / NOTICE / HINT
Wear protective gloves. Sharp areas on the seat frame may injure your hands.
PROCEDURE
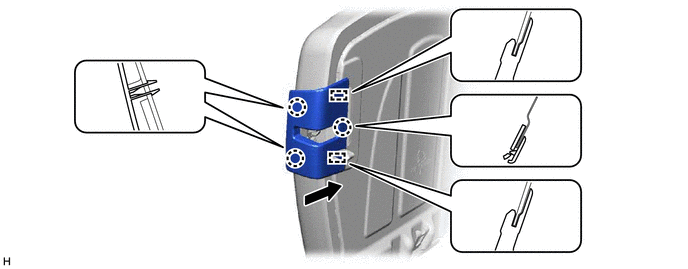
INSTALL REAR SEAT LOCK CONTROL LEVER SUB-ASSEMBLY LH
-
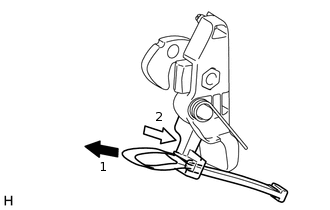
Install the rear seat lock control lever sub-assembly LH as indicated by the arrows, in the order shown in the illustration.
-
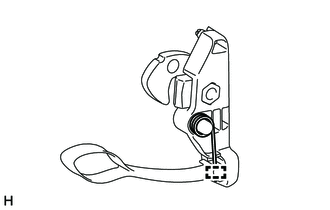
Engage the guide.
-
INSTALL REAR SEAT LOCK CONTROL LEVER SUB-ASSEMBLY RH
Tip:Use the same procedure as for the LH side.
INSTALL REAR SEATBACK LOCK SUB-ASSEMBLY LH
Using a T40 "TORX" socket wrench, install the rear seatback lock sub-assembly LH with the screw.
12 N*m
122 kgf*cm
9 ft.*lbf
INSTALL REAR SEATBACK LOCK SUB-ASSEMBLY RH
Tip:Use the same procedure as for the LH side.
INSTALL SEPARATE TYPE REAR SEATBACK COVER LH
Temporarily install the separate type rear seatback cover LH to the separate type rear seatback pad LH.
for Fabric Seat:
-
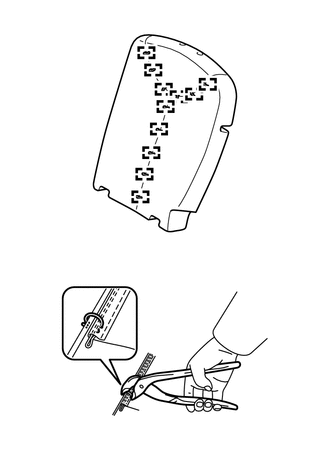
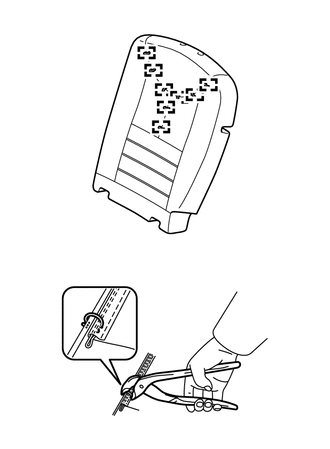
Using hog ring pliers, install the separate type rear seatback cover LH to the separate type rear seatback pad LH with 11 new hog rings.
Note:Be careful not to damage the separate type rear seatback cover LH.
Be sure to securely install the hog rings as shown in the illustration while preventing wrinkles from forming on the separate type rear seatback cover LH.
-
for Leather Seat:
-
Using hog ring pliers, install the separate type rear seatback cover LH to the separate type rear seatback pad LH with 8 new hog rings.
Note:Be careful not to damage the separate type rear seatback cover LH.
Be sure to securely install the hog rings as shown in the illustration while preventing wrinkles from forming on the separate type rear seatback cover LH.
-
INSTALL SEPARATE TYPE REAR SEATBACK COVER RH
Tip:Use the same procedure as for the LH side.
INSTALL SEPARATE TYPE REAR SEATBACK COVER WITH PAD LH
-
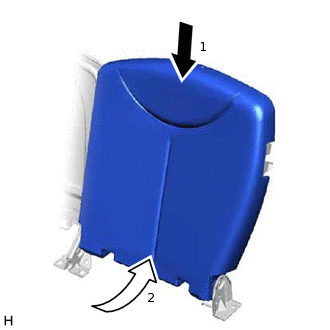
Install the separate type rear seatback cover with pad LH to the rear seatback frame sub-assembly as indicated by the arrows, in the order shown in the illustration.
-
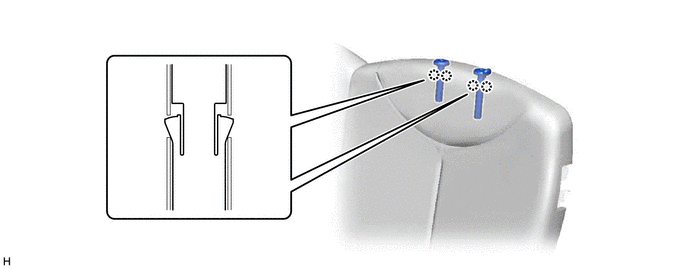
Engage the 6 hooks.
Engage the 4 claws to install the 2 rear seat headrest supports.
-
INSTALL SEPARATE TYPE REAR SEATBACK COVER WITH PAD RH
Tip:Use the same procedure as for the LH side.
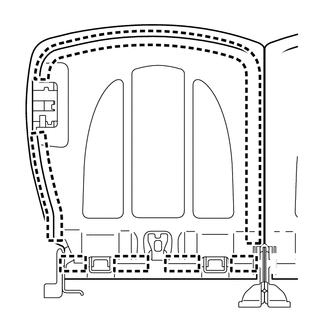
INSTALL REAR SEATBACK LOCK STRIKER COVER LH
Engage the 3 claws and 2 guides to install the rear seatback lock striker cover LH as shown in the illustration.
INSTALL REAR SEATBACK LOCK STRIKER COVER RH
Tip:Use the same procedure as for the LH side.
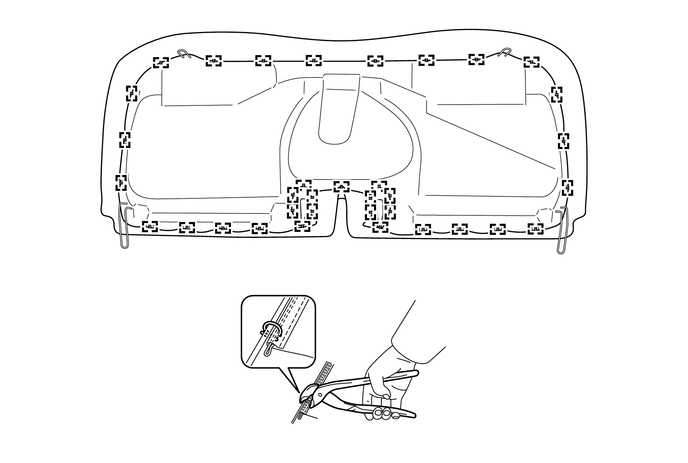
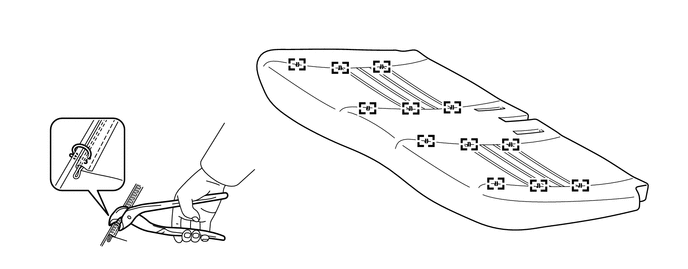
INSTALL BENCH TYPE REAR SEAT CUSHION COVER
Temporarily install the bench type rear seat cushion cover to the rear seat cushion pad.
for Fabric Seat:
Using hog ring pliers, install 16 new hog rings.
Note:Be careful not to damage the bench type rear seat cushion cover.
Be sure to securely install the hog rings as shown in the illustration while preventing wrinkles from forming on the bench type rear seat cushion cover.

for Leather Seat:
Using hog ring pliers, install 12 new hog rings.
Note:Be careful not to damage the bench type rear seat cushion cover.
Be sure to securely install the hog rings as shown in the illustration while preventing wrinkles from forming on the bench type rear seat cushion cover.
Using hog ring pliers, install the bench type rear seat cushion cover to the rear seat cushion pad with 35 new hog rings.
Note:Be careful not to damage the bench type rear seat cushion cover.
Be sure to securely install the hog rings as shown in the illustration while preventing wrinkles from forming on the bench type rear seat cushion cover.