HEADLIGHT DIMMER SWITCH REMOVAL
Tech Tips
-
Use the same procedure for RHD and LHD vehicles.
-
The procedure listed below is for LHD vehicles.
-
PRECAUTION
Note
After turning the ignition switch off, waiting time may be required before disconnecting the cable from the battery terminal. Therefore, make sure to read the disconnecting the cable from the battery terminal notice before proceeding with work Click here.
-
DISCONNECT CABLE FROM NEGATIVE BATTERY TERMINAL
CAUTION:
Wait at least 90 seconds after disconnecting the cable from the negative (-) battery terminal to disable the SRS system.
Note
When disconnecting the cable, some systems need to be initialized after the cable is reconnected Click here.
-
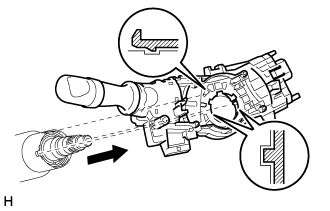
REMOVE SPIRAL CABLE SUB-ASSEMBLY
-
REMOVE WINDSHIELD WIPER SWITCH ASSEMBLY
-
Disconnect the 2 connectors.
-
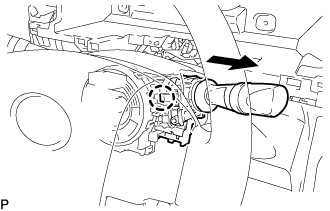
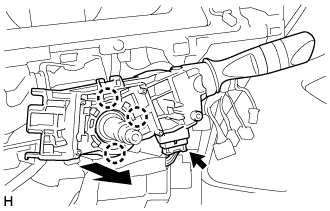
Detach the claw and remove the windshield wiper switch assembly as shown in the illustration.
Note
If the claw is pushed with excessive force, it may be broken.
-
-
REMOVE HEADLIGHT DIMMER SWITCH ASSEMBLY (for LHD)
-
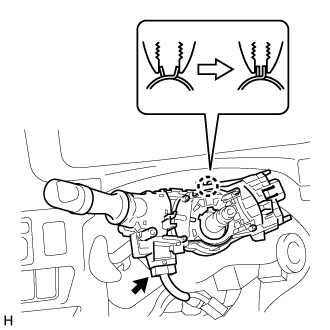
Disconnect the connector.
-
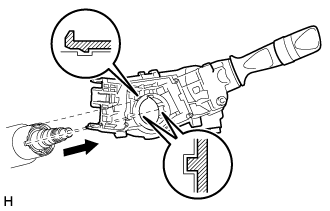
While loosening the band clamp as shown in the illustration, detach the claw.
-
Remove the headlight dimmer switch assembly.
Note
If the claw is pressed forcefully, it will break.
-
-
REMOVE HEADLIGHT DIMMER SWITCH ASSEMBLY (for RHD)
-
w/o Entry and Start System:
-
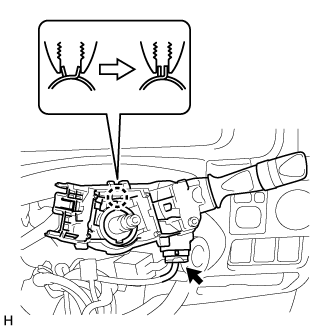
Disconnect the connector.
-
While loosening the band clamp as shown in the illustration, detach the claw.
-
Remove the headlight dimmer switch assembly.
Note
If the claw is pressed forcefully, it will break.
-
-
w/ Entry and Start System:
-
Disconnect the connector.
-
Detach the 3 claws and remove the headlight dimmer switch assembly.
-
-