WATER PUMP (w/o EGR Cooler) REMOVAL
-
DISCONNECT CABLE FROM NEGATIVE BATTERY TERMINAL
CAUTION:
Wait at least 90 seconds after disconnecting the cable from the negative (-) battery terminal to prevent airbag and seat belt pretensioner activation.
-
REMOVE NO. 1 ENGINE UNDER COVER
-
Remove the 4 bolts and cover.
-
-
DRAIN ENGINE COOLANT
-
Drain the engine coolant Click here.
-
-
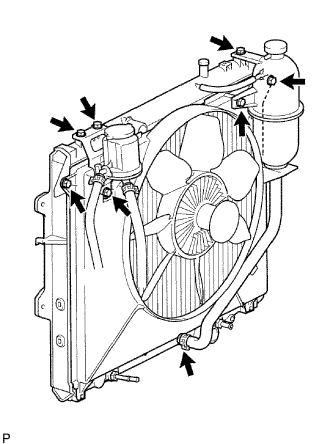
DISCONNECT RADIATOR HOSE INLET
-
Disconnect the hose from the radiator tank upper.
-
-
REMOVE FAN SHROUD
-
Remove the 3 bolts and oil reservoir.
-
Disconnect the No. 1 and No. 2 water by-pass hoses from the tank upper and lower.
-
Remove the 2 bolts and radiator reservoir.
-
Loosen the 4 nuts holding the fluid coupling fan.
-
Remove the drive belt Click here.
-
Remove the 2 bolts holding the fan shroud.
-
Remove the 4 nuts of the fluid coupling fan, and then remove the shroud together with the coupling fan.
Note
Be careful not to damage the radiator core.
-
Remove the fan pulley from the water pump.
-
-
REMOVE COOLER COMPRESSOR ASSEMBLY
-
Remove the 4 bolts and compressor.
-
-
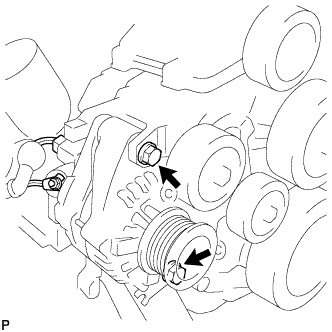
REMOVE GENERATOR ASSEMBLY
-
Remove the nut and generator wire.
-
Disconnect the generator connector.
-
Remove the 2 bolts and generator.
-
-
REMOVE V-RIBBED BELT TENSIONER ASSEMBLY
-
Remove the 4 bolts and tensioner.
-
-
REMOVE CHARGE AIR COOLER ASSEMBLY
-
Remove the CAC Click here.
-
-
REMOVE NO. 1 TIMING BELT COVER
-
Remove the bolt and water hose clamp.
-
Remove the wire harness clamp.
-
Remove the 6 bolts and timing belt cover.
-
-
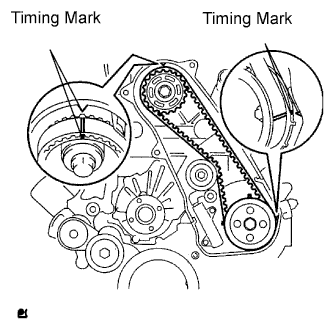
REMOVE TIMING BELT
-
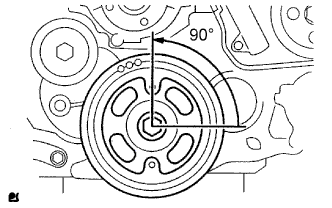
Turn the crankshaft clockwise and align the timing marks as shown in the illustration.
-
Uniformly loosen the 2 bolts and remove the timing belt tensioner.
-
Remove the timing belt.
-
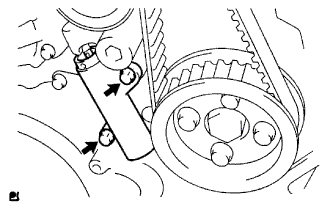
Using a 10 mm hexagon wrench, remove the bolt, timing belt idler and washer.
Tech Tips
-
When turning the camshaft while the timing belt is removed, turn the crankshaft 90° counterclockwise.
-
When installing the timing belt, return the camshaft to the timing marks and then turn the crankshaft clockwise until it aligns with the timing marks, as shown in the illustration.
-
-
-
REMOVE NO. 1 TIMING BELT IDLER SUB-ASSEMBLY
-
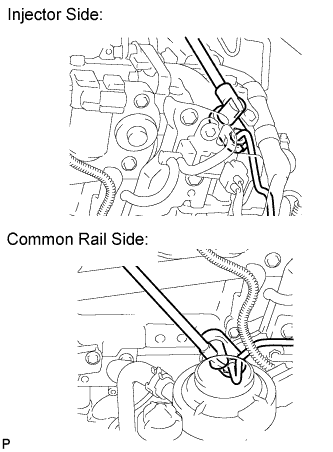
REMOVE NO. 1, NO. 2 AND NO. 3 INJECTION PIPE SUB-ASSEMBLY
Note
-
After removing the fuel pipe, cover the outlets on the common rail with tape to keep out foreign matter.
-
After removing the fuel pipe, put it in a plastic bag to prevent foreign matter from contaminating its injector inlet.
-
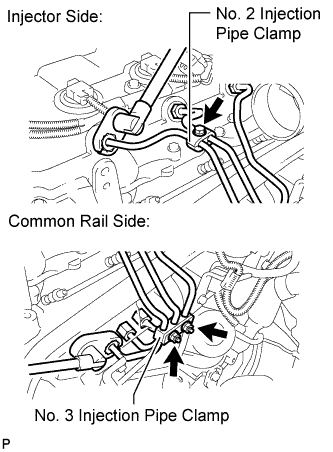
Remove the bolt and No. 2 injection pipe clamp.
-
Remove the 2 nuts and No. 3 injection pipe clamp.
-
Using a 17 mm union nut wrench, loosen the union nuts and remove the No. 1, No. 2 and No. 3 injection pipes.
-
-
REMOVE NO. 4 INJECTION PIPE SUB-ASSEMBLY
-
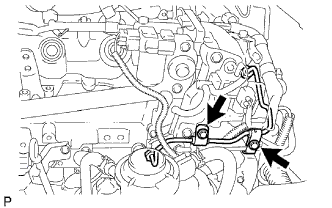
Remove the 2 bolts and disconnect the 2 injection pipe clamps.
Note
If an injection pipe clamp is removed from the No. 4 injection pipe, replace the injection clamp with a new one.
-
Using a 17 mm union nut wrench, loosen the union nuts and remove the No. 4 injection pipe.
-
-
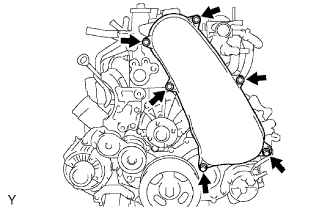
REMOVE CYLINDER HEAD COVER SUB-ASSEMBLY
Note
If the cylinder head cover is removed, replace the 4 No. 3 cylinder head cover gaskets with new ones.
-
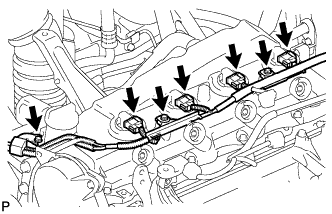
Remove the 3 bolts and disconnect the 4 connectors.
-
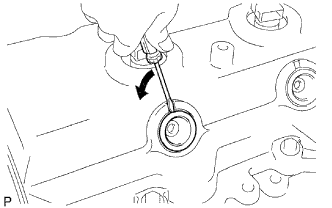
Using a small screwdriver, remove the holder seal by prying the portion between the holder seal and the cutout part of the cylinder head.
-
Disconnect the ventilation hose.
-
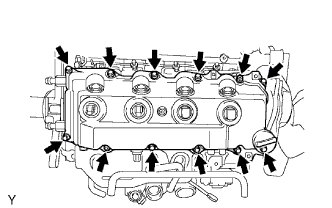
Remove the 10 bolts, 2 nuts, cylinder head cover and gasket.
-
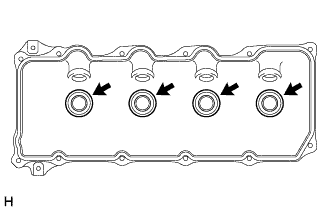
Remove the 4 No. 3 cylinder head cover gaskets from the cylinder head cover.
-
-
CLEAN CAMSHAFT TIMING PULLEY
-
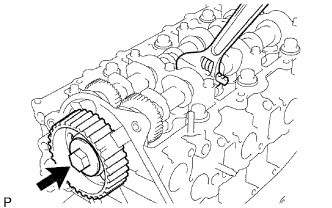
Remove the bolt of the camshaft timing pulley by holding the camshaft with a wrench.
Note
Make sure to remove the bolt of the camshaft timing pulley with the timing belt not installed.
-
Remove the camshaft timing pulley.
-
-
REMOVE NO. 2 TIMING BELT COVER
-
Remove the 4 bolts, nuts and No. 2 timing belt cover.
-
-
REMOVE WATER PUMP ASSEMBLY
-
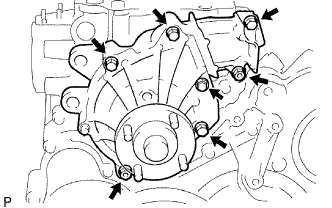
Remove the 2 nuts, 5 bolts, water pump and gasket.
-