FRONT SEAT ASSEMBLY DISASSEMBLY
CAUTION / NOTICE / HINT
Wear protective gloves. Sharp areas on the parts may injure your hands.
Use the same procedure for the RH side and LH side.
The following procedure is for the LH side.
PROCEDURE
REMOVE HEATER SWITCH WITH COVER (w/ Seat Heater System)
REMOVE SEAT HEATER CONTROL SUB-ASSEMBLY (w/ Seat Heater System)
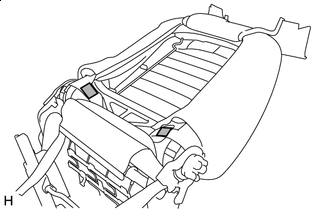
DISCONNECT SEPARATE TYPE FRONT SEATBACK COVER
-

Disengage the 2 hooks to disconnect the 2 rubber bands of the separate type front seatback cover.
-
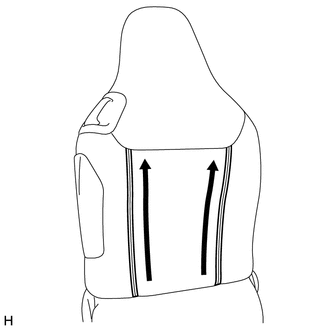
Open the 2 fasteners.
-
REMOVE FRONT SEAT INNER BELT ASSEMBLY
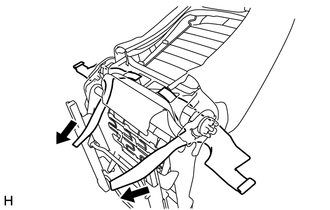
REMOVE FRONT SEAT AIRBAG ASSEMBLY
REMOVE SEAT AIRBAG CASE
REMOVE RECLINING ADJUSTER RELEASE HANDLE
-
Disengage the 5 claws and remove the reclining adjuster release handle.
-
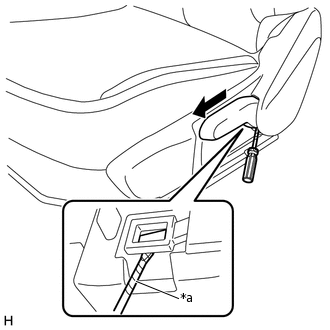
REMOVE FRONT SEAT INNER CUSHION SHIELD
-

Using a T20 "TORX" socket wrench, remove the screw.
-

Disengage the claw, guide and clip to remove the front seat inner cushion shield.
-
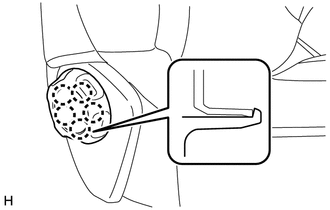
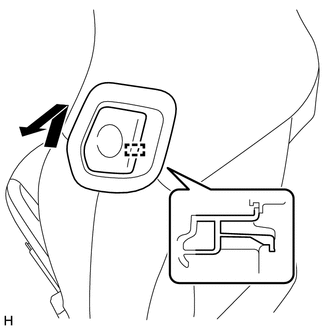
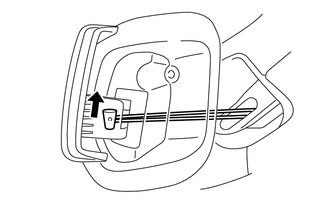
REMOVE VERTICAL ADJUSTING HANDLE (w/ Vertical Adjuster)
-
*a
Protective Tape
Using a screwdriver with its tip wrapped with protective tape, disengage the claw and remove the vertical adjusting handle as shown in the illustration.
-
REMOVE FRONT SEAT CUSHION SHIELD
w/ Vertical Adjuster:
-

Using a T20 "TORX" socket wrench, remove the screw.
-

Disengage the 3 claws, 3 guides and clip to remove the front seat cushion shield.
-
w/o Vertical Adjuster:
-

Using a T20 "TORX" socket wrench, remove the 2 screws.
-

Disengage the 2 claws, 2 guides and clip to remove the front seat cushion shield.
-
w/ Seat Heater System:
-

Disengage the clamp.
-
REMOVE SEAT SIDE GARNISH BRACKET (w/ Vertical Adjuster)
-

Using a T20 "TORX" socket wrench, remove the 2 screws and seat side garnish bracket.
-
REMOVE VERTICAL ADJUSTER SPACER (w/ Vertical Adjuster)
-

Using a T20 "TORX" socket wrench, remove the 2 screws and vertical adjuster spacer.
-
REMOVE SEPARATE TYPE FRONT SEAT CUSHION COVER WITH PAD
-

Remove the 2 seat cover fastener retainers.
-
Disconnect the 2 rubber bands of the separate type front seat cushion cover.
-

Disconnect the connector.
-

Disengage the 4 hooks.
-

*a
Wire Harness Clamp
w/ Seat Heater System:
Remove the wire harness clamp.
Disconnect the connector.
Disengage the 3 clamps.
Disengage the 10 hooks and remove the separate type front seat cushion cover with pad from the separate type front seat cushion spring assembly.

-
REMOVE SEPARATE TYPE FRONT SEAT CUSHION COVER
-
Remove the 8 hog rings and separate type front seat cushion cover from the separate type front seat cushion pad.
-
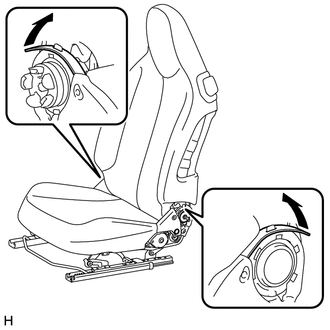
REMOVE RECLINING REMOTE CONTROL LEVER SUB-ASSEMBLY (for 3 Door)
-
Remove the 2 wire harness clamps.
-

Using a T20 "TORX" socket wrench, remove the screw.
-
Disengage the guide and separate the reclining remote control lever sub-assembly as shown in the illustration.
-

Disengage the 2 claws.
-
Disconnect the reclining remote control cable assembly to remove the reclining remote control lever sub-assembly as shown in the illustration.
-
REMOVE RECLINING REMOTE CONTROL CABLE ASSEMBLY (for 3 Door)
Disengage the hook.
-

*a
Hook
*b
Guide Pin
Disengage the 2 claws.
Disengage the guide pin and separate the left cable of the reclining remote control cable.
-

*a
Guide Pin
Disengage the 2 claws.
Disengage the guide pin to remove the reclining remote control cable assembly.
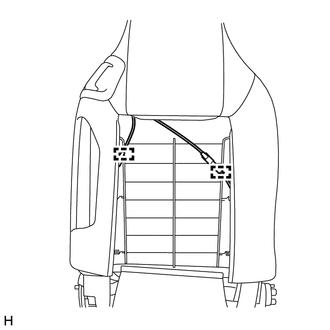
REMOVE SEPARATE TYPE FRONT SEATBACK COVER WITH PAD
-

Disengage the hook.
-

Fastener
Disengage the 2 fasteners.
-

Disengage the 2 hooks.
-
Remove the front seat hinge cover LH and front seat hinge cover RH as shown in the illustration.
Remove the separate type front seatback cover with pad from the separate type front seatback spring assembly.
-
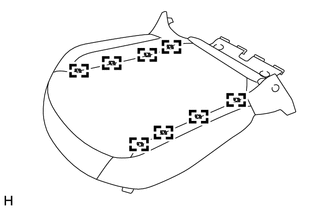
REMOVE SEPARATE TYPE FRONT SEATBACK COVER
-
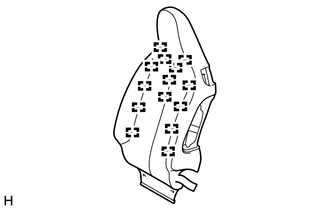
Remove the 14 hog rings and separate type front seatback cover from the separate type front seatback pad.
-
REMOVE SEPARATE TYPE FRONT SEATBACK SPRING ASSEMBLY
-

Using a T20 "TORX" socket wrench, remove the 2 screws.
-
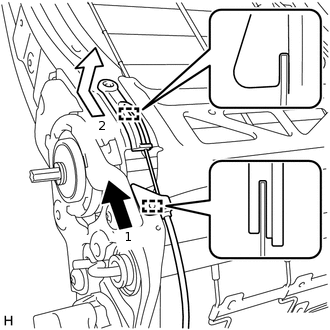
Disengage the 2 guides and remove the front seat cushion cable as indicated by the arrows, in the order shown in the illustration.
-

Using a T45 "TORX" socket wrench, remove the 4 bolts and separate type front seatback spring assembly from the separate type front seat cushion spring assembly.
-
REMOVE FRONT SEAT HEADREST INSERT SUB-ASSEMBLY
-
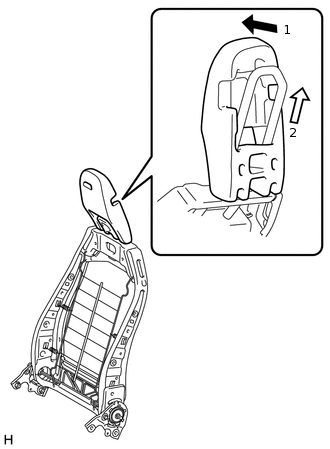
Remove the front seat headrest insert sub-assembly as indicated by the arrows in the order shown in the illustration.
-
REMOVE SEAT FRAME SET BRACKET SUB-ASSEMBLY
-

Disengage the 4 claws to remove the seat frame set bracket sub-assembly from the front seat cushion spring assembly.
-
REMOVE FRONT SEAT CUSHION EDGE PROTECTOR
-
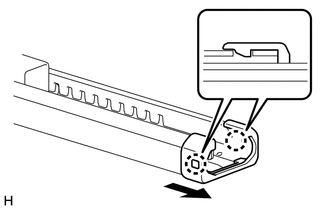
Disengage 2 claws and remove the front seat cushion edge protector as shown in the illustration.
Tip:Use the same procedure for the RH side and LH side.
-