WASHER MOTOR REMOVAL
CAUTION / NOTICE / HINT
PROCEDURE
-
REMOVE UPPER RADIATOR SUPPORT SEAL
-
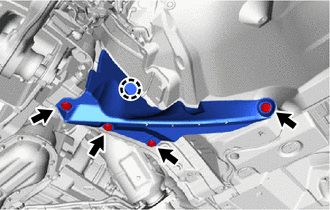
REMOVE FRONT FENDER REINFORCEMENT SUB-ASSEMBLY TOP LH
-
REMOVE FRONT WHEEL
-
REMOVE NO. 1 ENGINE UNDER COVER ASSEMBLY
-
REMOVE TRANSMISSION UNDER COVER
-
REMOVE NO. 2 ENGINE UNDER COVER ASSEMBLY
-
REMOVE FRONT WHEEL OPENING EXTENSION PAD LH
-

Remove the 2 screws and front wheel opening extension pad LH.
-
-
REMOVE ENGINE SIDE COVER LH
-
Remove the 4 clips.
-
Detach the claw and remove the engine side cover LH.
-
-
REMOVE FRONT FENDER WHEEL OPENING MOULDING LH
-
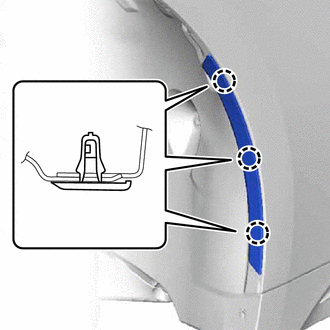
Detach the claw and remove the front fender wheel opening moulding LH.
-
-
REMOVE FRONT FENDER LINER LH
-

Remove the 5 screws.
-
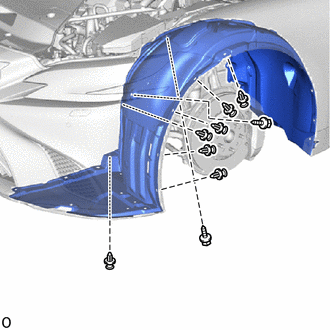
Remove the 7 clips.
-
Remove the 2 screws.
-
Remove the 3 clips.
-
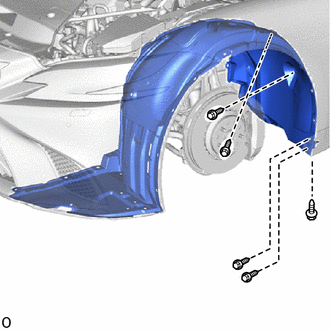
Remove the 5 screws.
-


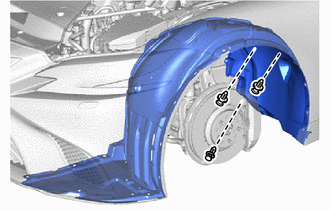
Remove in this Direction (1) 
Remove in this Direction (2) Bend the front fender liner LH inward, slide the duct to the lower side of the vehicle and remove the front fender liner LH as shown in the illustration.
-
-
REMOVE WINDSHIELD WASHER JAR ASSEMBLY
-
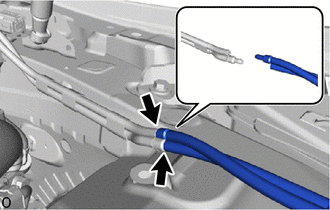
Disconnect the 2 windshield washer hose assemblies as shown in the illustration.
Note
Make sure to disconnect the windshield washer hose assembly as shown in the illustration to prevent improper installation during reinstallation.
-

Detach the claw and disconnect the head light cleaner hose as shown in the illustration.
Tech Tips
Prepare a container before performing the procedure.
-
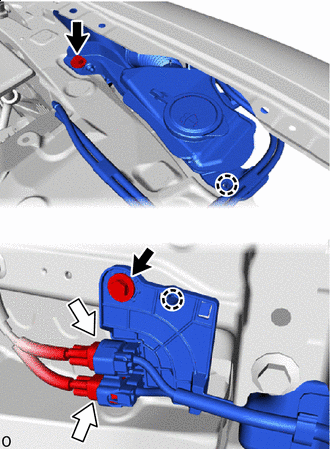

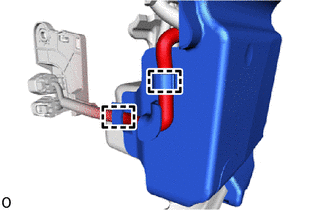
Bolt 
Connector Remove the 2 bolts as shown in the illustration.
-
Detach the claw.
-
Disconnect the 2 connectors.
-
Detach the claw and remove the No. 1 washer bracket.
-
Remove in this Direction (1) Remove in this Direction (2) Remove the 2 bolts.
-
Slide in the direction indicated by the arrow shown in the illustration and detach the guide to remove the windshield washer jar assembly.
Note
Do not damage the vehicle with the washer inlet.
Tech Tips
Washer fluid remains in the windshield washer jar assembly. Therefore, prepare a container to collect the washer fluid.
-
Drain the washer fluid remaining in the windshield washer jar.
-
-
REMOVE WASHER HOSE PROTECTOR
-
Disconnect the wire harness from the wire harness clamp.
-

Detach the 3 clips and remove the washer hose protector.
-
-
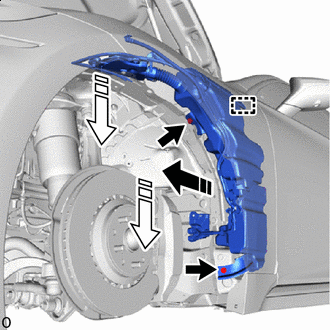
REMOVE WINDSHIELD WASHER MOTOR AND PUMP ASSEMBLY
-
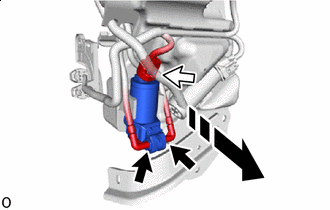
Remove in this Direction Washer hoses Connector Disconnect the 2 washer hoses.
-
Disconnect the connector.
-
Remove the windshield washer motor and pump assembly as shown in the illustration.
-