PRESSURE SWITCH REMOVAL
-
RECOVER REFRIGERANT FROM REFRIGERATION SYSTEM
-
Start up the engine.
-
A/C switch is ON.
-
Operate the cooler compressor with an engine speed of approximately 1,000 rpm for 5 to 6 minutes to circulate the refrigerant and collect the compressor oil remaining in each component into the cooler compressor.
-
Stop the engine.
-
Using SST, Recover the refrigerant from the A/C system using a refrigerant recovery unit.
- SST
- 09985-20010 ( 09985-02130, 09985-02150, 09985-02090, 09985-02110, 09985-02010, 09985-02050, 09985-02060, 09985-02070 )
-
-
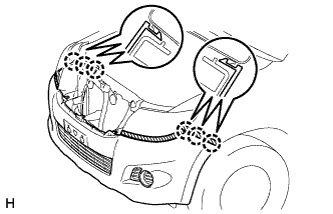
REMOVE RADIATOR GRILLE
-
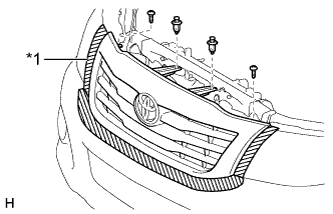
Text in Illustration *1 Protective Tape Put protective tape around the radiator grille.
-
Remove the 2 clips and 2 screws.
-
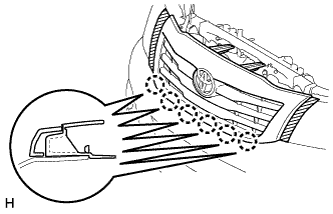
Detach the 6 claws and remove the radiator grille.
-
-
REMOVE FRONT BUMPER COVER
-
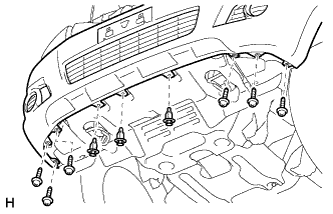
Remove the 3 clips and 6 screws.
-
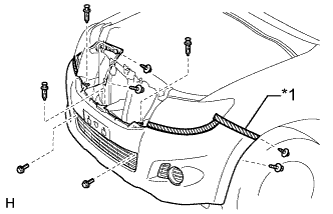
Text in Illustration *1 Protective Tape Put protective tape around the front bumper cover.
-
Remove the 2 bolts, 2 screws and 5 clips.
-
w/ Fog Light:
Disconnect the 2 fog light connectors.
-
w/ Headlight Cleaner System:
Disconnect the No. 1 headlight cleaner hose.
-
Detach the 6 claws and remove the front bumper cover.
-
-
REMOVE ENGINE SIDE COVER SUB-ASSEMBLY LH (for 4WD and Pre-Runner)
-
Remove the 2 clips, 3 bolts and engine side cover.
-
-
REMOVE ENGINE SIDE COVER SUB-ASSEMBLY RH (for 4WD and Pre-Runner)
Tech Tips
Use the same procedure described for the LH side.
-
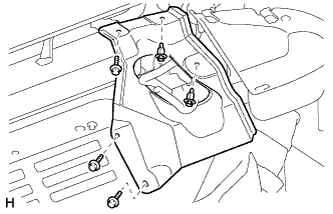
REMOVE ENGINE UNDER COVER (except 4WD and Pre-Runner)
-
Remove the 4 clips, 5 bolts and engine under cover.
-
-
REMOVE FRONT BUMPER REINFORCEMENT EXTENSION LH (for 4WD and Pre-Runner)
-
Detach the 2 claws and remove the front bumper reinforcement extension.
-
-
REMOVE FRONT BUMPER REINFORCEMENT EXTENSION RH (for 4WD and Pre-Runner)
Tech Tips
Use the same procedure described for the LH side.
-
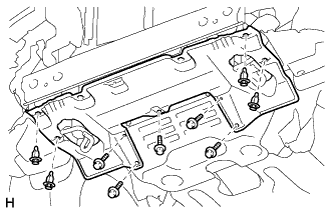
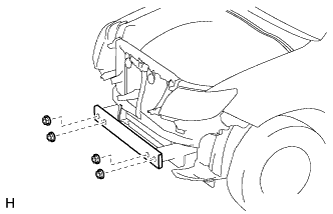
REMOVE FRONT BUMPER REINFORCEMENT SUB-ASSEMBLY
-
Remove the 4 nuts and front bumper reinforcement.
-
-
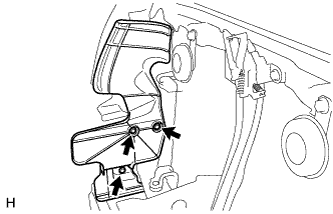
REMOVE RADIATOR SIDE DEFLECTOR RH
-
Remove the 3 clips and radiator side deflector RH.
-
-
REMOVE V-BANK COVER (for 1GR-FE)
-
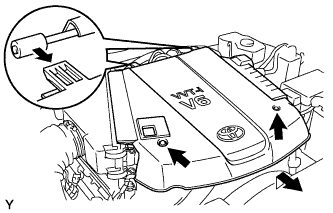
Remove the 2 nuts and the V-bank cover.
-
-
REMOVE AIR CLEANER ASSEMBLY (for 1GR-FE)
-
Disconnect the vacuum hose.
-
Disconnect the MAF meter connector.
-
Remove the 2 wire harness clamps.
-
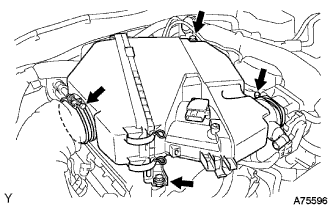
Loosen the 2 hose clamps.
-
Remove the 2 bolts and air cleaner.
-
-
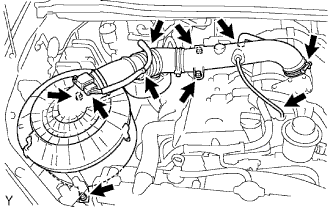
REMOVE AIR CLEANER ASSEMBLY (for 1KD-FTV, 2KD-FTV)
-
w/o EGR Cooler:
Disconnect the ventilation hose.
-
w/ Mass Air Flow Meter:
Disconnect the mass air flow meter sensor connector.
-
w/ Intake Air Temperature Sensor:
Disconnect the intake air temperature sensor connector.
-
Loosen the hose clamp.
-
Remove the 2 bolts and air cleaner.
-
-
REMOVE INTAKE AIR CONNECTOR AND AIR CLEANER ASSEMBLY (for 2TR-FE)
-
Disconnect the vacuum hose.
-
Disconnect the No. 2 ventilation hose.
-
Disconnect the MAF meter connector and wire harness clamps.
-
Loosen the hose clamp and remove the 4 bolts, air cleaner and intake air connector assembly.
-
-
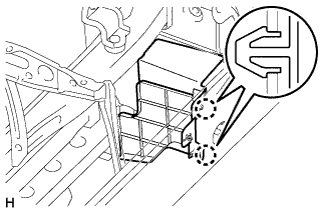
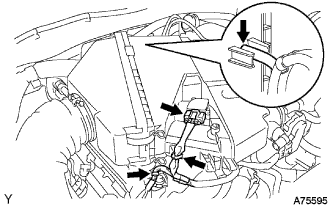
REMOVE AIR CONDITIONING TUBE AND ACCESSORY ASSEMBLY
-
Disconnect the connector.
-
Remove the 3 bolts and air conditioning tube and accessory assembly (pressure switch).
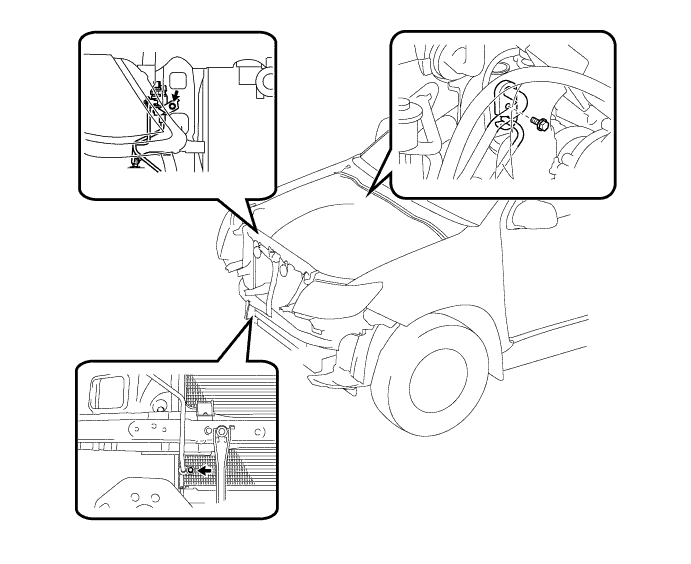
-
Remove the O-rings from the air conditioning tube and accessory assembly (pressure switch).
Note
Seal the openings of the disconnected parts using vinyl tape to prevent moisture and foreign matter from entering them.
-