STARTER (for 2.2 kW Type) DISASSEMBLY
-
REMOVE MAGNET STARTER SWITCH ASSEMBLY
-
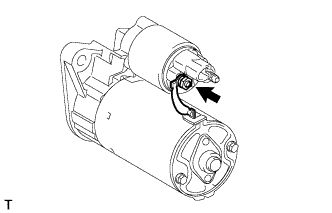
Remove the nut, and then disconnect the lead wire from terminal C.
-
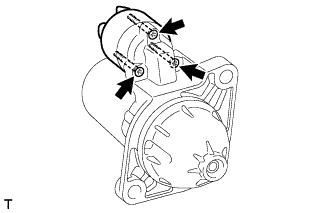
Using a T25 "TORX" socket wrench, remove the 3 screws holding the magnet starter switch assembly to the starter drive housing.
-
Remove the magnet starter switch assembly.
-
Remove the return spring.
-
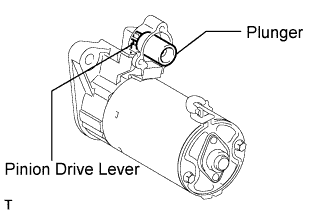
Remove the plunger from the pinion drive lever.
-
-
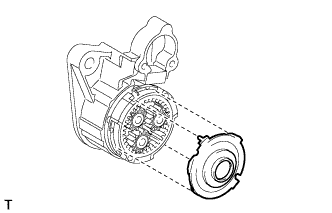
REMOVE STARTER YOKE ASSEMBLY
-
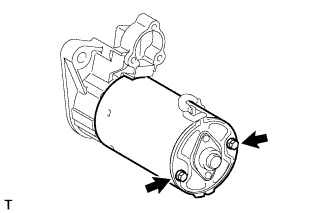
Remove the 2 bolts and starter yoke assembly from the starter drive housing.
-
Remove the cover ring from the planet carrier.
-
Remove the plate from the planet carrier.
-
-
REMOVE STARTER BRUSH HOLDER ASSEMBLY
Note
Do not drop the starter armature assembly.
-
Hold the starter yoke between aluminum plates in a vise.
Note
Do not damage the starter yoke assembly.
-
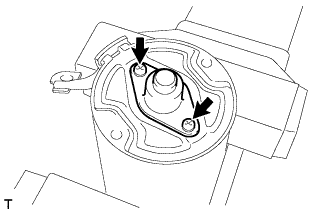
Remove the 2 screws and starter commutator end frame cover from the starter commutator end frame.
-
Remove the seal ring.
-
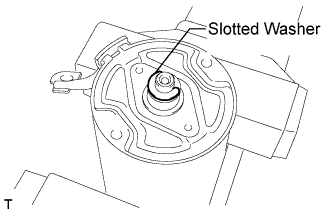
Remove the slotted washer.
-
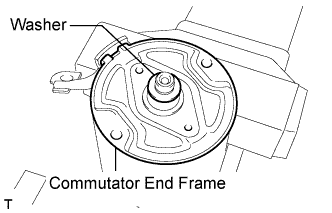
Remove the washer.
-
Remove the starter commutator end frame from the starter yoke assembly.
-
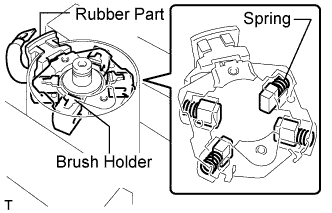
Remove the starter brush holder from the starter armature assembly.
Note
Do not pull on the rubber part.
-
-
REMOVE STARTER ARMATURE ASSEMBLY
-
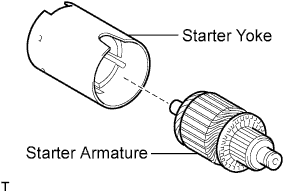
Remove the starter armature from the starter yoke.
-
-
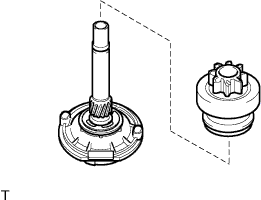
REMOVE STARTER CLUTCH SUB-ASSEMBLY
-
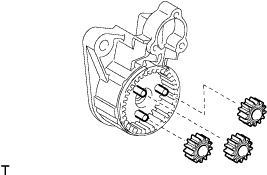
Remove the 3 planetary gears from the planet carrier.
-
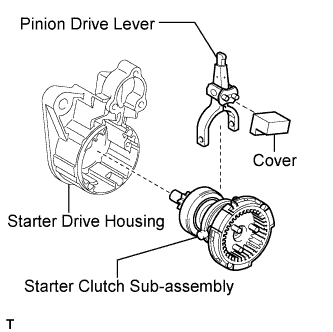
Remove the starter clutch sub-assembly, pinion drive lever and cover from the starter drive housing.
-
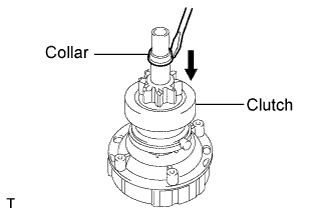
Using a screwdriver, move the pinion stop collar to the starter clutch.
-
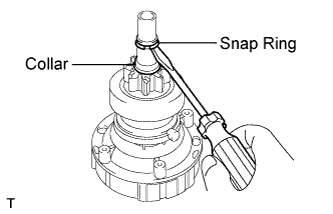
Using a screwdriver, remove the snap ring.
-
Remove the pinion stop collar and starter clutch sub-assembly from the planet carrier shaft.
-
-
REMOVE PLANET CARRIER SHAFT SUB-ASSEMBLY
-
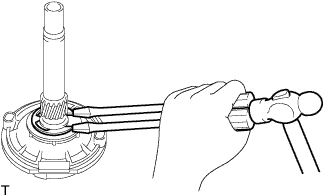
Using 2 screwdrivers and a hammer, tap off the snap ring.
-
Remove the washer from the planet carrier shaft.
-
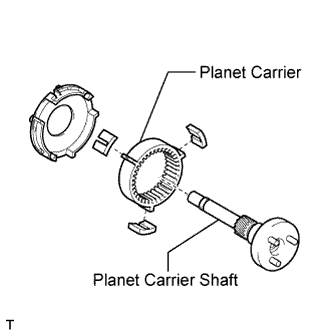
Remove the planet carrier shaft from the planet carrier.
-
Remove the intermediate sealing and the 3 damper rubbers from the planet carrier.
-