HV BATTERY REMOVAL

PROCEDURE
-
PRECAUTION
-
READ VALUE USING GTS
-
Connect the GTS to the DLC3.
-
Turn the power switch on (IG).
-
Enter the following menus: Powertrain / Hybrid Control / Data List / Temp of Batt TB 0 to 5.
-
Read the Data List.
Note
If any of the temperatures listed in "Temp of Batt TB 0 to 5" are 50°C or more, leave the vehicle until the temperature drops to less than 50°C.
-
-
READ OUTPUT DTC
-
Check for DTCs Click here.
Note
Check for DTCs and confirm that P0AA6 (Hybrid Battery Voltage System Isolation Fault) is not output before removing or installing internal battery components. If this DTC is output, perform troubleshooting for this DTC first.
-
-
REMOVE SERVICE PLUG GRIP
-
REMOVE INVERTER COVER
-
CHECK TERMINAL VOLTAGE
-
INSTALL INVERTER COVER
-
REMOVE FRONT SEAT ASSEMBLY RH
-
for Manual Seat:
-
for Power Seat:
-
-
REMOVE CENTER FLOOR CARPET COVER LH
-
REMOVE CENTER FLOOR CARPET COVER RH
-
REMOVE UPPER CONSOLE PANEL SUB-ASSEMBLY
-
REMOVE FRONT NO. 2 CONSOLE BOX INSERT
-
REMOVE CONSOLE BOX ASSEMBLY
-
REMOVE NO. 1 HYBRID BATTERY SHIELD SUB-ASSEMBLY
CAUTION:
Wear insulated gloves.
Note
-
When handling the HV battery, disconnect the high voltage connector of the battery smart unit to prevent the hybrid battery cell voltage from dropping.
-
Insulate the removed connectors with insulating tape.
-
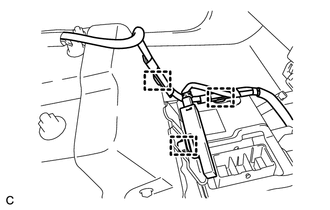
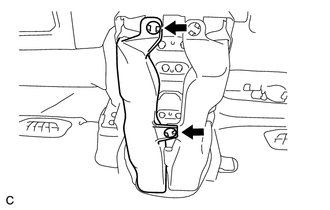
Disconnect the 3 clamps.
-
Remove the 4 bolts and No. 1 hybrid battery shield sub-assembly.
-
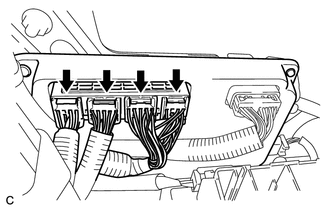
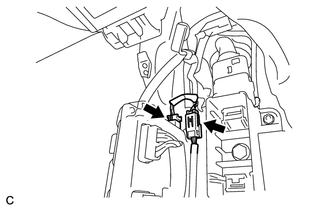
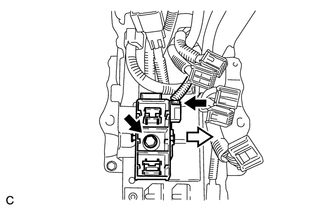
Disconnect the 4 connectors from the battery smart unit.
Note
Insulate the removed connectors with insulating tape.
-
-
DISCONNECT FRAME WIRE
CAUTION:
Wear insulated gloves.
Note
Insulate the removed terminals with insulating tape.
-
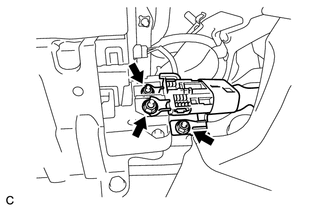
Using an insulated tool, remove the 3 nuts and disconnect the frame wire from the hybrid battery junction block assembly.
-
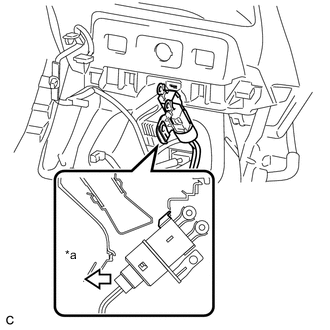
Text in Illustration *a Front of Vehicle Install the frame wire as shown in the illustration.
-
-
REMOVE NO. 1 HYBRID BATTERY EXHAUST DUCT
-
Remove the 2 clips and No. 1 hybrid battery exhaust duct.
-
-
REMOVE NO. 4 HYBRID BATTERY INTAKE DUCT
-
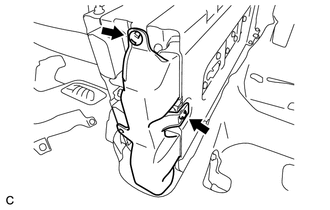
Remove the 2 clips and No. 4 hybrid battery intake duct.
-
-
REMOVE HV BATTERY
CAUTION:
Wear insulated gloves.
Note
-
Insulate the removed connectors and terminals with insulating tape.
-
Since the HV battery is very heavy, 2 people are needed to remove the HV battery.
-
Use cardboard or other similar material to protect the HV battery and vehicle body from damage.
-
When moving the hybrid battery, make sure to use an engine lifter.
-
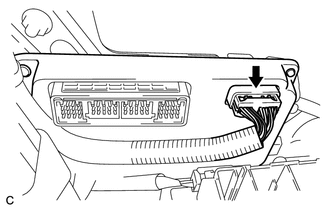
Disconnect the 2 connectors.
-
Disconnect the floor carpet from the HV battery.
-
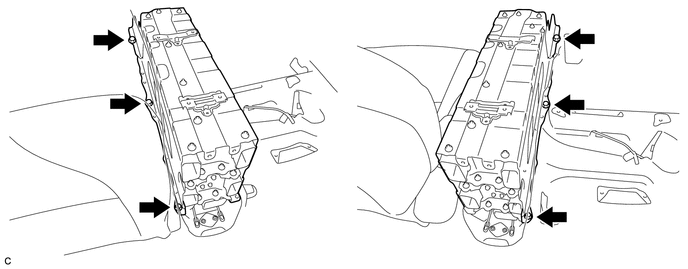
Remove the 6 bolts.
-
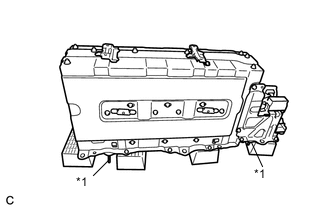
Text in Illustration *1 Guide Pin Remove the HV battery.
Tech Tips
Be sure to place the HV battery on the attachment to prevent the guide pins from being damaged.
-
-
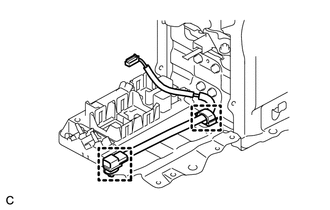
REMOVE NO. 2 HYBRID VEHICLE BATTERY COVER PANEL LH
CAUTION:
Wear insulated gloves.
Note
Insulate the removed connectors with insulating tape.
-
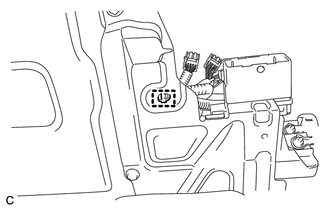
Disconnect the connector.
-
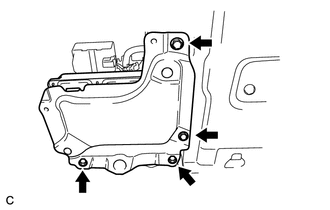
Remove the 4 bolts and No. 2 hybrid vehicle battery LH cover panel.
-
-
REMOVE BATTERY SMART UNIT
-
REMOVE NO. 2 HYBRID BATTERY SHIELD SUB-ASSEMBLY
CAUTION:
Wear insulated gloves.
Note
Insulate the removed connectors with insulating tape.
-
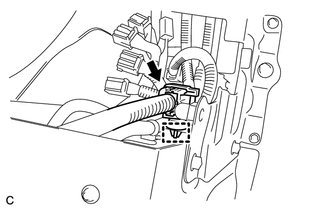
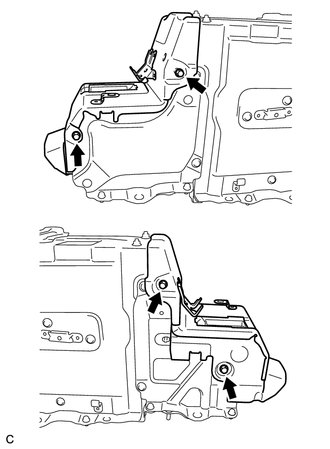
Disconnect the connector and clamp.
-
Disconnect the clamp.
-
Disconnect the connector.
-
Remove the bolt and electric vehicle battery plug assembly as shown in the illustration.
-
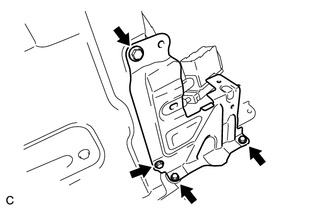
Remove the 4 bolts and No. 2 hybrid battery shield sub-assembly.
-
-
REMOVE HYBRID BATTERY JUNCTION BLOCK ASSEMBLY
-
REMOVE NO. 2 HYBRID BATTERY PACK WIRE
CAUTION:
Wear insulated gloves.
-
Disconnect the 2 clamps and remove the No. 2 hybrid battery pack wire.
-
-
PERFORM HV BATTERY RECOVERY INSPECTION
-
Before returning the HV battery, make sure to perform a recovery inspection Click here
-