STARTER REMOVAL
PROCEDURE
PRECAUTION
Note:After turning the ignition switch off, waiting time may be required before disconnecting the cable from the negative (-) battery terminal. Therefore, make sure to read the disconnecting the cable from the negative (-) battery terminal notices before proceeding with work.
When the starter assembly is replaced, "ST NO. 1 relay" must be also replaced.
DISCONNECT CABLE FROM NEGATIVE BATTERY TERMINAL
Note:When disconnecting the cable, some systems need to be initialized after the cable is reconnected.
REMOVE NO. 1 ENGINE COVER
REMOVE NO. 1 ENGINE UNDER COVER
REMOVE BATTERY
REMOVE BATTERY CARRIER
DISCONNECT NO. 1 VACUUM PIPE
-
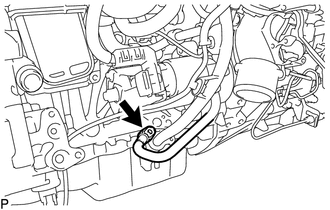
Using an E7 "TORX" socket wrench, remove the bolt and disconnect the No. 1 vacuum pipe from the cylinder block sub-assembly.
Remove the O-ring from the No. 1 vacuum pipe.
-
REMOVE ENGINE OIL LEVEL DIPSTICK GUIDE
-
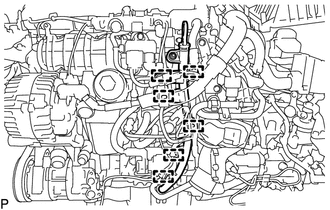
Disengage the 6 clamps and disconnect the No. 2 engine wire from the engine oil level dipstick guide.
Remove the engine oil level dipstick.
-
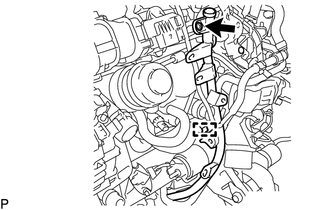
Disengage the clamp and disconnect the fuel feed pipe sub-assembly from the engine oil level dipstick guide.
Using a T25 "TORX" socket wrench, remove the bolt and engine oil level dipstick guide.
Remove the O-ring from the engine oil level dipstick guide.
-
REMOVE STARTER ASSEMBLY
-
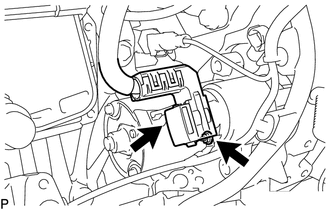
Open the terminal cap.
Remove the nut and disconnect the No. 2 engine wire from the starter assembly.
Remove the nut and disconnect the engine wire from the starter assembly.
-
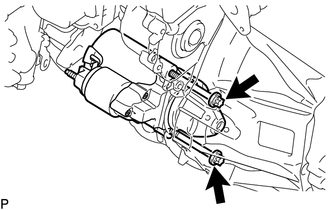
Using an E14 "TORX" socket wrench, remove the 2 bolts and starter assembly.
-