QUARTER TRIM SPEAKER INSTALLATION
Tech Tips
-
Use the same procedures for the RH side and LH side.
-
The procedures listed below are for the LH side.
-
INSTALL REAR SPEAKER ASSEMBLY
-
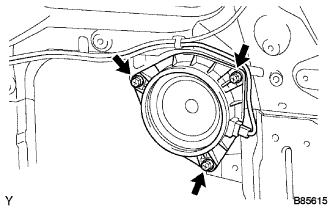
Hold the speaker to the panel.
-
Install the speaker with the 3 screws.
-
Connect the connector.
-
-
INSTALL QUARTER INSIDE TRIM BOARD LH
-
Attach the 7 clips, 3 guides and 4 claws to install the quarter inside trim board.
-
Connect the front seat outer belt floor anchor with the bolt.
- Torque:
- 42 N*m { 428 kgf*cm, 31 ft.*lbf }
-
-
INSTALL FRONT DOOR OPENING TRIM LH
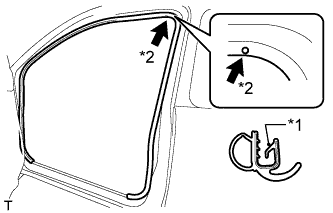
Text in Illustration *1 Paint Mark *2 Mark Position
-
Align the paint mark on the front door opening trim with the mark position on the vehicle and install the front door opening trim as shown in the illustration.
-
-
INSTALL FRONT DOOR SCUFF PLATE LH
-
Attach the 4 clips and 8 claws to install the front door scuff plate.
-
-
INSTALL REAR SEATBACK ASSEMBLY
-
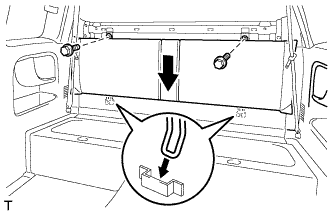
Place the rear seatback assembly in the cabin.
Note
Be careful not to damage the vehicle body.
-
Attach the 2 hooks to the vehicle body.
-
Install the rear seatback assembly with the 2 bolts.
- Torque:
- 39 N*m { 398 kgf*cm, 29 in.*lbf }
-
-
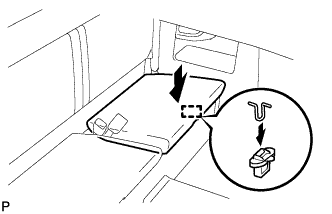
INSTALL LOWER BACK PANEL GARNISH
-
Attach the 5 clips, 2 guides and 6 claws to install the lower back panel garnish.
-
-
INSTALL REAR SEAT CUSHION ASSEMBLY LH (w/ Seat Cushion)
-
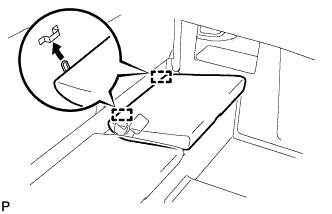
Attach the 2 hooks.
-
Attach the hook to install the rear seat cushion assembly LH.
-
-
INSTALL REAR SEAT CUSHION ASSEMBLY RH (w/ Seat Cushion)
Tech Tips
Use the same procedures described for the LH side.
-
INSTALL UPPER BACK PANEL GARNISH
-
Attach the 5 clips and 4 claws to install the upper back panel garnish.
-
-
CONNECT CABLE TO NEGATIVE BATTERY TERMINAL
-
PERFORM INITIALIZATION
-
Perform initialization Click here.
Note
Certain systems need to be initialized after disconnecting and reconnecting the cable from the negative (-) battery terminal.
-