REAR SEAT ASSEMBLY (for Double Cab) DISASSEMBLY
CAUTION:
Wear protective gloves. Sharp areas on the parts may injure your hands.
-
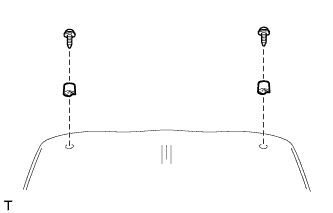
REMOVE REAR SEAT HEADREST ASSEMBLY
-
Remove the 2 rear seat headrests.
-
-
REMOVE REAR CENTER SEAT HEADREST ASSEMBLY (w/ Center Headrest)
-
Remove the rear center seat headrest assembly.
-
-
REMOVE REAR SEAT LEG BRACKET LH
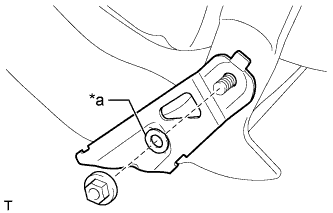
Text in Illustration *a Washer installed between nut and rear seat leg bracket LH
-
If the washer is installed between the nut and rear seat leg bracket LH:
Remove the nut, washer and rear seat leg bracket LH.
-
If the washer is not installed between the nut and rear seat leg bracket LH:
Remove the nut and rear seat leg bracket LH.
-
-
REMOVE REAR SEAT CUSHION COVER LH

Text in Illustration *a Washer installed between rear seat leg bracket LH and rear seat cushion cover LH
-
If the washer is installed between the rear seat leg bracket LH and rear seat cushion cover LH:
Remove the washer and screw.
-
If the washer is not installed between the rear seat leg bracket LH and rear seat cushion cover LH:
Remove the screw.
-
Pull up the rear seat cushion cover LH to detach the guide and remove the rear seat cushion cover LH.
-
-
REMOVE REAR SEAT LEG BRACKET RH
Tech Tips
Use the same procedures described for the LH side.
-
REMOVE REAR SEAT CUSHION COVER RH
Tech Tips
Use the same procedures described for the LH side.
-
REMOVE REAR SEAT HEADREST SUPPORT
-
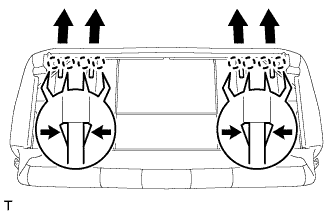
w/o Center Headrest:
Detach the 8 claws and remove the 4 headrest supports.
-
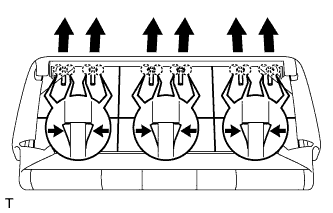
w/ Center Headrest:
Detach the 12 claws and remove the 6 headrest supports.
-
-
REMOVE REAR SEATBACK ASSEMBLY
-
Remove the 2 bolts and rear seatback assembly from the rear seat cushion assembly.
-
-
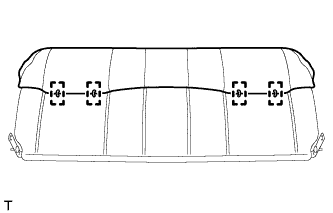
REMOVE NO. 1 SEATBACK COVER
-
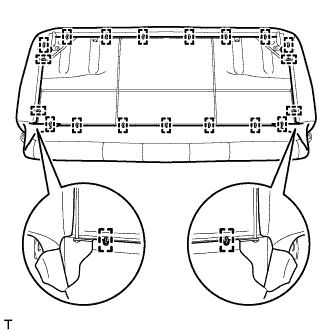
Remove the hog rings.
-
Remove the hog rings and No. 1 seatback cover from the No. 1 seatback pad.
-
-
REMOVE NO. 1 SEATBACK PAD
Note
As the No. 1 seatback pad is affixed to the No. 1 seatback frame, do not remove the No. 1 seatback pad from the No. 1 seatback frame unless it is necessary to replace the No. 1 seatback pad. If the No. 1 seatback pad is removed from the No. 1 seatback frame, make sure to replace the No. 1 seatback pad.
-
Remove the No. 1 seatback pad from the No. 1 seatback frame.
-
If reusing the No. 1 seatback frame:
Remove any remaining pad and adhesive from the No. 1 seatback frame.
-
-
REMOVE REAR SEAT CUSHION
-
Remove the 2 screws and 2 rear seat cushions.
-
-
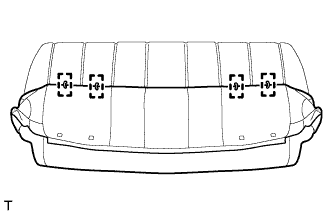
REMOVE NO. 1 SEAT CUSHION COVER
-
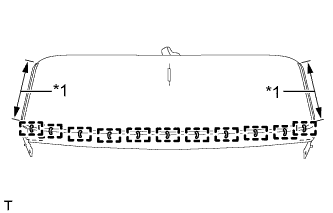
Text in Illustration *1 Fastener for TSAM Made:
-
Remove the hog rings.
-
Open the 2 fasteners.
-
-

Text in Illustration *1 Fastener for TMT Made:
-
Remove the hog rings.
-
Open the 2 fasteners.
-
-
Pull the fold seat stopper band assembly through the 2 holes of the No. 1 seat cushion cover.
-
Remove the hog rings and No. 1 seat cushion cover from the rear seat cushion pad.
-
-
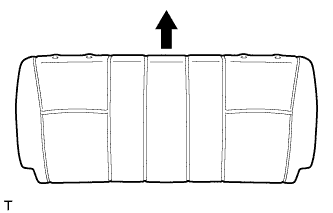
REMOVE NO. 1 SEAT CUSHION PAD
-

Remove the No. 1 seat cushion pad from the No. 1 seat cushion frame.
-
-
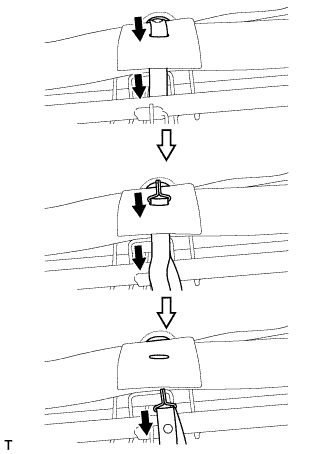
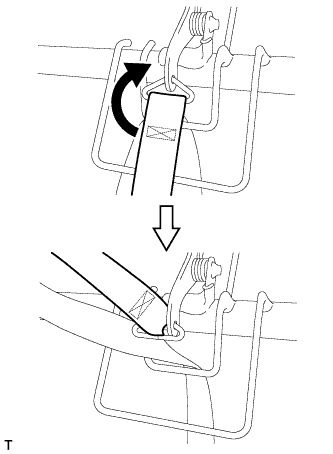
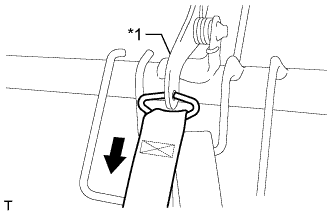
REMOVE FOLD SEAT STOPPER BAND ASSEMBLY
-
Move the fold seat stopper band as shown in the illustration.
-
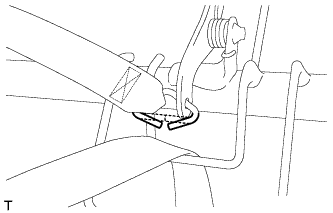
Using needle nose pliers, spread the connecting wire.
-
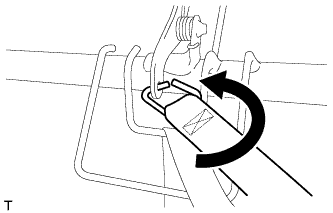
Move the connecting wire and fold seat stopper band assembly as shown in the illustration.
-
Text in Illustration *1 No. 1 Seat Cushion Frame Lock Plate Pull and disconnect the connecting wire from the No. 1 seat cushion frame lock plate.
-
Remove the fold seat stopper band assembly from the connecting wire.
-