LOAD SENSING PROPORTIONING VALVE REASSEMBLY
-
INSTALL LOAD SENSING SPRING BUSH & BOOT KIT
-
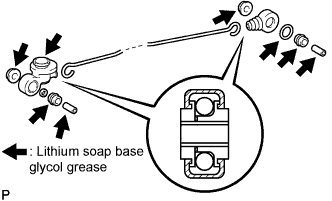
Apply lithium soap base glycol grease to the parts shown in the illustration.
-
Install a new valve boot and a new spring boot to the spring assembly.
-
Install a new load sensing spring bush No.1, No.2, collar and the plate washer to the valve boot.
-

Install the spring shackle No.1, plate washer, nut and the lock nut to the spring shackle No.2.
-
Place the spring shackle in the vise.
-
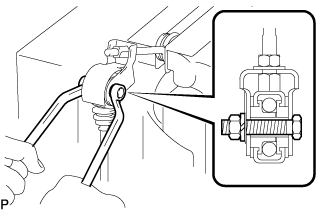
With the 2 plate washers on both sides of the load sensing spring boot, insert the bolt through the washers, spring shackle No.1, and spring boot.
-
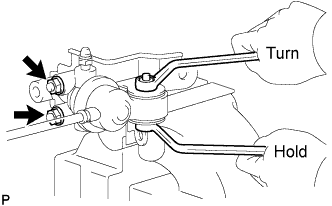
Tighten the nut while holding the bolt.
- Torque:
- 18 N*m { 185 kgf*cm, 13 ft.*lbf }
-
Install the 2 shackle bushes and the collar to the spring shackle No.2.
-
Install the bolt and spring shackle No.2 to the load sensing spring bracket.
- Torque:
- 12.5 N*m { 130 kgf*cm, 9 ft.*lbf }
-
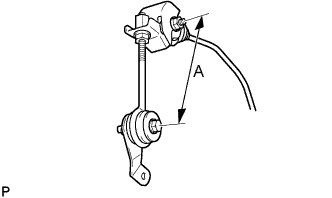
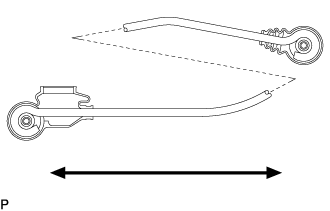
Turn the nut and lock nut so that dimension A, shown in the illustration, is adjusted to approximately 120 mm (4.724 in.).
- Torque:
- 12.5 N*m { 130 kgf*cm, 9 ft.*lbf }
-
-
INSTALL LOAD SENSING PROPORTIONING VALVE ASSEMBLY
-
Install the valve boot to the load sensing proportioning valve assembly.
-
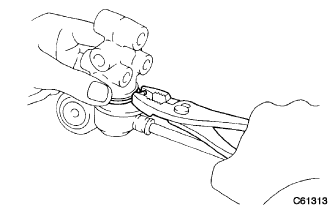
Place the load sensing proportioning valve assembly in the vise.
-
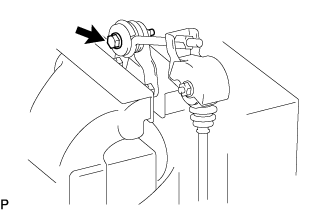
Install the load sensing spring assembly to the load sensing valve boot with the 2 washers, bolt, and nut.
- Torque:
- 18 N*m { 185 kgf*cm, 13 ft.*lbf }
Tech Tips
Tighten the nut while holding the bolt.
-
Install the valve bracket with the 2 spring washers, valve set plate, and 2 nuts.
- Torque:
- 12.5 N*m { 130 kgf*cm, 9 ft.*lbf }
-