QUARTER WINDOW GLASS REMOVAL
Tech Tips
-
Use the same procedures for the LH side and RH side.
-
The procedures listed below are for the LH side.
-
A bolt without a torque specification is shown in the standard bolt chart Click here.
-
REMOVE FRONT SEAT ASSEMBLY (Bench Seat Type)
-
Remove front seat assembly Click here.
-
-
REMOVE FRONT SEAT ASSEMBLY (Separate Seat Type)
-
Remove front seat assembly Click here.
-
-
REMOVE FRONT DOOR SCUFF PLATE LH
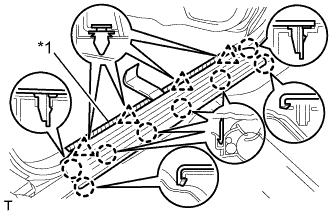
Text in Illustration *1 Protective Tape
-
Put protective tape around the front door scuff plate.
-
Using a moulding remover, detach the 4 clips and 8 claws and remove the front door scuff plate.
-
-
REMOVE FRONT DOOR OPENING TRIM WEATHERSTRIP LH
Text in Illustration *1 Protective Tape
-
Put protective tape around the front door scuff plate.
-
Using a moulding remover, detach the 4 clips and 8 claws and remove the front door scuff plate.
-
-
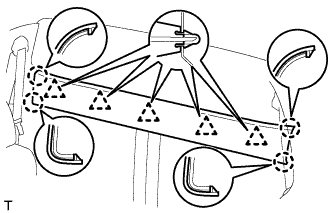
REMOVE BACK PANEL GARNISH UPPER
-
Detach the 4 claws and 5 clips and remove the upper back panel garnish.
-
-
REMOVE REAR SEAT CUSHION ASSEMBLY LH
-
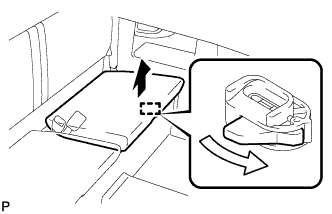
Operate the rear seat cushion lock hook release lever and pull up the rear seat cushion assembly LH to detach the hook.
Text in Illustration 
Pull Up 
Release -

Detach the 2 hooks and rear seat cushion assembly LH.
-
-
REMOVE REAR SEAT CUSHION ASSEMBLY RH
Tech Tips
Use the same procedures described for the LH side.
-
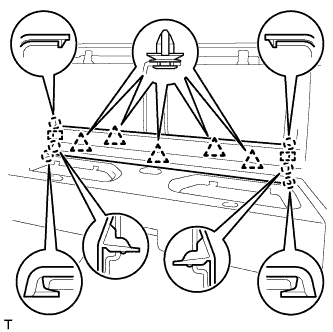
REMOVE BACK PANEL GARNISH LOWER
-
Detach the 6 claws, 2 guides and 5 clips and remove the lower back panel garnish.
-
-
REMOVE REAR SEATBACK ASSEMBLY
-
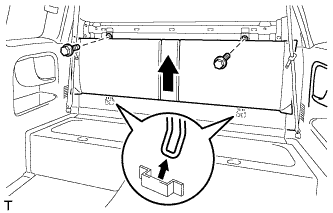
Remove the 2 bolts.
-
Lift up the rear seatback assembly in the direction indicated by the arrow to detach the 2 hooks from the vehicle body. Then remove the rear seatback assembly.
Note
Be careful not to damage the vehicle body.
-
-
REMOVE FRONT SEAT OUTER BELT ASSEMBLY LH
-
Using a moulding remover, detach the 2 claws and remove the outer seat track bracket cover.
-
-
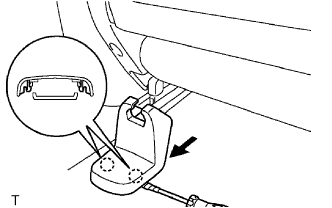
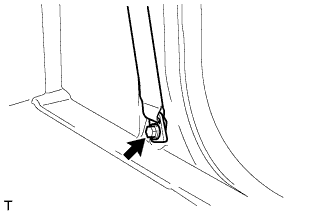
REMOVE REAR NO. 1 SEAT BELT ASSEMBLY OUTER LH
-
Remove the bolt and floor anchor.
-
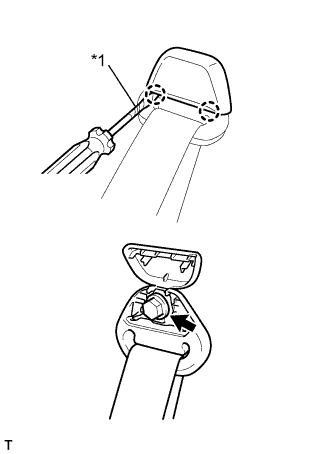
Using a screwdriver, detach the 2 claws and open the seat belt anchor cover.
Tech Tips
Tape the screwdriver tip before use.
-
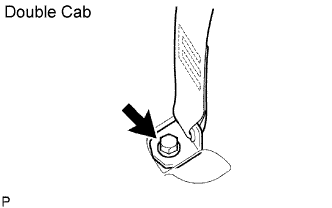
Remove the bolt.
-
Remove the bolt and seat belt.
-
-
REMOVE QUARTER INSIDE TRIM BOARD LH
-
Remove the bolt and disconnect the front seat outer belt floor anchor.
-
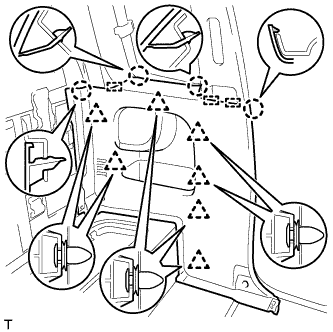
Detach the 4 claws, 3 guides and 7 clips and remove the quarter inside trim board.
-
-
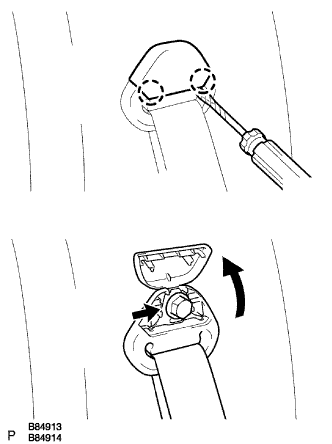
REMOVE QUARTER PILLAR GARNISH LH

-
Using a screwdriver, detach the 4 claws and remove the front seat belt shoulder anchor cover.
Tech Tips
Tape the screwdriver tip before use.
Text in Illustration *1 Protective Tape -
)Remove the bolt and disconnect the front seat belt shoulder anchor.
-
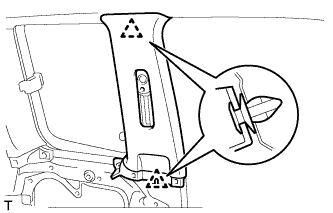
Detach the 2 clips and remove the quarter pillar garnish.
-
-
REMOVE ROOF SIDE GARNISH INNER UPPER LH
-
w/ Seat Cushion:
-
Using a screwdriver, detach the 2 claws and open the rear seat belt shoulder anchor cover.
Tech Tips
Tape the screwdriver tip before use.
Text in Illustration *1 Protective Tape -
Remove the bolt and disconnect the rear seat belt shoulder anchor.
-
-
Detach the 3 clips and remove the inner upper roof side garnish.
-
-
REMOVE QUARTER WINDOW ASSEMBLY LH

Note
-
When separating the glass from the vehicle, be careful not to damage the vehicle's paint or interior/exterior ornaments.
-
Procedures must be performed with 2 people, where the second person supports the glass.
-
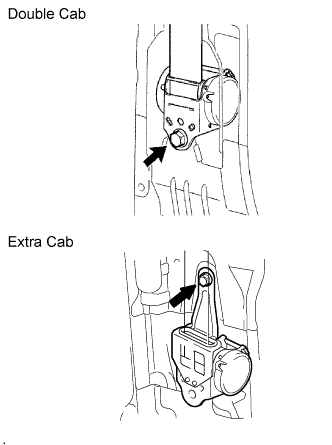
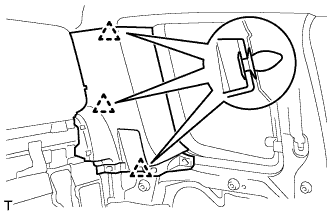
Remove the 2 bolts.
-
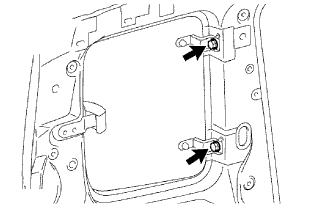
Remove the 2 bolts.
-
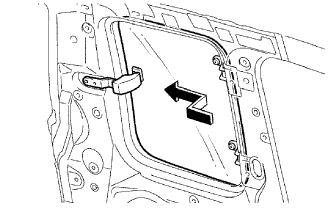
Remove the glass as shown in the illustration.
-
Remove the screw, bush, retainer and lock.
-
Remove the 2 screws, 2 washers, 2 retainers, 2 bushes and 2 hinges.
-
Remove the weatherstrip LH.
-