REAR DOOR REASSEMBLY
CAUTION / NOTICE / HINT
Use the same procedure for the RH side and LH side.
The following procedure is for the LH side.
PROCEDURE
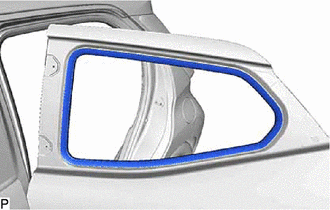
INSTALL REAR DOOR GLASS OUTER WEATHERSTRIP (w/ Rear Door Glass Outer Weatherstrip)
INSTALL REAR DOOR DUST PROOF SEAL
-
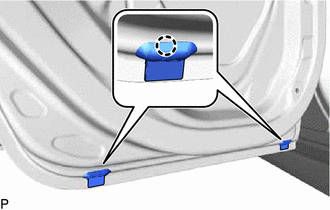
Engage the 2 claws to install 2 new rear door dust proof seals.
-
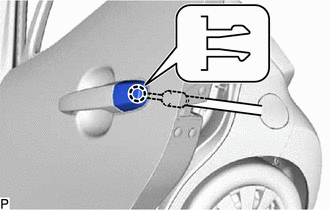
INSTALL REAR DOOR CHECK ASSEMBLY
Apply MP grease to the sliding parts of the rear door check assembly.
Clean the bolt hole on the vehicle body.
Clean the bolt threads of the bolt (A).
Apply adhesive to the threads of the bolt (A).
Adhesive
Toyota Genuine Adhesive 1324, Three Bond 1324 or equivalent
-
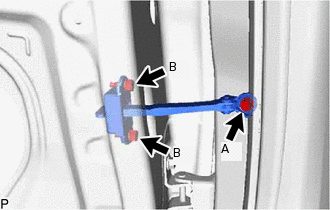
Install the rear door check assembly with the 3 bolts.
Bolt (A)
30 N*m
306 kgf*cm
22 ft.*lbf
Bolt (B)
8.0 N*m
82 kgf*cm
71 in.*lbf
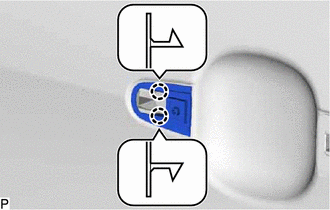
INSTALL REAR DOOR OUTSIDE HANDLE FRAME SUB-ASSEMBLY
Apply MP grease to the sliding parts of the rear door outside handle frame sub-assembly.
-
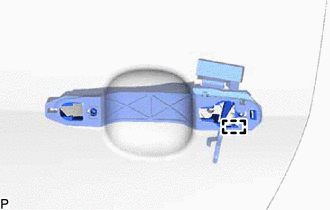
Engage the guide to install the rear door outside handle frame sub-assembly.
INSTALL REAR DOOR REAR OUTSIDE HANDLE PAD
-
Engage the 2 claws to install the rear door rear outside handle pad.
-
INSTALL REAR DOOR FRONT OUTSIDE HANDLE PAD
-
Engage the 2 claws to install the rear door front outside handle pad.
-
Using a T30 "TORX" socket wrench, install the screw.
4.0 N*m
41 kgf*cm
35 in.*lbf
-
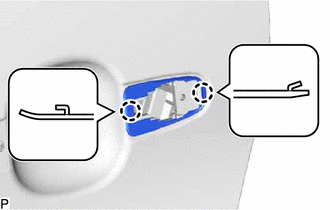
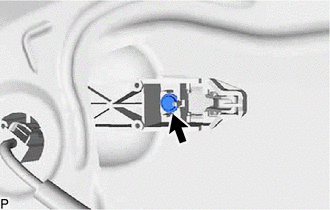
INSTALL REAR DOOR OUTSIDE HANDLE ASSEMBLY
-
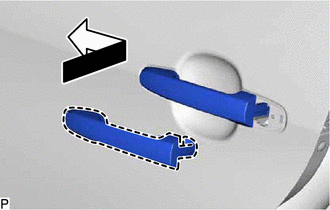
Insert the front end of the rear door outside handle assembly into the rear door outside handle frame sub-assembly.
Note:If the release plate of the rear door outside handle frame sub-assembly is not pulled and held when installing the rear door outside handle assembly, it will interfere with the rear door outside handle assembly and will be damaged.
Insert the rear end of the rear door outside handle assembly into the rear door outside handle frame sub-assembly, then slide the rear door outside handle assembly toward the front of the vehicle to install it.
-
INSTALL REAR DOOR OUTSIDE HANDLE COVER
-
Engage the claw to temporarily install the rear door outside handle cover.
Using a T30 "TORX" socket wrench, install the rear door outside handle cover with the screw.
4.0 N*m
41 kgf*cm
35 in.*lbf
-
INSTALL REAR DOOR LOCK ASSEMBLY
INSTALL REAR DOOR GLASS FRONT WEATHERSTRIP
-
Install a new rear door glass front weatherstrip.
-
INSTALL REAR DOOR GLASS SUB-ASSEMBLY
INSTALL NO. 2 REAR DOOR SERVICE HOLE COVER
Apply new butyl tape to the rear door panel.
-
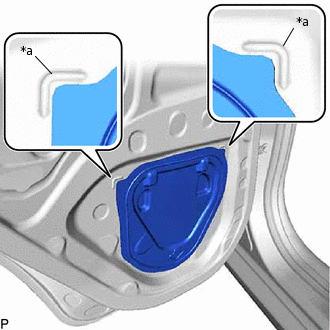
*a
Reference Point
Install a new No. 2 rear door service hole cover according to the reference points on the rear door panel.
INSTALL REAR DOOR SERVICE HOLE COVER
Apply new butyl tape to the rear door panel.
-
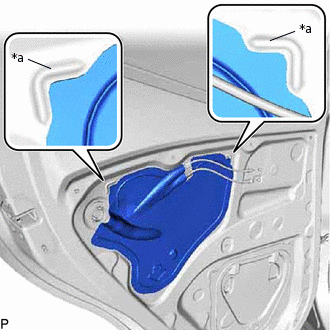
*a
Reference Point
Install a new rear door service hole cover according to the reference points on the rear door panel.
INSTALL REAR DOOR INSIDE HANDLE SUB-ASSEMBLY
-
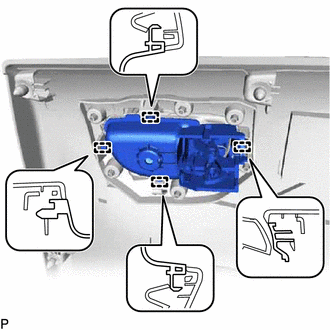
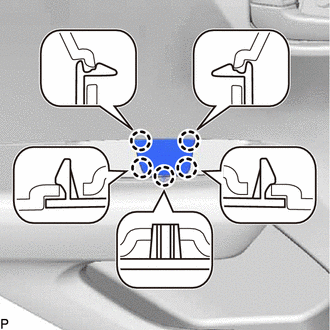
Engage the 4 guides to install the rear door inside handle sub-assembly to the rear door trim board sub-assembly.
-
INSTALL REAR DOOR TRIM BOARD SUB-ASSEMBLY
-
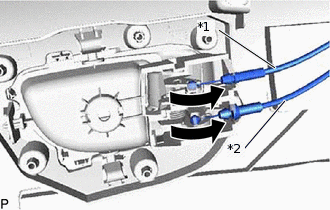
*1
Rear Door Inside Locking Cable Assembly
*2
Rear Door Lock Remote Control Cable Assembly
Connect the rear door inside locking cable assembly and rear door lock remote control cable assembly as shown in the illustration.
-
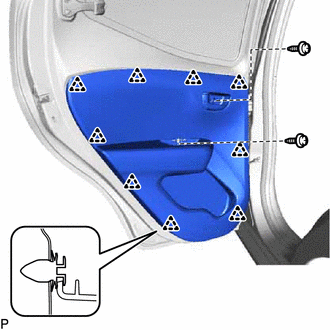
Engage the 9 clips to install the rear door trim board sub-assembly.
Install the 2 screws.
-
Engage the 5 claws to install the cover.
-
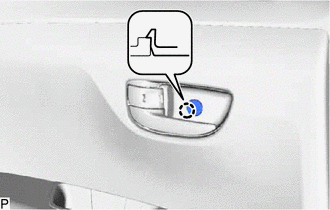
Engage the claw to close the cover.
-