ROOF DRIP SIDE FINISH MOULDING REMOVAL
CAUTION / NOTICE / HINT
Use the same procedure for the RH and LH sides.
The procedure listed below is for the LH side.
PROCEDURE
REMOVE ROOF RACK ASSEMBLY LH (w/ Roof Rack)
Remove the roof rack (Click here).
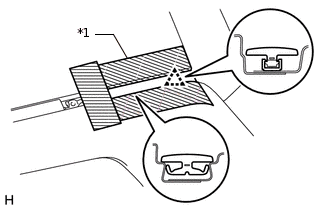
REMOVE ROOF DRIP SIDE FINISH MOULDING JOINT COVER LH (w/o Roof Rack)
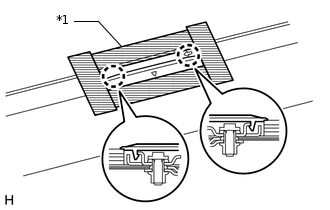
*1
Protective Tape
Tip:Use the same procedure for all roof drip side finish moulding joint covers.
Put protective tape around the roof drip side finish moulding joint cover.
Detach the 2 claws and remove the roof drip side finish moulding joint cover.
REMOVE ROOF DRIP SIDE FINISH MOULDING LH
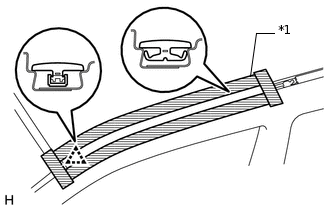
*1
Protective Tape
Put protective tape around the roof drip side finish moulding.
Detach the clip and remove the roof drip side finish moulding.
Note:When removing the rear roof drip side finish moulding, be careful not to damage the roof drip side finish moulding clip.
If the roof drip side finish moulding clip is damaged or becomes detached from the vehicle, replace it with a new one.
REMOVE CENTER NO. 2 ROOF DRIP SIDE FINISH MOULDING LH (w/o Roof Rack)
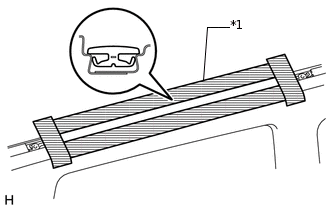
*1
Protective Tape
Put protective tape around the center No. 2 roof drip side finish moulding.
Remove the center No. 2 roof drip side finish moulding.
REMOVE CENTER ROOF DRIP SIDE FINISH MOULDING LH (w/o Roof Rack)
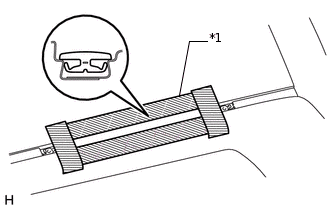
*1
Protective Tape
Put protective tape around the center roof drip side finish moulding.
Remove the center roof drip side finish moulding.
REMOVE REAR ROOF DRIP SIDE FINISH MOULDING LH
*1
Protective Tape
Put protective tape around the rear roof drip side finish moulding.
Detach the clip and remove the rear roof drip side finish moulding.
Note:When removing the rear roof drip side finish moulding, be careful not to damage the roof drip side finish moulding clip.
If the roof drip side finish moulding clip is damaged or becomes detached from the vehicle, replace it with a new one.