REAR DOOR DISASSEMBLY
CAUTION / NOTICE / HINT
Use the same procedure for the RH side and LH side.
The following procedure is for the LH side.
PROCEDURE
REMOVE REAR DOOR TRIM BOARD SUB-ASSEMBLY
-
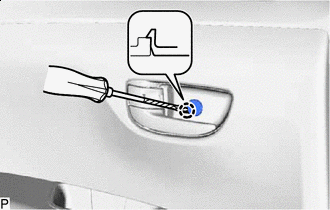

Protective Tape
Using a screwdriver with its tip wrapped with protective tape, disengage the claw and open the cover.
-
Using a moulding remover, disengage the 5 claws to remove the cover.
-
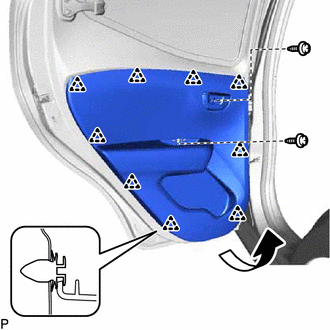
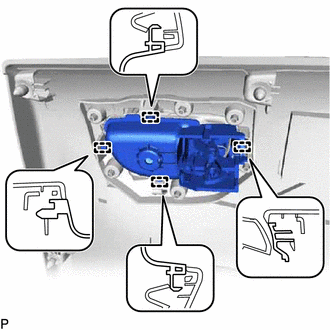
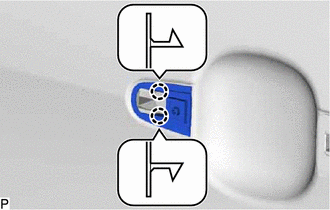
Remove the 2 screws.
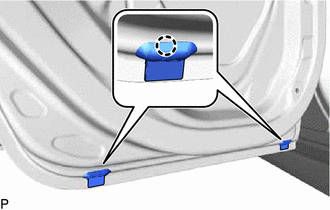
Disengage the 9 clips as shown in the illustration.
-
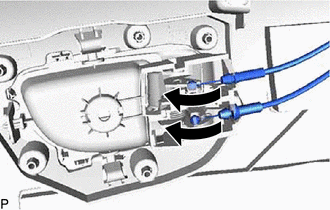
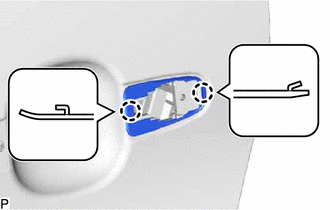
Disconnect the rear door lock remote control cable assembly and rear door inside locking cable assembly as shown in the illustration to remove the rear door trim board sub-assembly.
-
REMOVE REAR DOOR INSIDE HANDLE SUB-ASSEMBLY
-
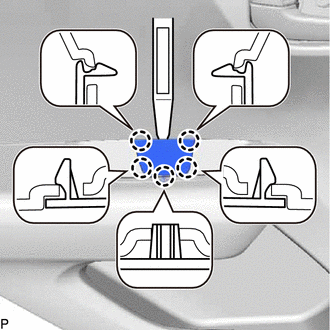
Disengage the 4 guides to remove the rear door inside handle sub-assembly.
-
REMOVE REAR DOOR SERVICE HOLE COVER
-
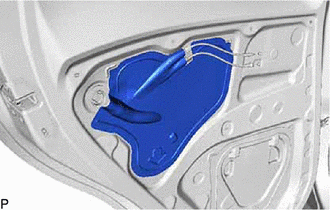
Remove the rear door service hole cover.
Tip:Remove any remaining butyl tape from the rear door panel.
-
REMOVE NO. 2 REAR DOOR SERVICE HOLE COVER
-
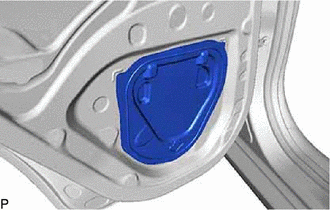
Remove the No. 2 rear door service hole cover.
Tip:Remove any remaining butyl tape from the rear door panel.
-
REMOVE REAR DOOR GLASS SUB-ASSEMBLY
REMOVE REAR DOOR GLASS FRONT WEATHERSTRIP
-
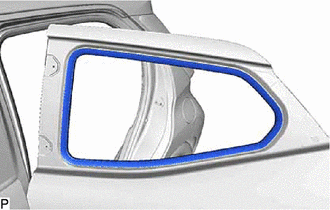
Remove the rear door glass front weatherstrip.
-
REMOVE REAR DOOR LOCK ASSEMBLY
REMOVE REAR DOOR OUTSIDE HANDLE COVER
-
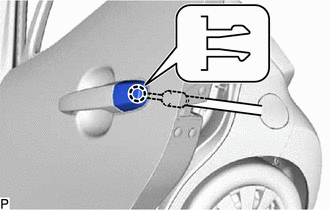
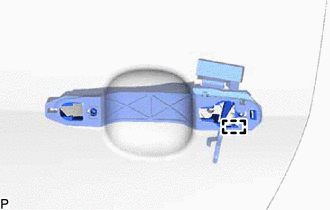
Using a T30 "TORX" socket wrench, loosen the screw.
Tip:The screw cannot be removed because it is integrated into the rear door outside handle frame sub-assembly.
Disengage the claw to remove the rear door outside handle cover.
-
REMOVE REAR DOOR OUTSIDE HANDLE ASSEMBLY
-
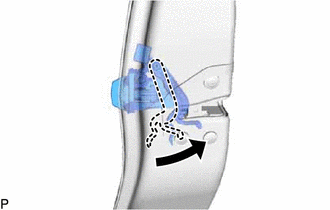
Pull and hold the release plate of the rear door outside handle frame sub-assembly as shown in the illustration.
Note:The release plate may interfere with the rear door outside handle assembly and may be damaged when removing the rear door outside handle assembly, unless the release plate of the rear door outside handle frame sub-assembly is pulled and held.
-
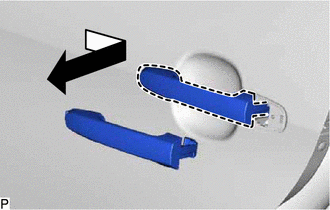
Remove the rear door outside handle assembly as shown in the illustration.
-
REMOVE REAR DOOR FRONT OUTSIDE HANDLE PAD
-
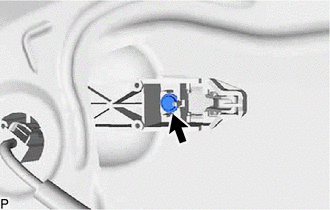
Using a T30 "TORX" socket wrench, loosen the screw.
Tip:The screw cannot be removed because it is integrated into the rear door outside handle frame sub-assembly.
-
Disengage the 2 claws to remove the rear door front outside handle pad.
-
REMOVE REAR DOOR REAR OUTSIDE HANDLE PAD
-
Disengage the 2 claws to remove the rear door rear outside handle pad.
-
REMOVE REAR DOOR OUTSIDE HANDLE FRAME SUB-ASSEMBLY
-
Disengage the guide to remove the rear door outside handle frame sub-assembly.
-
REMOVE REAR DOOR CHECK ASSEMBLY
-
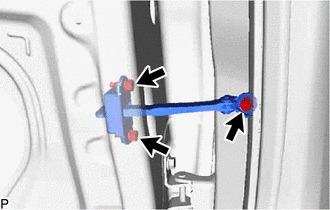
Remove the 3 bolts and rear door check assembly.
-
REMOVE REAR DOOR DUST PROOF SEAL
-
Disengage the 2 claws to remove the 2 rear door dust proof seals.
-
REMOVE REAR DOOR GLASS OUTER WEATHERSTRIP (w/ Rear Door Glass Outer Weatherstrip)