EGR COOLER (for DPF) REMOVAL
Note
-
When replacing the injectors (including shuffling the injectors between the cylinders), common rail or cylinder head, it is necessary to replace the injection pipes with new ones.
-
When replacing the fuel supply pump, common rail, cylinder block, cylinder head, cylinder head gasket or timing gear case, it is necessary to replace the fuel inlet pipe with a new one.
-
After removing the injection pipes and fuel inlet pipe, clean them with a brush and compressed air.
-
DISCONNECT CABLE FROM NEGATIVE BATTERY TERMINAL
Note
When disconnecting the cable, some systems need to be initialized after the cable is reconnected Click here.
-
REMOVE DIESEL THROTTLE BODY ASSEMBLY
-
REMOVE NO. 1 ENGINE UNDER COVER
-
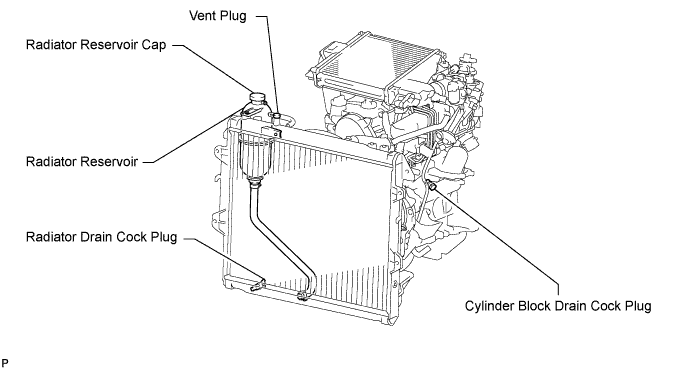
DRAIN ENGINE COOLANT
CAUTION:
Do not remove the radiator reservoir cap while the engine and radiator are still hot. Pressurized, hot engine coolant and steam may be released and cause serious burns.
-
Loosen the radiator drain cock plug.
Tech Tips
Collect the coolant in a container and dispose of it according to the regulations in your area.
-
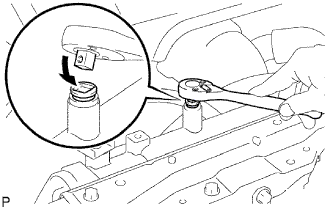
Drain the coolant by removing the reservoir cap and, using a wrench, remove the vent plug.
-
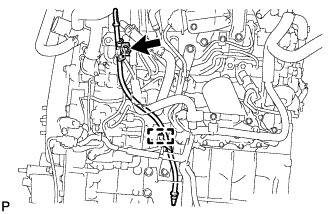
Loosen the cylinder block drain cock plug.
-
-
REMOVE FRONT WHEEL LH
-
REMOVE FRONT FENDER APRON SEAL UPPER
-
Remove the 5 clips and front fender apron seal upper.
-
-
REMOVE FRONT FENDER SEAL
-
Remove the 5 clips and front fender seal.
-
-
REMOVE ENGINE OIL LEVEL DIPSTICK GUIDE
-
Remove the engine oil level dipstick.
-
Detach the wire harness clamp.
-
Remove the bolt and engine oil level dipstick guide.
-
Remove the O-ring from the engine oil level dipstick guide.
-
-
DISCONNECT WATER BY-PASS HOSE
-
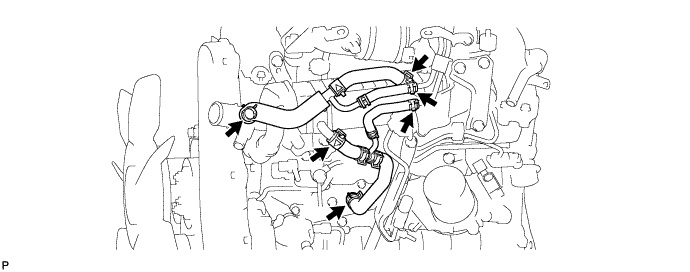
Disconnect the 6 water by-pass hoses.
-
-
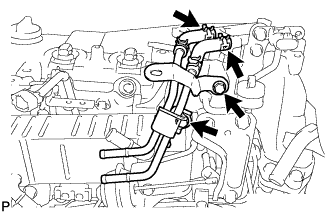
REMOVE MANIFOLD STAY WITH VACUUM SWITCHING VALVE
-
Disconnect the vacuum switching valve connector.
-
Disconnect the 2 vacuum transmitting hoses.
-
Remove the 2 bolts and manifold stay with vacuum switching valve.
-
-
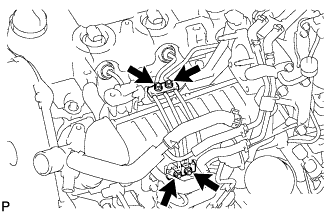
REMOVE NO. 3 CYLINDER HEAD COVER SUB-ASSEMBLY
-
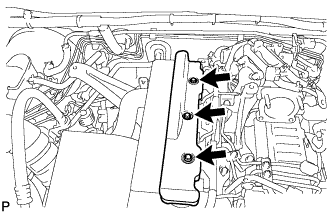
Remove the 3 bolts and No. 3 cylinder head cover.
-
-
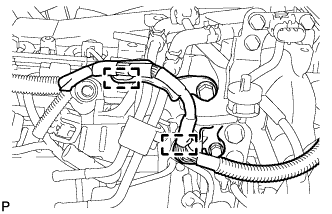
REMOVE FUEL INLET PIPE SUB-ASSEMBLY
-
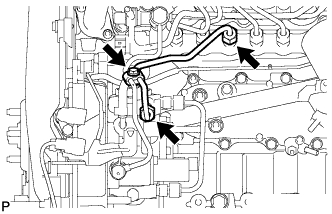
Remove the bolt and No. 2 injection pipe clamp.
-
Using a 17 mm union nut wrench, loosen the union nuts and remove the fuel inlet pipe.
-
-
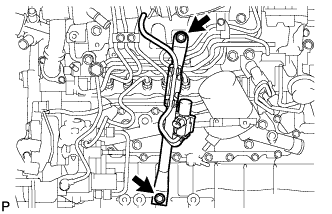
REMOVE NO. 1, NO. 2 AND NO. 3 INJECTION PIPE SUB-ASSEMBLY
Note
-
After removing the injection pipe, cover the outlets on the common rail with tape to keep out foreign matter.
-
After removing the injection pipe, put it in a plastic bag to prevent foreign matter from contaminating its injector inlet.
-
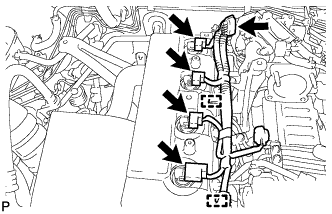
Disconnect the 4 injector connectors and electric EGR control valve connector.
-
Detach the 2 wire harness clamps.
-
Remove the 4 nuts and 2 No. 3 injection pipe clamps.
-

Text in Illustration *a Injector Side *b Common Rail Side Using a 17 mm union nut wrench, loosen the union nuts and remove the No. 1, No. 2 and No. 3 injection pipes.
-
-
REMOVE NO. 5 WATER BY-PASS PIPE
-
Detach the 2 wire harness clamps.
-
Disconnect the 2 water hoses from the electric EGR control valve.
-
Remove the 2 bolts and No. 5 water by-pass pipe.
-
-
REMOVE MANIFOLD ABSOLUTE PRESSURE SENSOR
-
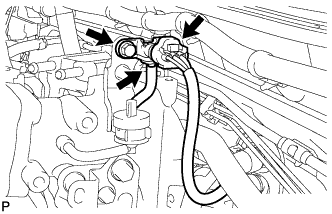
Disconnect the manifold absolute pressure sensor connector and vacuum hose.
-
Remove the bolt and manifold absolute pressure sensor.
-
-
REMOVE GAS FILTER BRACKET WITH GAS FILTER
-
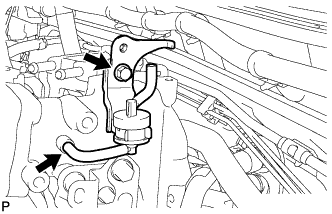
Disconnect the vacuum hose.
-
Remove the bolt and gas filter bracket with gas filter.
-
-
REMOVE WIRING HARNESS CLAMP BRACKET
-
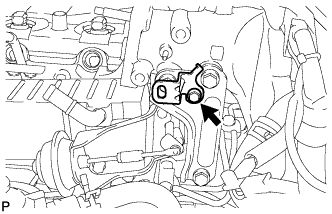
Remove the bolt and wiring harness clamp bracket.
-
-
REMOVE THROTTLE BODY BRACKET
-
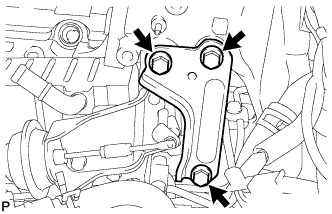
Remove the 3 bolts and throttle body bracket.
-
-
DISCONNECT ENGINE WIRE
-
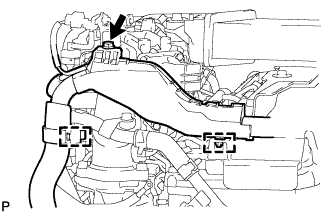
Detach the 2 wire harness clamps.
-
Remove the bolt and disconnect the engine wire.
-
-
DISCONNECT NO. 3 WATER BY-PASS PIPE
-
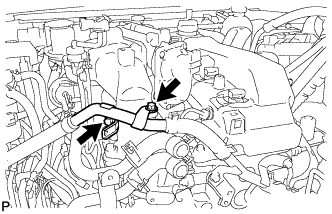
Remove the 2 bolts and disconnect the No. 3 water by-pass pipe.
-
-
REMOVE EGR VALVE BRACKET
-
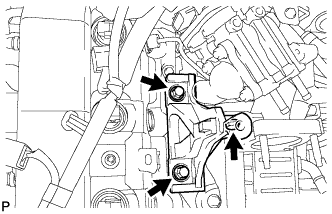
Remove the 3 bolts and EGR valve bracket.
-
-
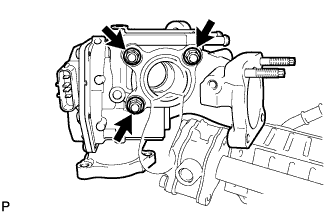
REMOVE ELECTRIC EGR CONTROL VALVE ASSEMBLY WITH NO. 2 EGR VALVE AND EGR COOLER
-
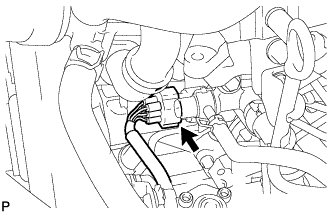
Disconnect the fuel pressure sensor connector from the common rail.
-
Remove the 5 bolts, 2 nuts and electric EGR control valve with No. 2 EGR valve and EGR cooler.
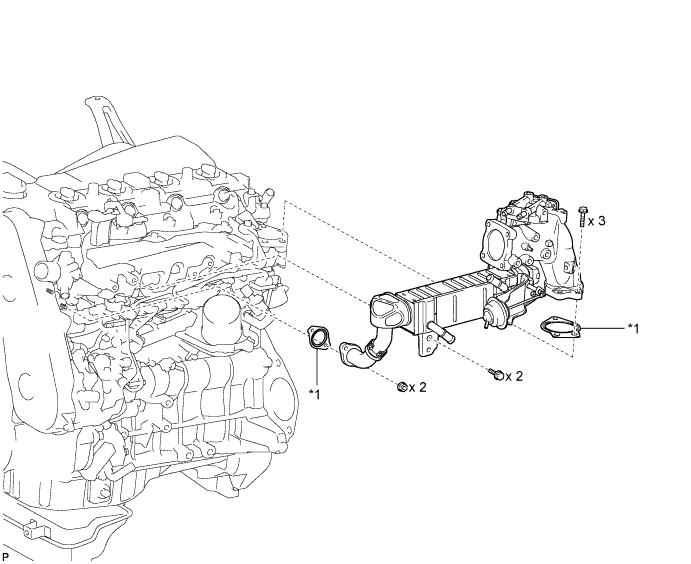
Text in Illustration *1 Gasket - - -
Remove the 2 gaskets from the cylinder head and intake manifold.
-
-
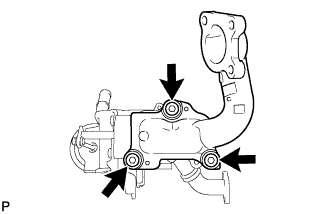
REMOVE INTAKE AIR CONNECTOR WITH ELECTRIC EGR CONTROL VALVE ASSEMBLY
-
Remove the 3 nuts, intake air connector with electric EGR control valve and gasket.
-
-
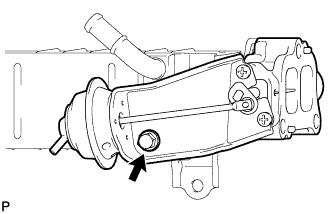
REMOVE ELECTRIC EGR CONTROL VALVE ASSEMBLY
-
Remove the electric EGR control valve and gasket from the intake air connector.
-
-
REMOVE EGR VALVE ADAPTER
-
Using a 6 mm hexagon wrench, remove the 3 hexagon socket head cap bolts, 3 plate washers, EGR valve adapter and gasket.
-
-
REMOVE NO. 2 EGR VALVE ASSEMBLY
-
Remove the bolt, No. 2 EGR valve and gasket.
-
-
REMOVE EGR COOLER INSULATOR
-
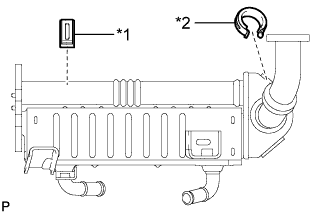
Text in Illustration *1 No. 2 EGR Cooler Insulator *2 No. 1 EGR Cooler Insulator Remove the 2 EGR cooler insulators from the EGR cooler.
-