RADIATOR DISASSEMBLY
-
REMOVE RADIATOR BRACKET SUB-ASSEMBLY
-
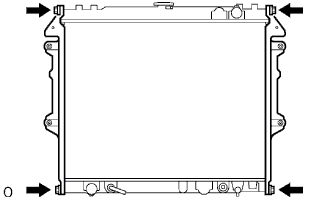
Remove the 4 bolts and 2 brackets.
-
-
REMOVE RADIATOR DRAIN COCK PLUG
-
Remove the drain cock plug.
-
Remove the O-ring.
-
-
ASSEMBLE SST
-
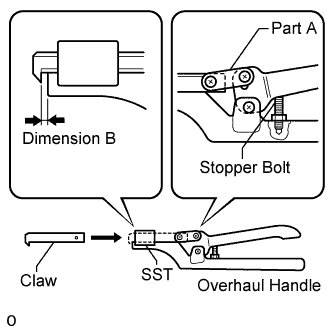
Install the claw to part A of the overhaul handle as shown in the illustration.
- SST
- 09230-01010 ( 09231-01010, 09231-01030 )
-
While squeezing the handle, adjust the stopper bolt so that dimension B is as specified below.
Dimension B 0.2 to 0.3 mm (0.008 to 0.012 in.) Note
If this adjustment is not performed, the claw will be damaged.
-
-
UNCAULK LOCK PLATE
-
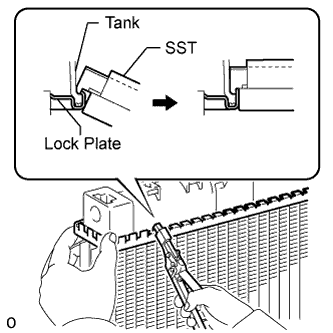
Using SST, squeeze the handle until stopped by the stopper bolt to release the caulking.
- SST
- 09230-01010 ( 09231-01010, 09231-01030 )
-
-
REMOVE RADIATOR TANK UPPER AND RADIATOR TANK LOWER
-
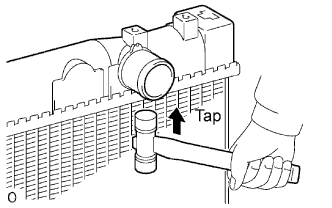
Lightly tap the bracket of the radiator (or the connection area for the radiator hose inlet or outlet) with a plastic-faced hammer and remove the tank.
Note
Do not tap automatic transmission oil cooler pipe.
-
Remove the O-ring.
-
-
REMOVE OIL COOLER ASSEMBLY
-
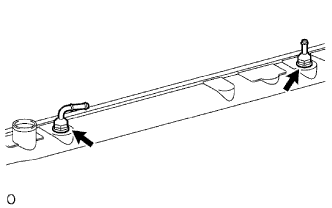
Remove the 2 cooler pipes.
-
Remove the 2 nuts, 2 plate washers and oil cooler.
-
Remove the 2 O-rings from the oil cooler.
-