AIR CONDITIONING AMPLIFIER REMOVAL
CAUTION / NOTICE / HINT
The necessary procedures (adjustment, calibration, initialization, or registration) that must be performed after parts are removed, installed, or replaced during the air conditioning amplifier assembly removal/installation are shown below.
| Replaced Part or Performed Procedure | Necessary procedures | Effect/Inoperative Function when Necessary Procedure not Performed | Link |
|---|---|---|---|
w/ Stop and Start System |
|
Stop and start system | for 8GR-FKS: Click here for V35A-FTS: Click here |
PROCEDURE
-
REMOVE ACCELERATOR PEDAL SENSOR ASSEMBLY (for LHD)
-
REMOVE INSTRUMENT SIDE PANEL RH (for RHD)
-
REMOVE NO. 1 INSTRUMENT PANEL UNDER COVER SUB-ASSEMBLY (for RHD)
-
REMOVE AIR CONDITIONING AMPLIFIER ASSEMBLY
-
for LHD:
-
Detach the clamp.
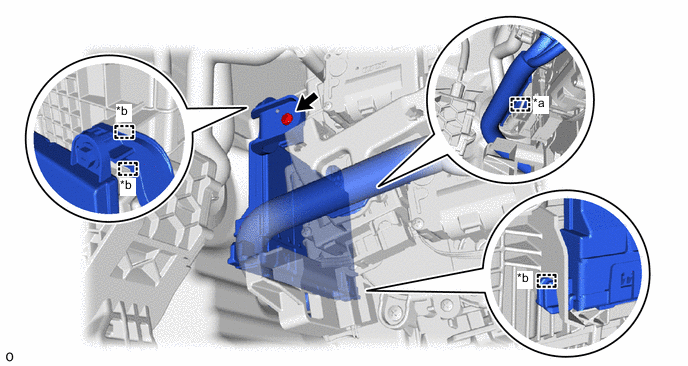
*a Clamp *b Guide -
Remove the screw.
-
Detach the guide to remove the air conditioning amplifier assembly with heater bracket.
-
-
for RHD:
-
Detach the clamp.
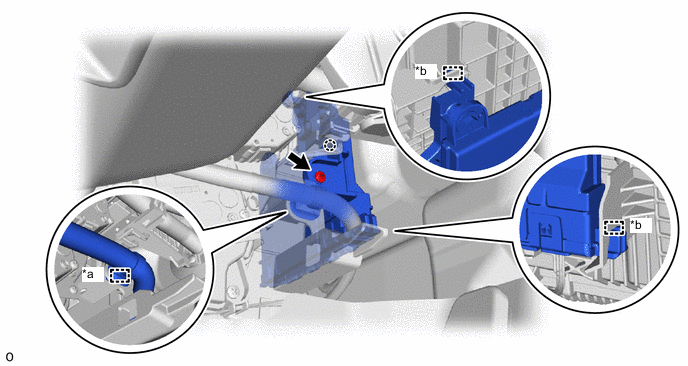
*a Clamp *b Guide -
Remove the screw.
-
Detach the claw.
-
Detach the guide to remove the air conditioning amplifier assembly with heater bracket.
-
-
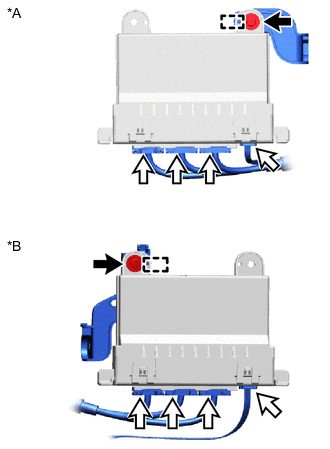
*A for LHD *B for RHD 
Screw 
Connector Disconnect the 4 connectors.
-
Remove the screw, detach the guide and remove the heater bracket.
-