FLOOR SHIFT ASSEMBLY INSTALLATION
-
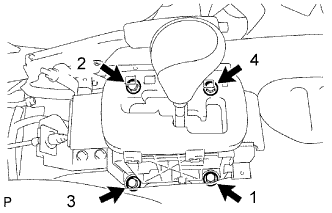
INSTALL FLOOR SHIFT ASSEMBLY
-
Install the floor shift with the 4 bolts.
- Torque:
- 14 N*m { 143 kgf*cm, 10 ft.*lbf }
Note
Tighten the bolts in the order shown in the illustration.
-
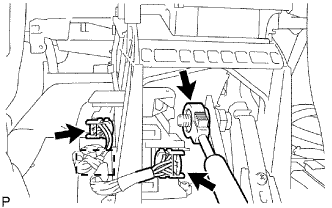
Attach the clamp and connect the 2 connectors.
-
Move the shift lever to L.
-
Connect the transmission control cable.
-
-
CONNECT CABLE TO NEGATIVE BATTERY TERMINAL
Note
Certain systems need to be initialized after disconnecting and reconnecting the cable to the negative (-) battery terminal.
-
ADJUST SHIFT LEVER POSITION
-
Move the shift lever to N.
-
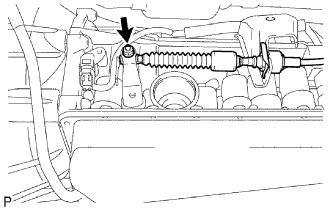
Remove the nut and disconnect the control cable.
-
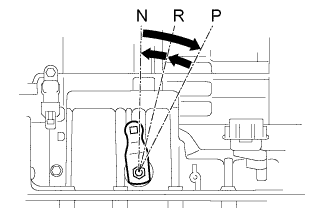
Turn the control shaft lever clockwise until it stops, and then turn it counterclockwise 2 notches to set it to the N position.
-
While holding the control shaft lever slightly toward the R position side, connect the cable with the nut.
- Torque:
- 14 N*m { 143 kgf*cm, 10 ft.*lbf }
-
-
INSPECT SHIFT LEVER POSITION
-
When moving the shift lever from P to R with the ignition switch ON and the brake pedal depressed, make sure that the shift lever moves smoothly and correctly into position.
-
Start the engine and make sure that the vehicle moves forward after moving the shift lever from N to D, and moves in reverse after shifting to R.
If the results are not as specified, inspect the park/ neutral position switch and check the shift lever.
-
-
INSTALL CONSOLE BOX ASSEMBLY
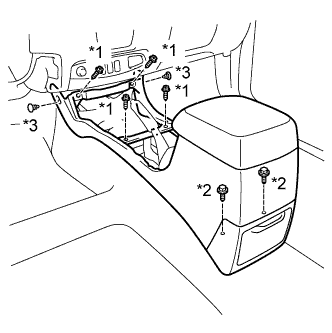
Text in Illustration *1 Screw *2 Bolt *3 Clip
-
Install the console box with the 4 screws and 2 bolts.
-
Install the 2 clips.
-
-
INSTALL UPPER CONSOLE PANEL SUB-ASSEMBLY
-
Attach the 12 claws to install the upper console panel.

Text in Illustration *A for 2WD *B for 4WD
-
-
INSTALL PARKING BRAKE HOLE COVER SUB-ASSEMBLY
-
Attach the 4 claws to install the parking brake hole cover.
-
-
INSTALL TRANSFER SHIFT LEVER KNOB SUB-ASSEMBLY
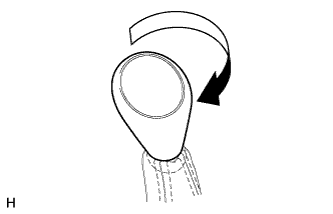
-
Install the shift lever knob and twist it in the direction indicated by the arrow.
-
-
PERFORM INITIALIZATION
-
Perform initialization Click here.
-